
Animation Basics
On an animation board, you move objects across several frames. The number of frames you can create depends on your plan: on the Basic plan it is limited by the project's file size (typically around 50–70 frames), and on the Starter plan it is up to 15 frames. Each frame can last from 0.1 to 5 seconds.
Finished animations can be exported as a video file or an animated GIF. → Exporting Animation
Creating a project
Create an animation project from "Animation" in the project list.
On the Basic plan, you can also create an animation from the scenes of a static board. When the animation data has been created, a message tells you so and asks whether to open the new animation board right away. 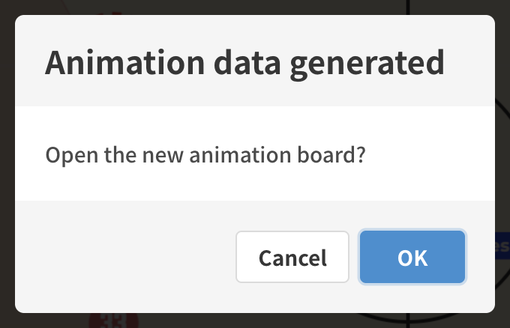
Building an animation
Build an animation by repeating two steps: add a frame, then move objects in that frame.
See How to move objects for curves, heights, and more.
Animation controller
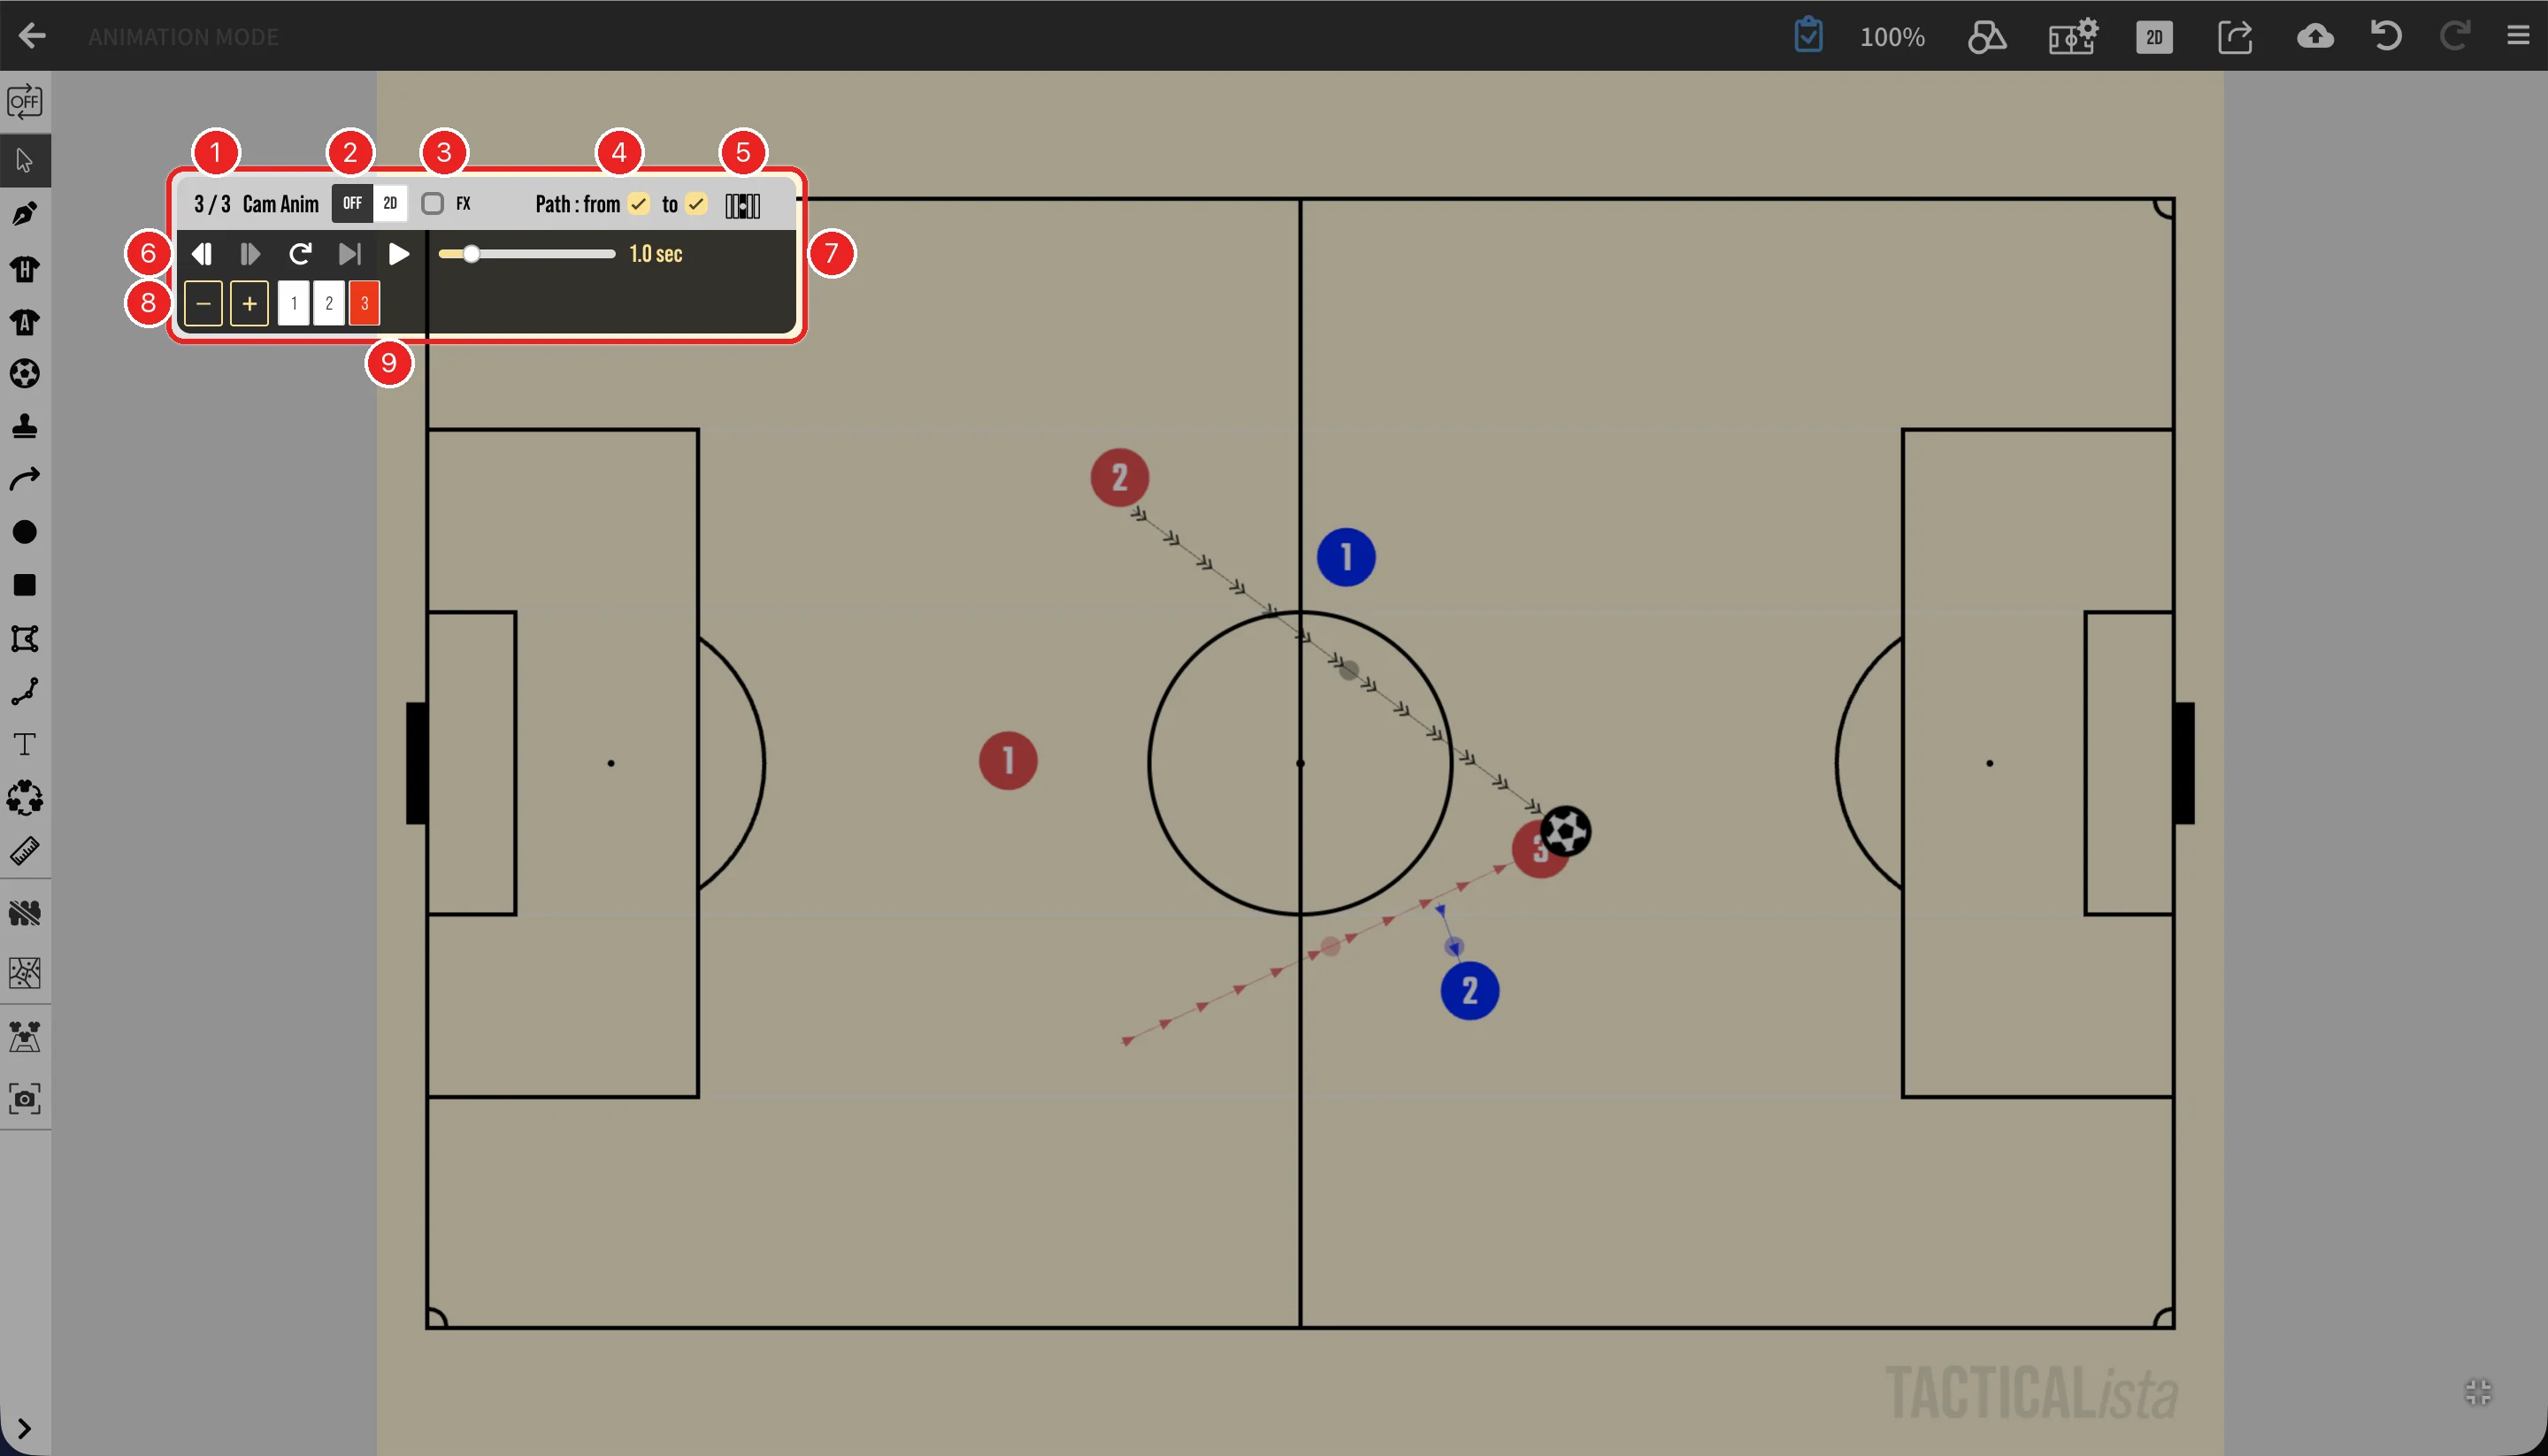
| No. | Item | Description |
|---|---|---|
| 1 | Frame count | Current frame / number of frames |
| 2 | Camera animation | OFF / 2D / 3D for Camera Animation (3D is available while the 3D view is shown) |
| 3 | Animation settings | Opens the settings for the range of frames for new objects, path display, Effective mode, and easing. The icon on the left shows the current add range → Animation settings |
| 4 | Playback buttons | From the left: previous frame, next frame, play the current frame, play the next frame, and play to the end |
| 5 | Frame duration | The duration of the current frame (0.1 to 5 seconds) |
| 6 | − / + | deletes the current frame, and duplicates it as a new frame |
| 7 | Frame list | Press a frame to edit it. The list scrolls horizontally when there are many frames |
| 8 | Motion path buttons | Shown when one player or ball is selected: "Motion path" (trace a movement on the field), "Reset", "Add" and "Remove" for path vertices, and "Auto-orient" → How to move objects |
Animation settings
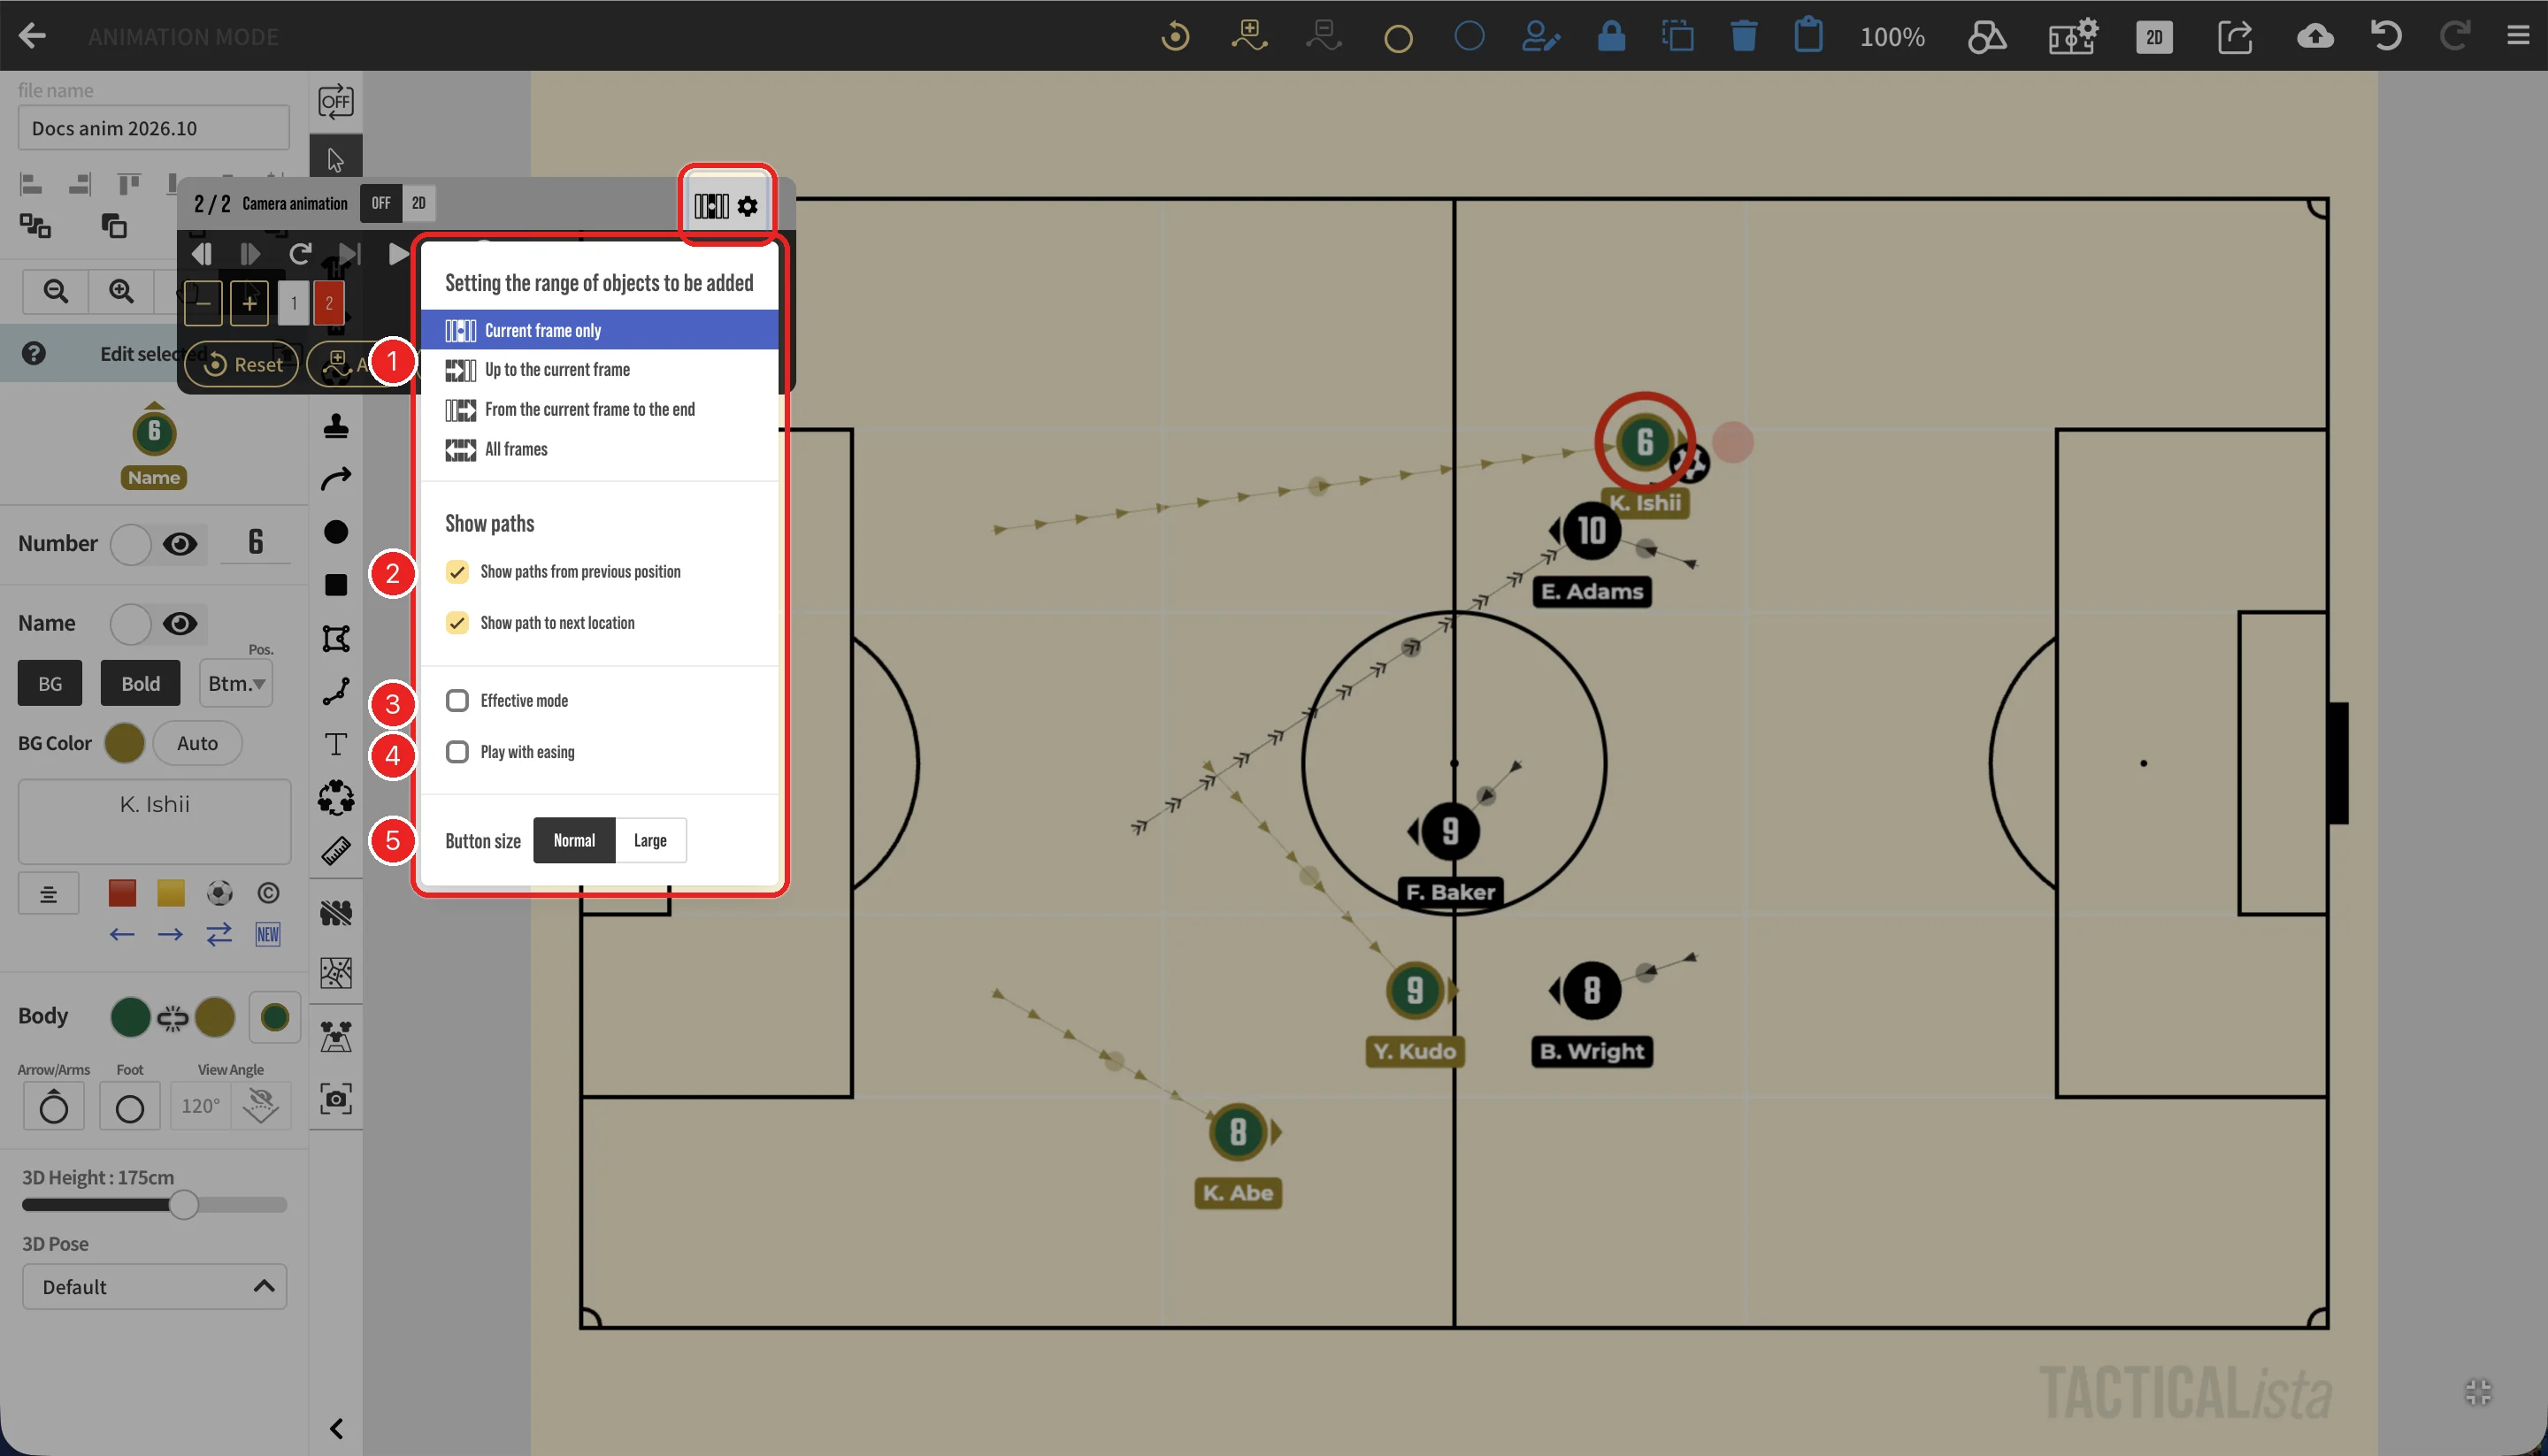
| No. | Item | Description |
|---|---|---|
| 1 | Setting the range of objects to be added | The frames that newly added objects are placed in → Range of frames for new objects |
| 2 | Show paths | "Show paths from previous position" shows the path from the previous frame, and "Show path to next location" shows the path to the next frame |
| 3 | Effective mode | → Effective mode |
| 4 | Play with easing | → Play with easing |
| 5 | Button size | Choose "Normal" or "Large" for the controller buttons. "Large" makes the buttons and the frame list a size bigger, and the controller grows to fit. The setting is saved per browser |
The menu stays open while you change items. Click outside it to close it.
Adding and deleting frames
- Press to duplicate the current frame and add it after. Then move objects in the new frame.
- Press to delete the current frame.
Swapping frames
Press the current frame in the frame list to show a popup. swaps it with the previous frame, and swaps it with the next one. The popup does not appear when there is only one frame.
Copying and pasting frames
You can copy the state of a frame (the position, direction, and visibility of objects, the frame duration, and camera keys) and insert it somewhere else. This is handy when you want to reuse the layout of a distant frame. To move a frame far away, copy it, delete the original, and paste it at the new position.
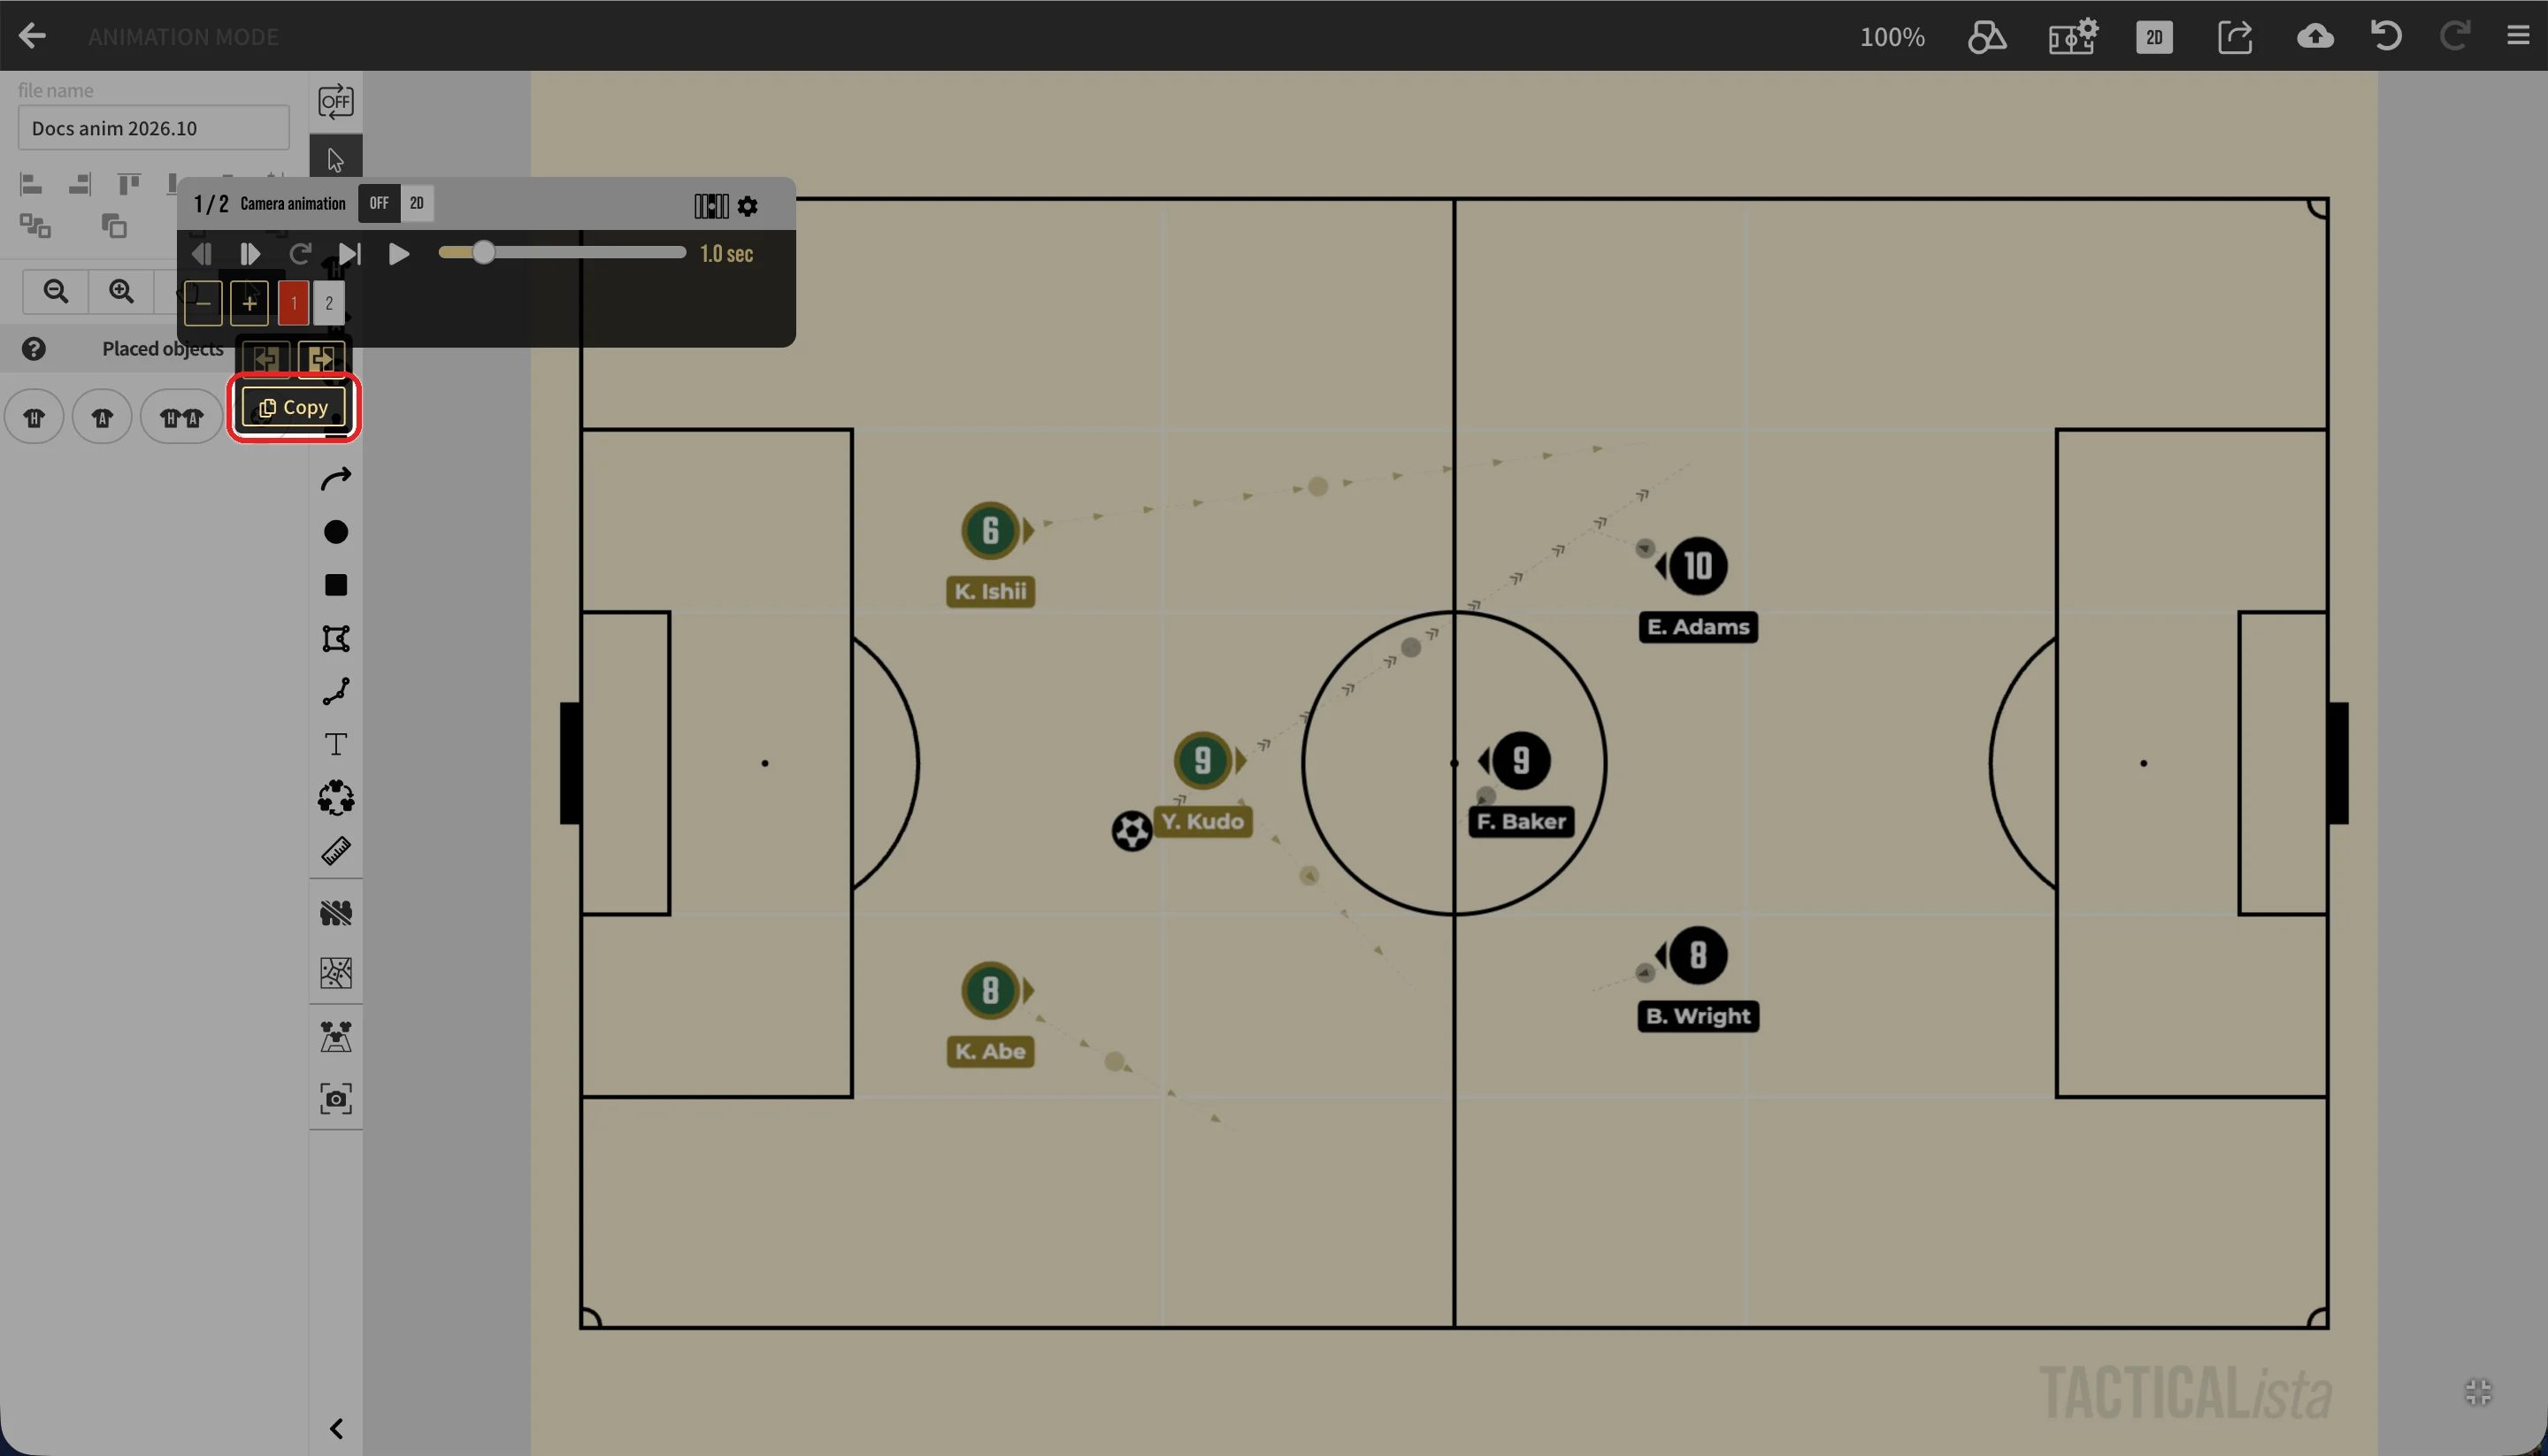
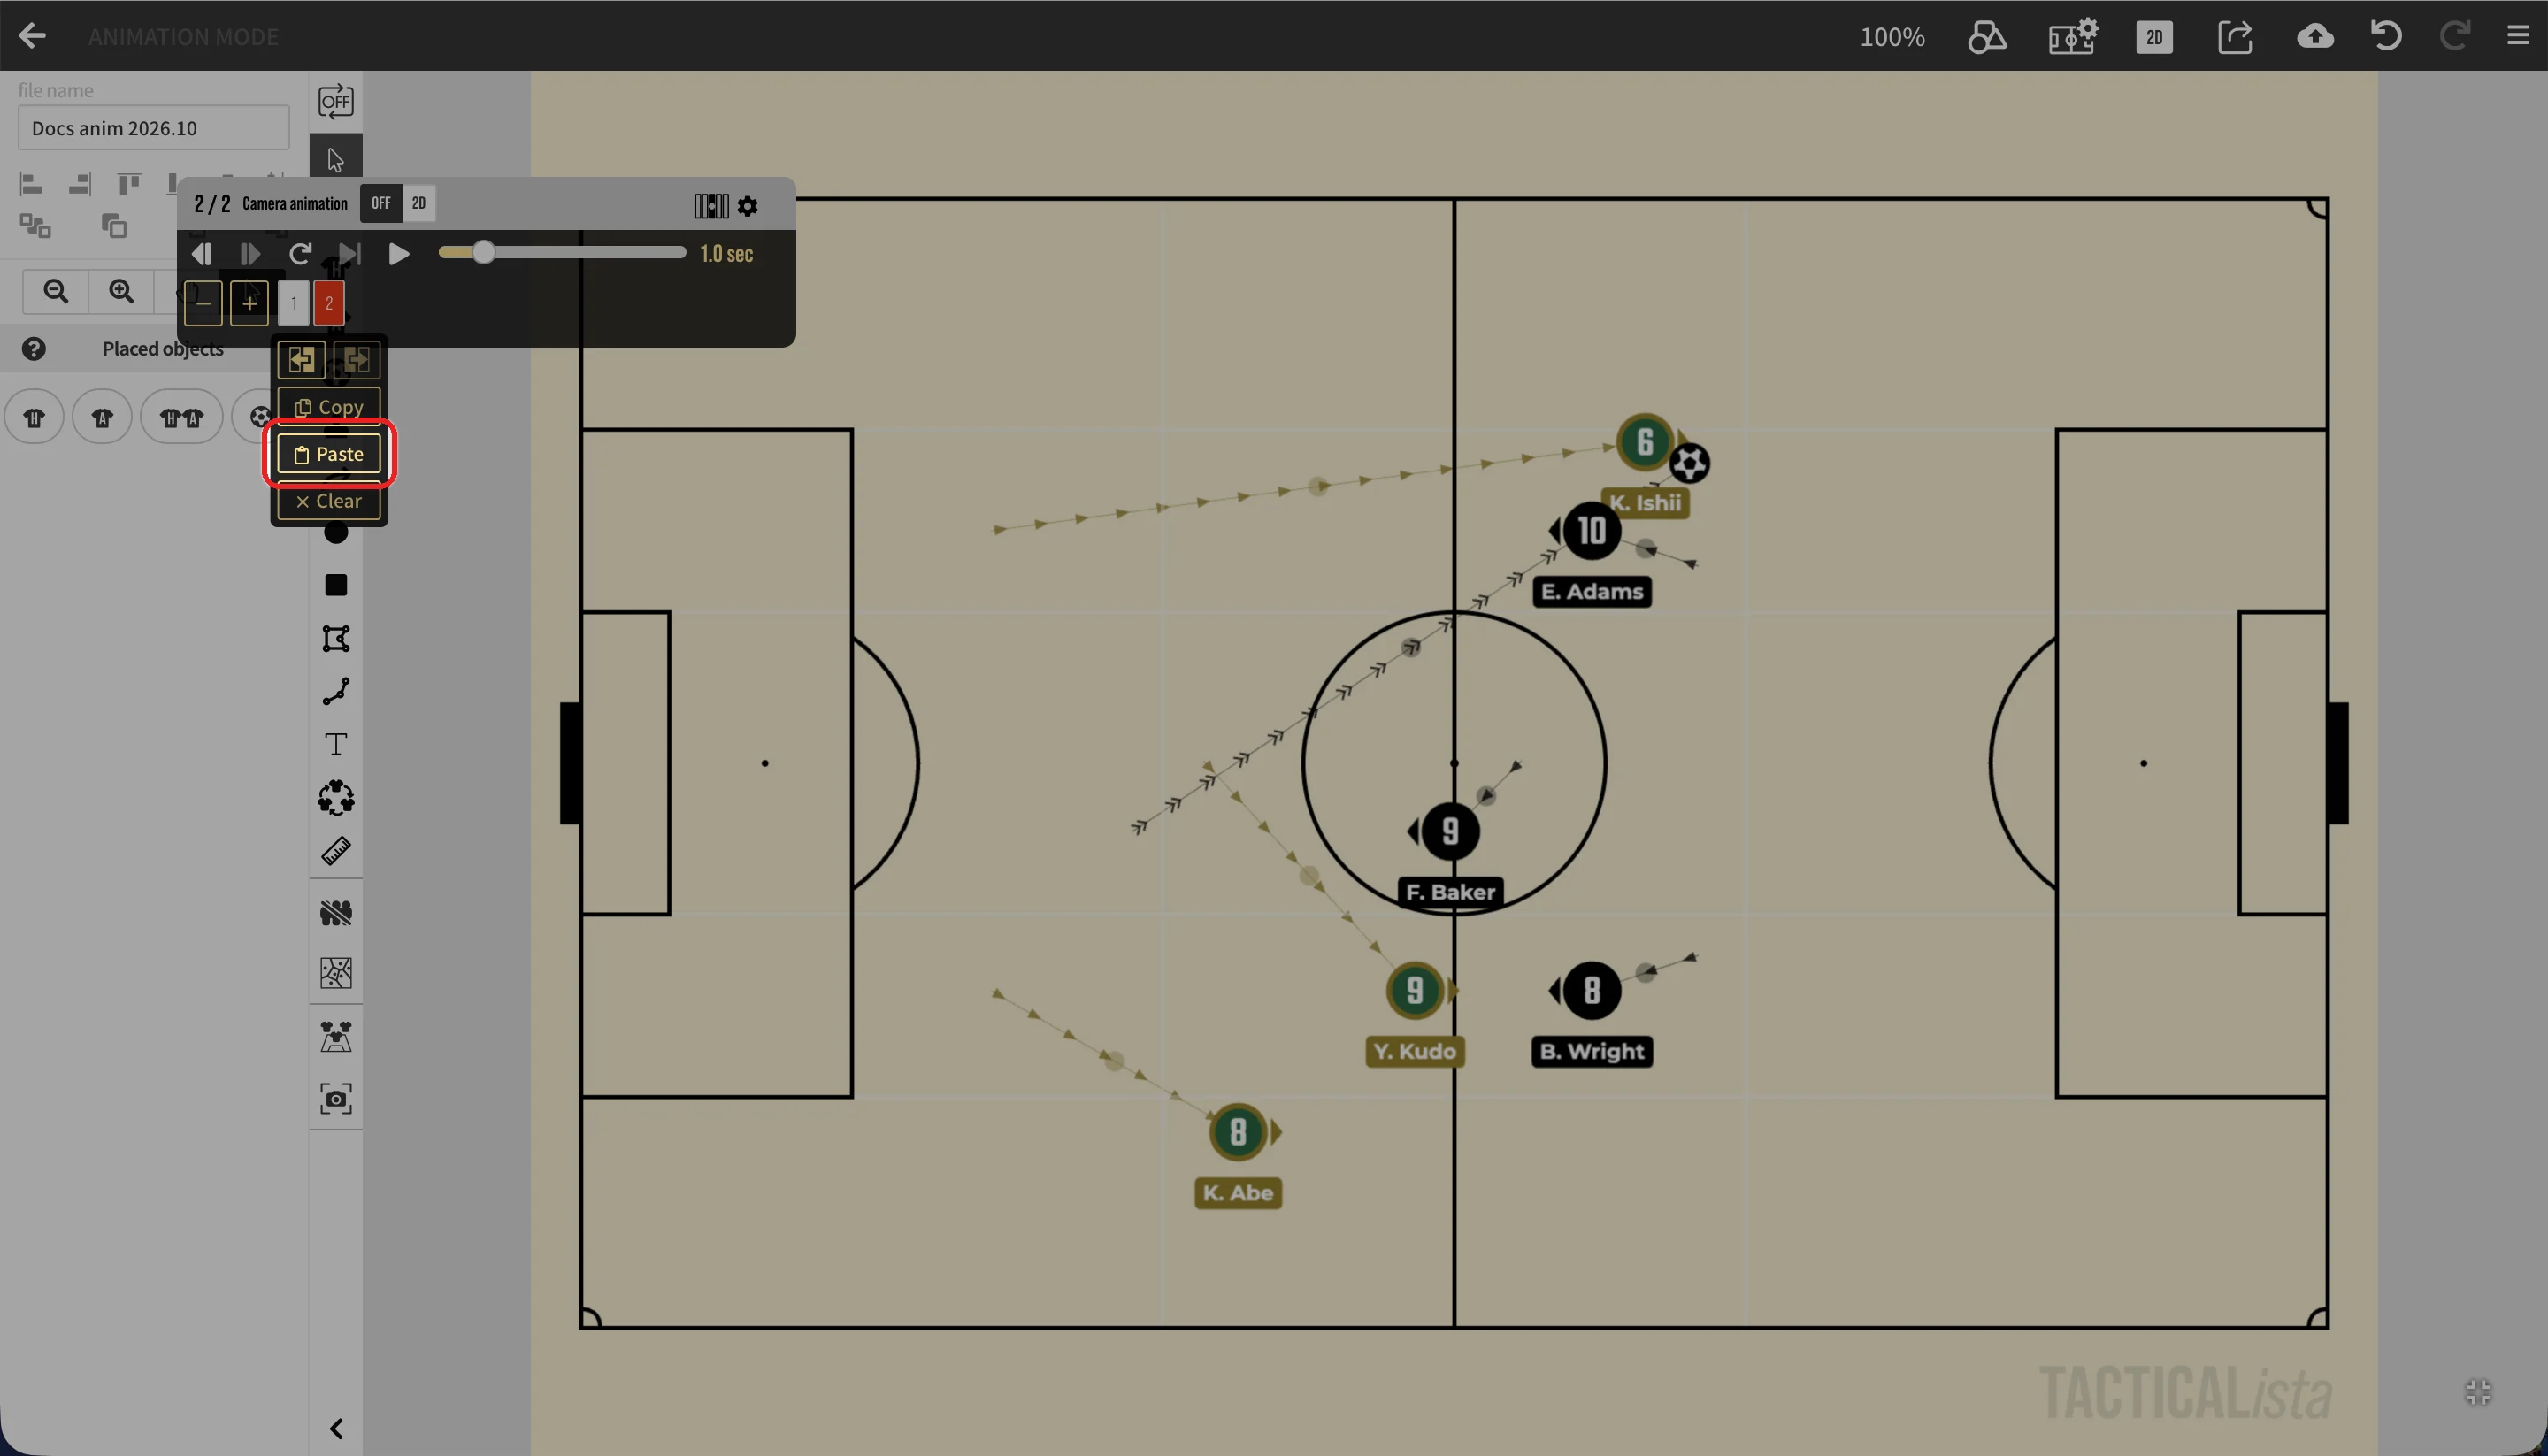
- In the frame list, press the frame you want to copy to show it, then press it again to open the popup.
- Press "Copy".
- Show the frame just before where you want to insert the copy, and press it again to open the popup.
- Press "Paste". A frame is inserted after the current frame, and the board switches to it.
- "Paste" and "Clear" appear only while a frame is copied. You can paste from the popup of any frame, as many times as you like. Press "Clear" to discard the copy.
- The copy keeps the state at the moment you copied it. Editing the original frame afterwards does not change it.
- When you paste, the movement into the inserted frame and the movement into the frame after it become straight lines. Curves, path vertices, and the arc of the ball's height are reset.
- Colors, player names, and other appearance settings are shared by all frames, so the pasted frame uses the appearance at the time you paste.
- Objects added after copying are hidden in the pasted frame.
- If you delete an object that was visible in the copied frame, the copy is discarded.
- One undo cancels a paste. The copy remains after you undo.
- The copy is kept only while the project is open. You cannot paste it into another project.
- You cannot paste when the number of frames is at the limit. Copy and paste are not available while a range is selected or during playback.
- This is separate from copying objects (Ctrl/Cmd+C). There is no keyboard shortcut for copying and pasting frames.
Duration per frame
Each frame has its own duration, from 0.1 to 5 seconds. Change it with the slider in the controller.
Selecting a range of frames
Drag across the frame list to select several frames and edit them together. The frames in the range turn yellow, and the first frame of the range is shown. 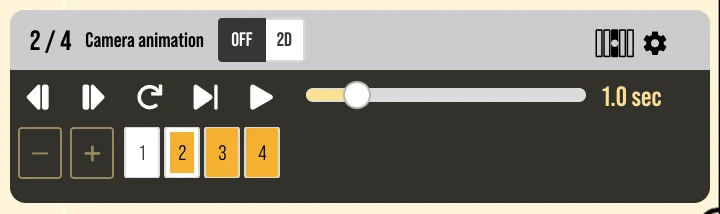
While a range is selected, these changes apply to every frame in the range:
- Moving, rotating, and resizing objects. The objects end up in the same position and direction in every frame of the range.
- A player's pose, view angle, name visibility, auto-orient, and the ball's height.
- Adding objects. New objects are added only to the frames in the range (this takes priority over the range of frames for new objects).
- Deleting objects. No dialog asks for the frames; the objects are removed only from the frames in the range.
- Showing and removing Voronoi and Delaunay diagrams.
- Frame duration. Moving the slider sets the same duration for every frame in the range.
- Frames cannot be added, deleted, swapped, copied, or pasted while a range is selected. Press a single frame to clear the range.
Playing an animation
- plays from the current frame to the end.
- plays the current frame (the movement from the previous frame).
- plays the next frame.
Effective mode
Turn on "Effective mode" in the animation settings to add an effect to objects that become visible when a frame changes.
| Object | Effect |
|---|---|
| Lines | Drawn as if extending from the start point to the end point. |
| Rectangles, ovals, polygons, polylines | Fade in. |
Effects play during playback and in exported videos. When switching or seeking frames, objects appear immediately without the effect. The setting is saved per project.
Play with easing
Turn on "Play with easing" in the animation settings, and at every frame change, movements start slowly, speed up, and slow down again before they stop. When it is off, objects move at a constant speed.
- The same easing applies to 2D objects, 2D and 3D cameras, players and the ball in the 3D view, and exported videos and GIFs.
- The camera speeds up and slows down once between one camera key and the next.
- The duration of each frame does not change.
- The setting is saved per project. It is off by default.
- It cannot be changed during playback or export.
Range of frames for new objects
When you add a new object, you can choose which frames it is added to. Choose the range in the animation settings. The icon of the current range is shown to the left of on the controller.
- Current frame only
- From the first frame to the current frame
- From the current frame to the last frame
- All frames
While a range of frames is selected, new objects are added to the frames in that range regardless of this setting.
When you delete an object, a dialog asks which frames to delete it from.