
Player Objects
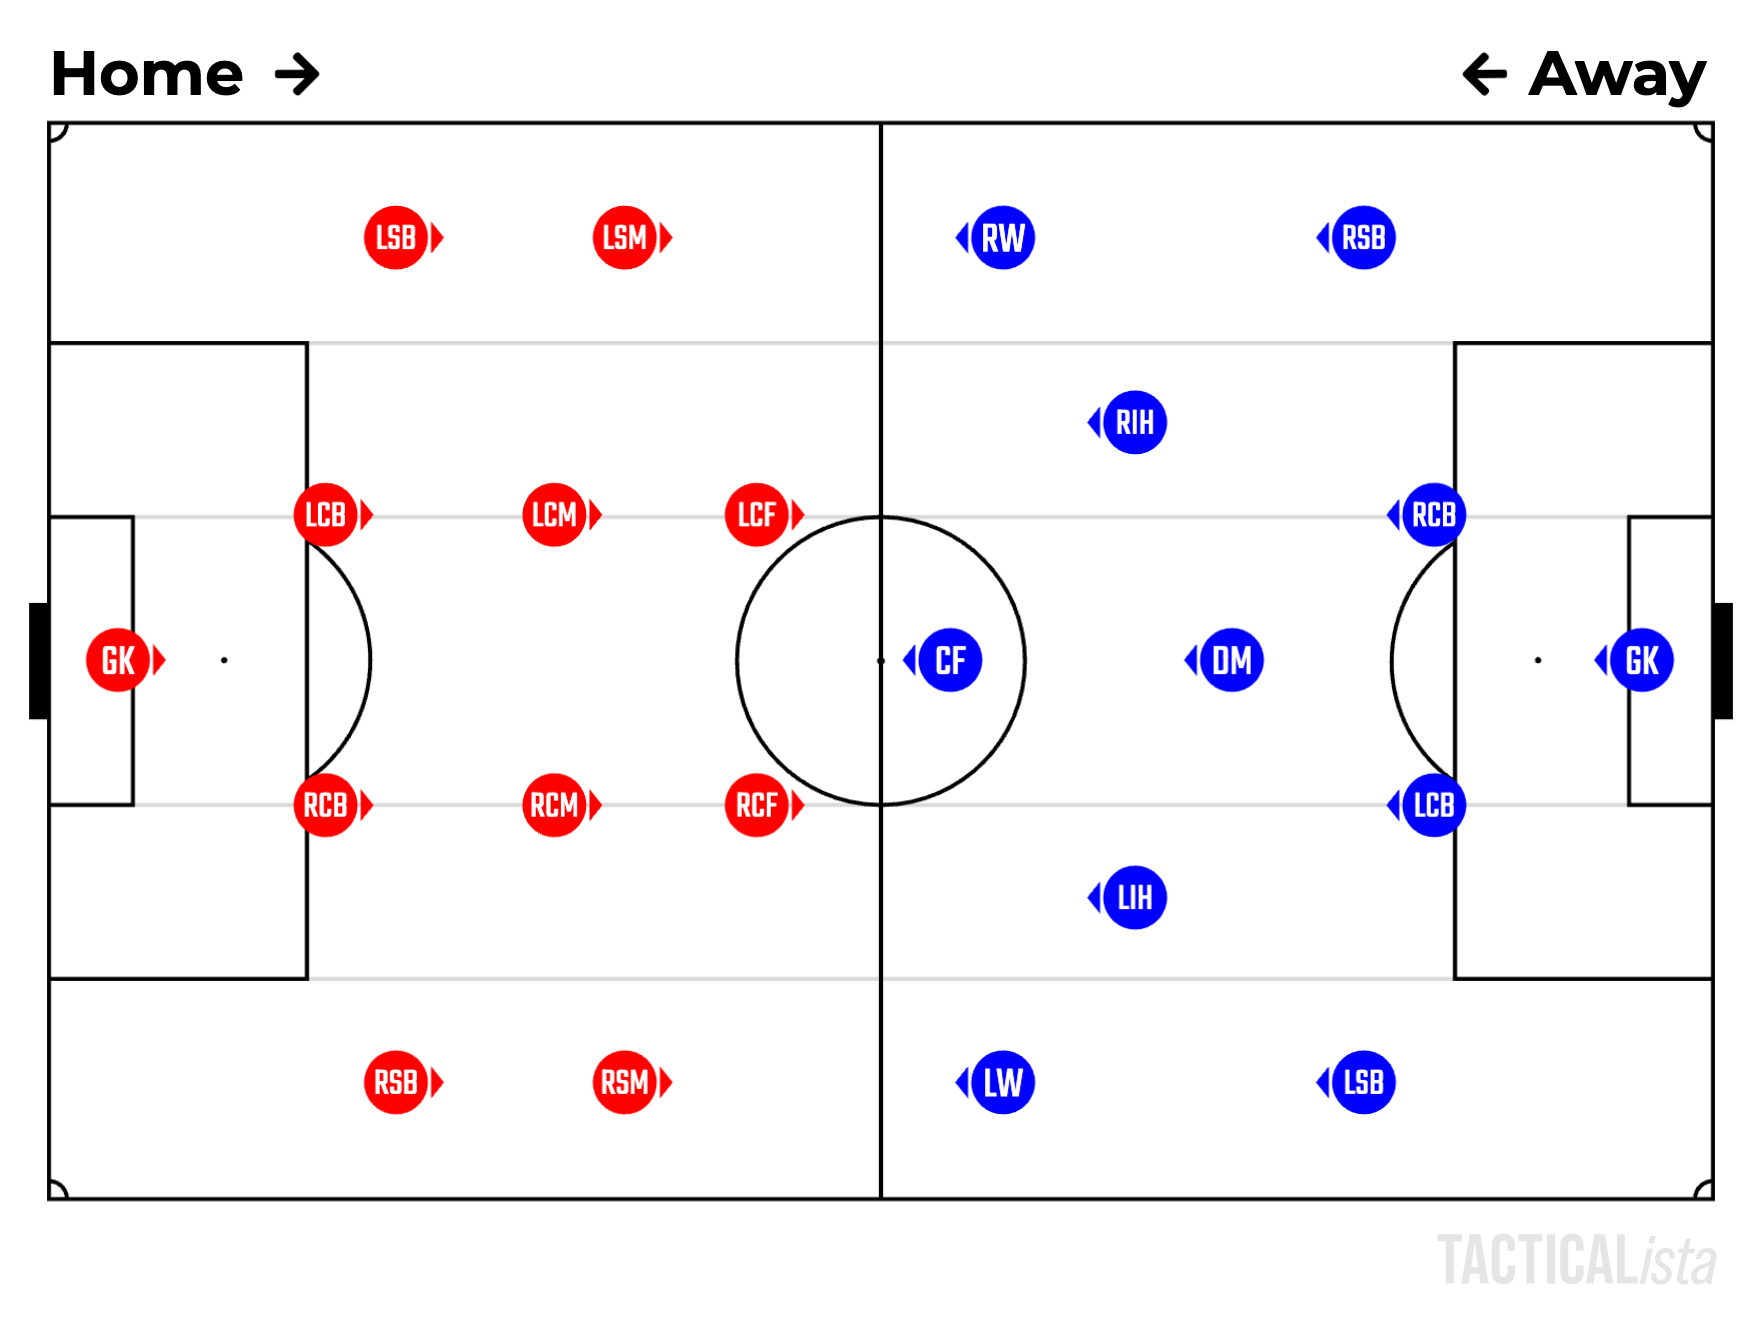
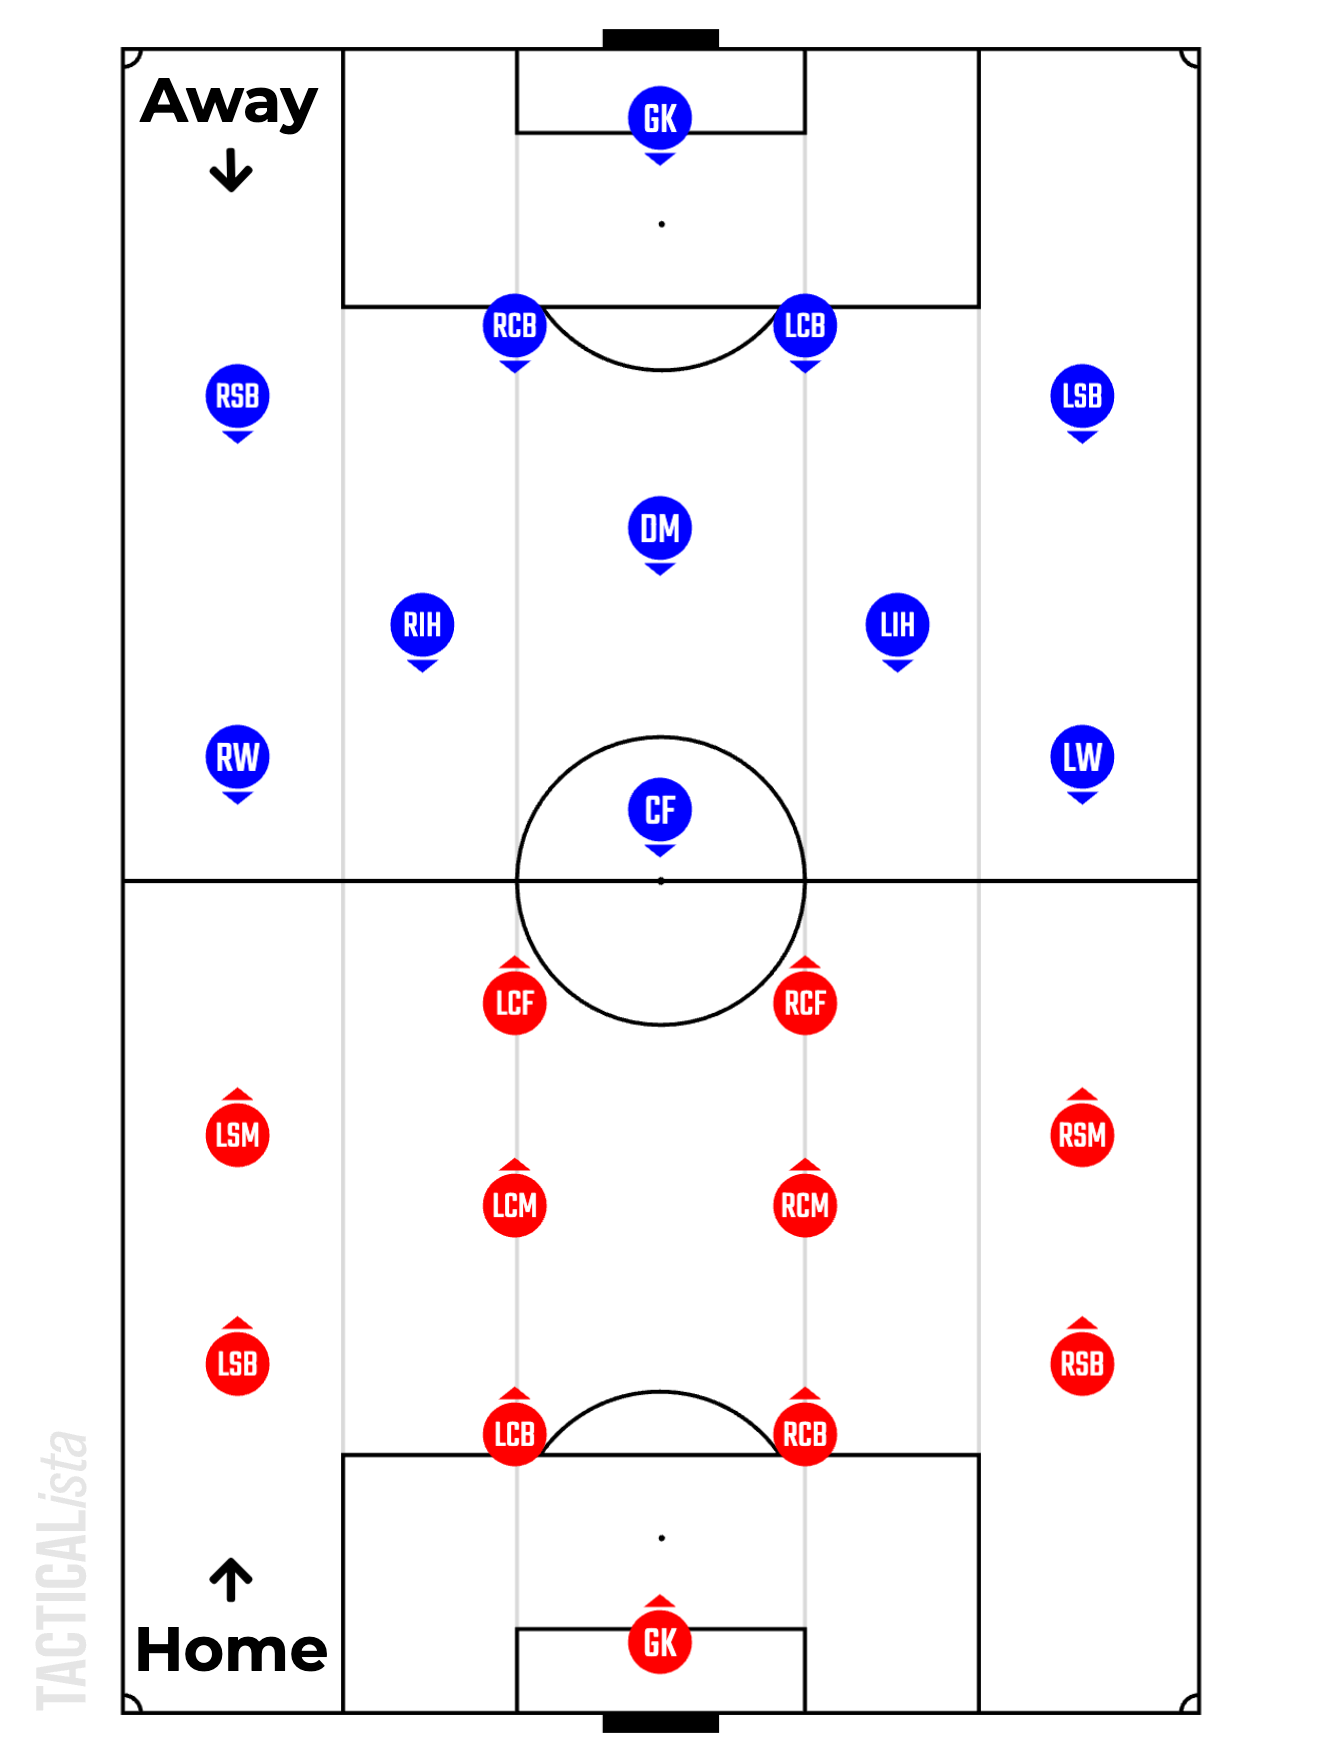
Each player object belongs to either home or away . When the field is horizontal, home attacks from left to right and away from right to left. When the field is vertical, home attacks from bottom to top and away from top to bottom.
Changing the look of a whole team
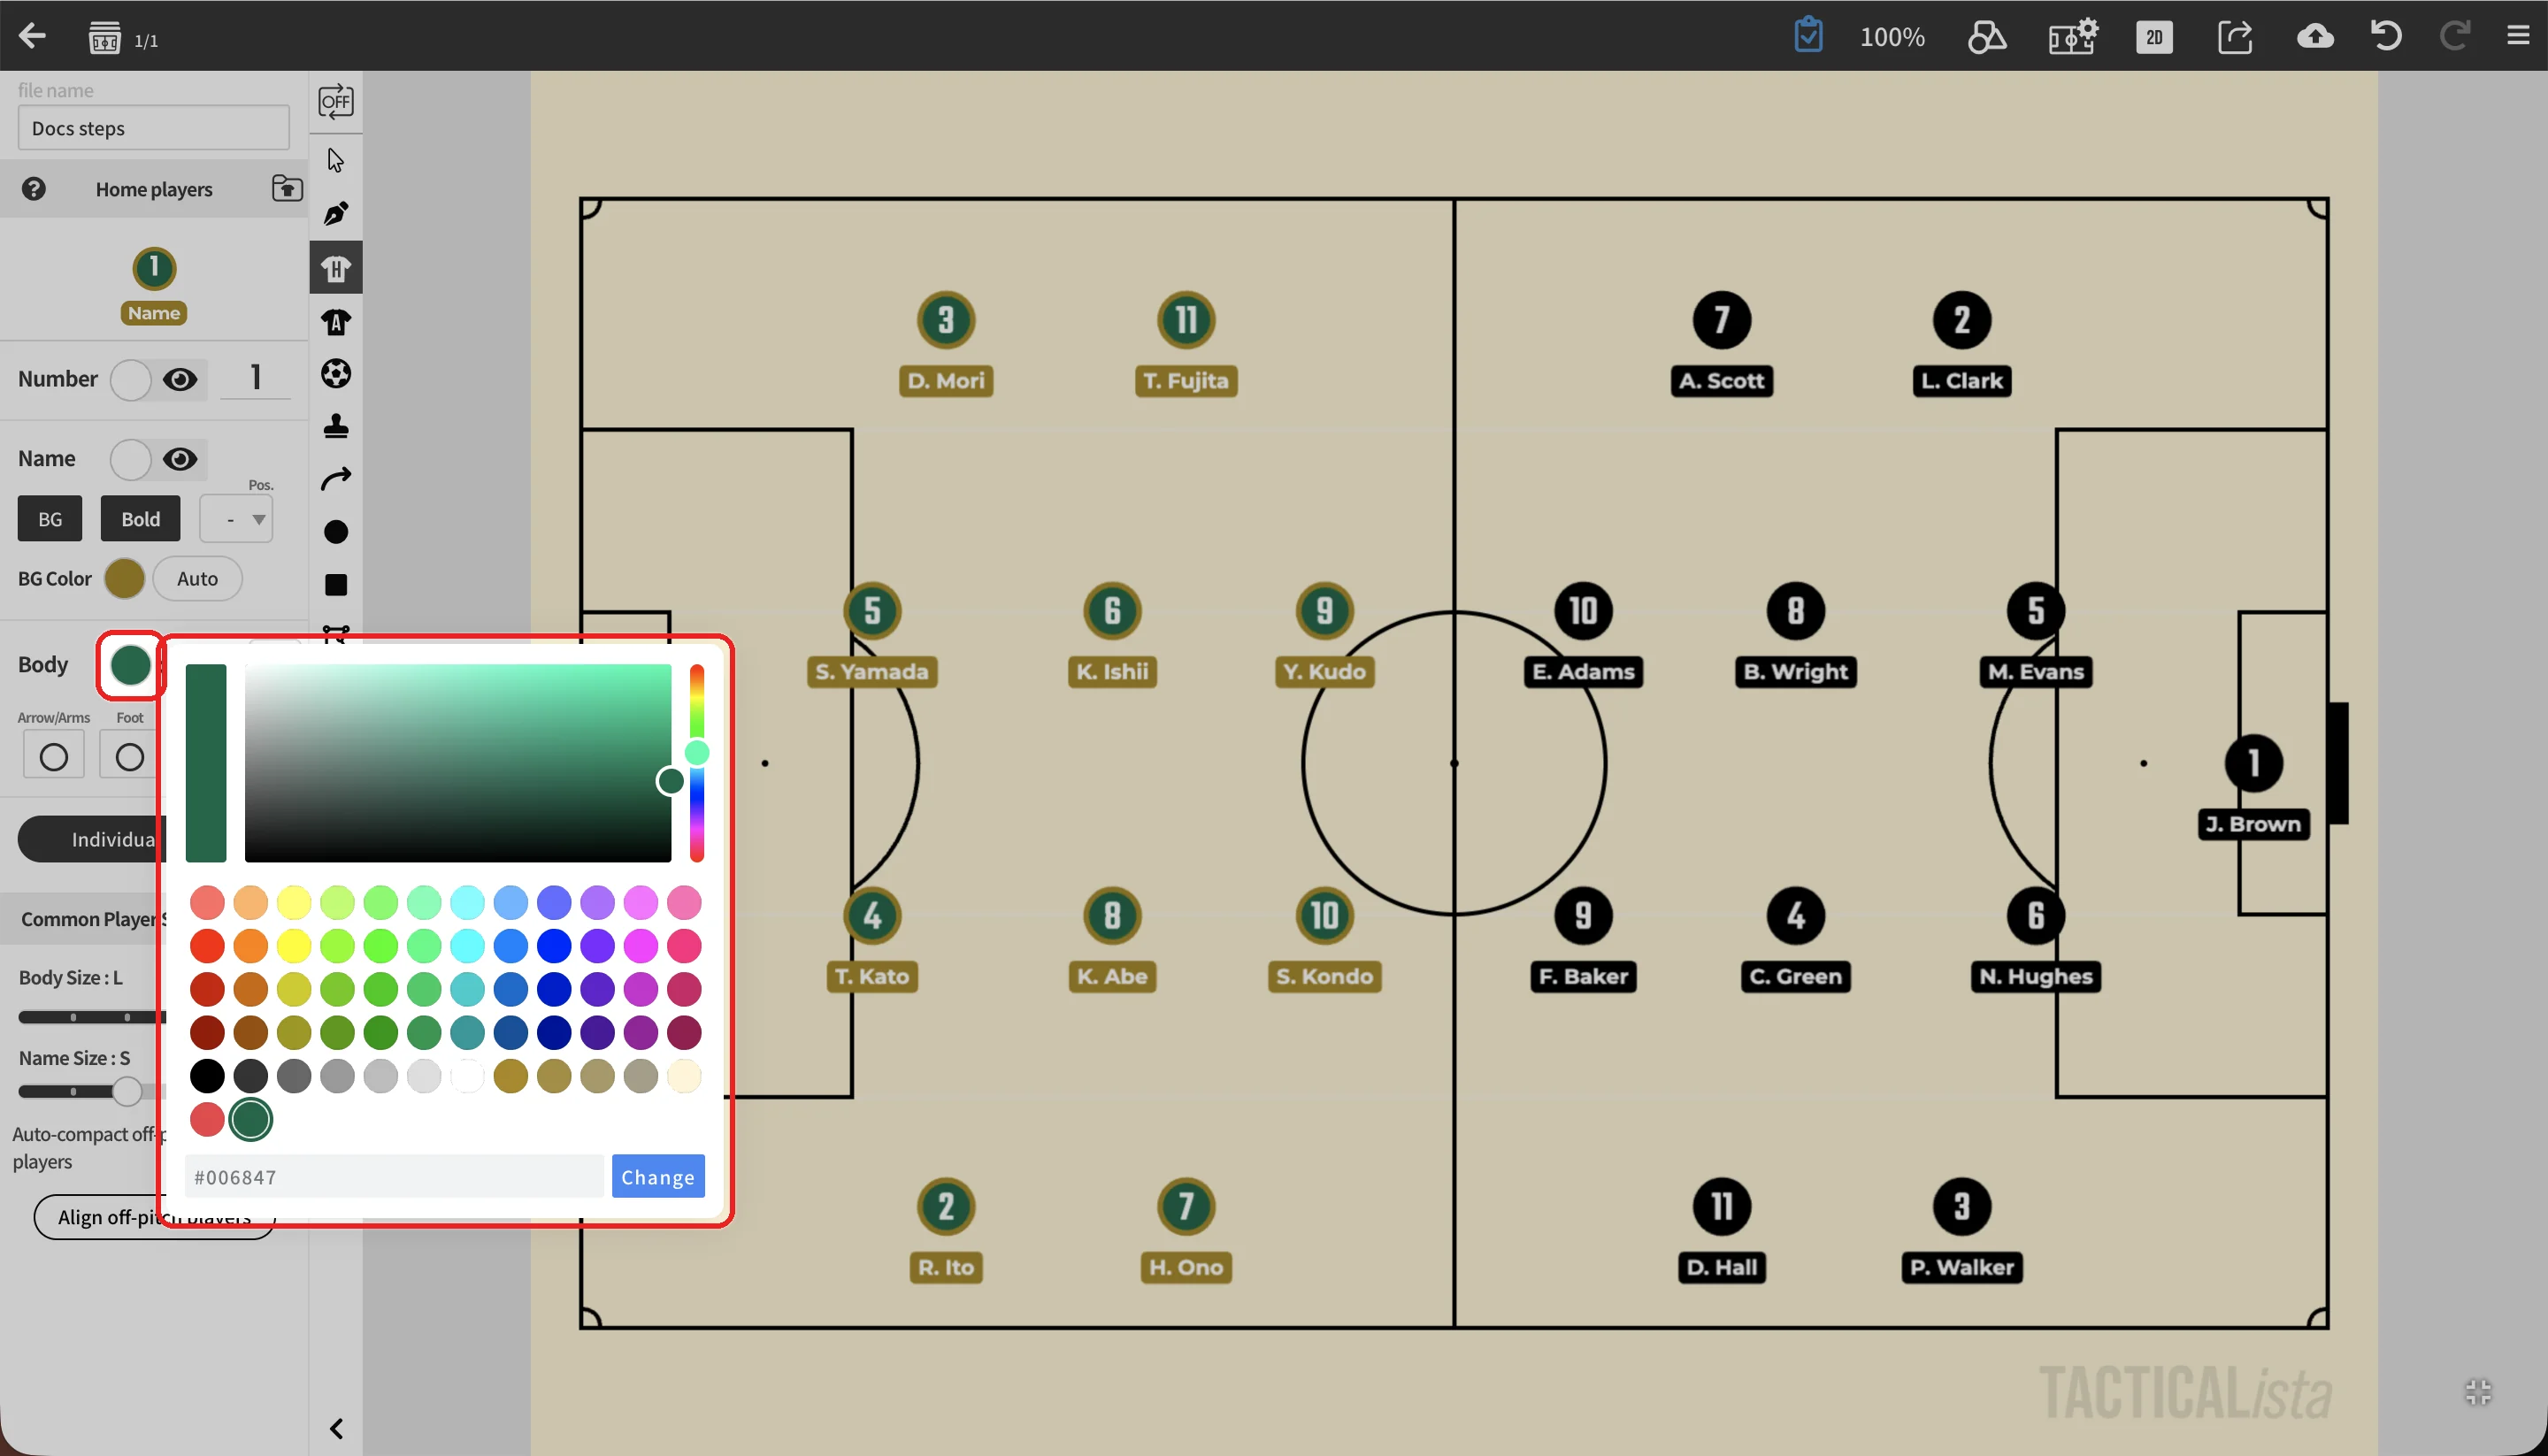
With (or ) selected in the toolbar, appearance changes apply to every home (or away) player. Players you add later use the same appearance.
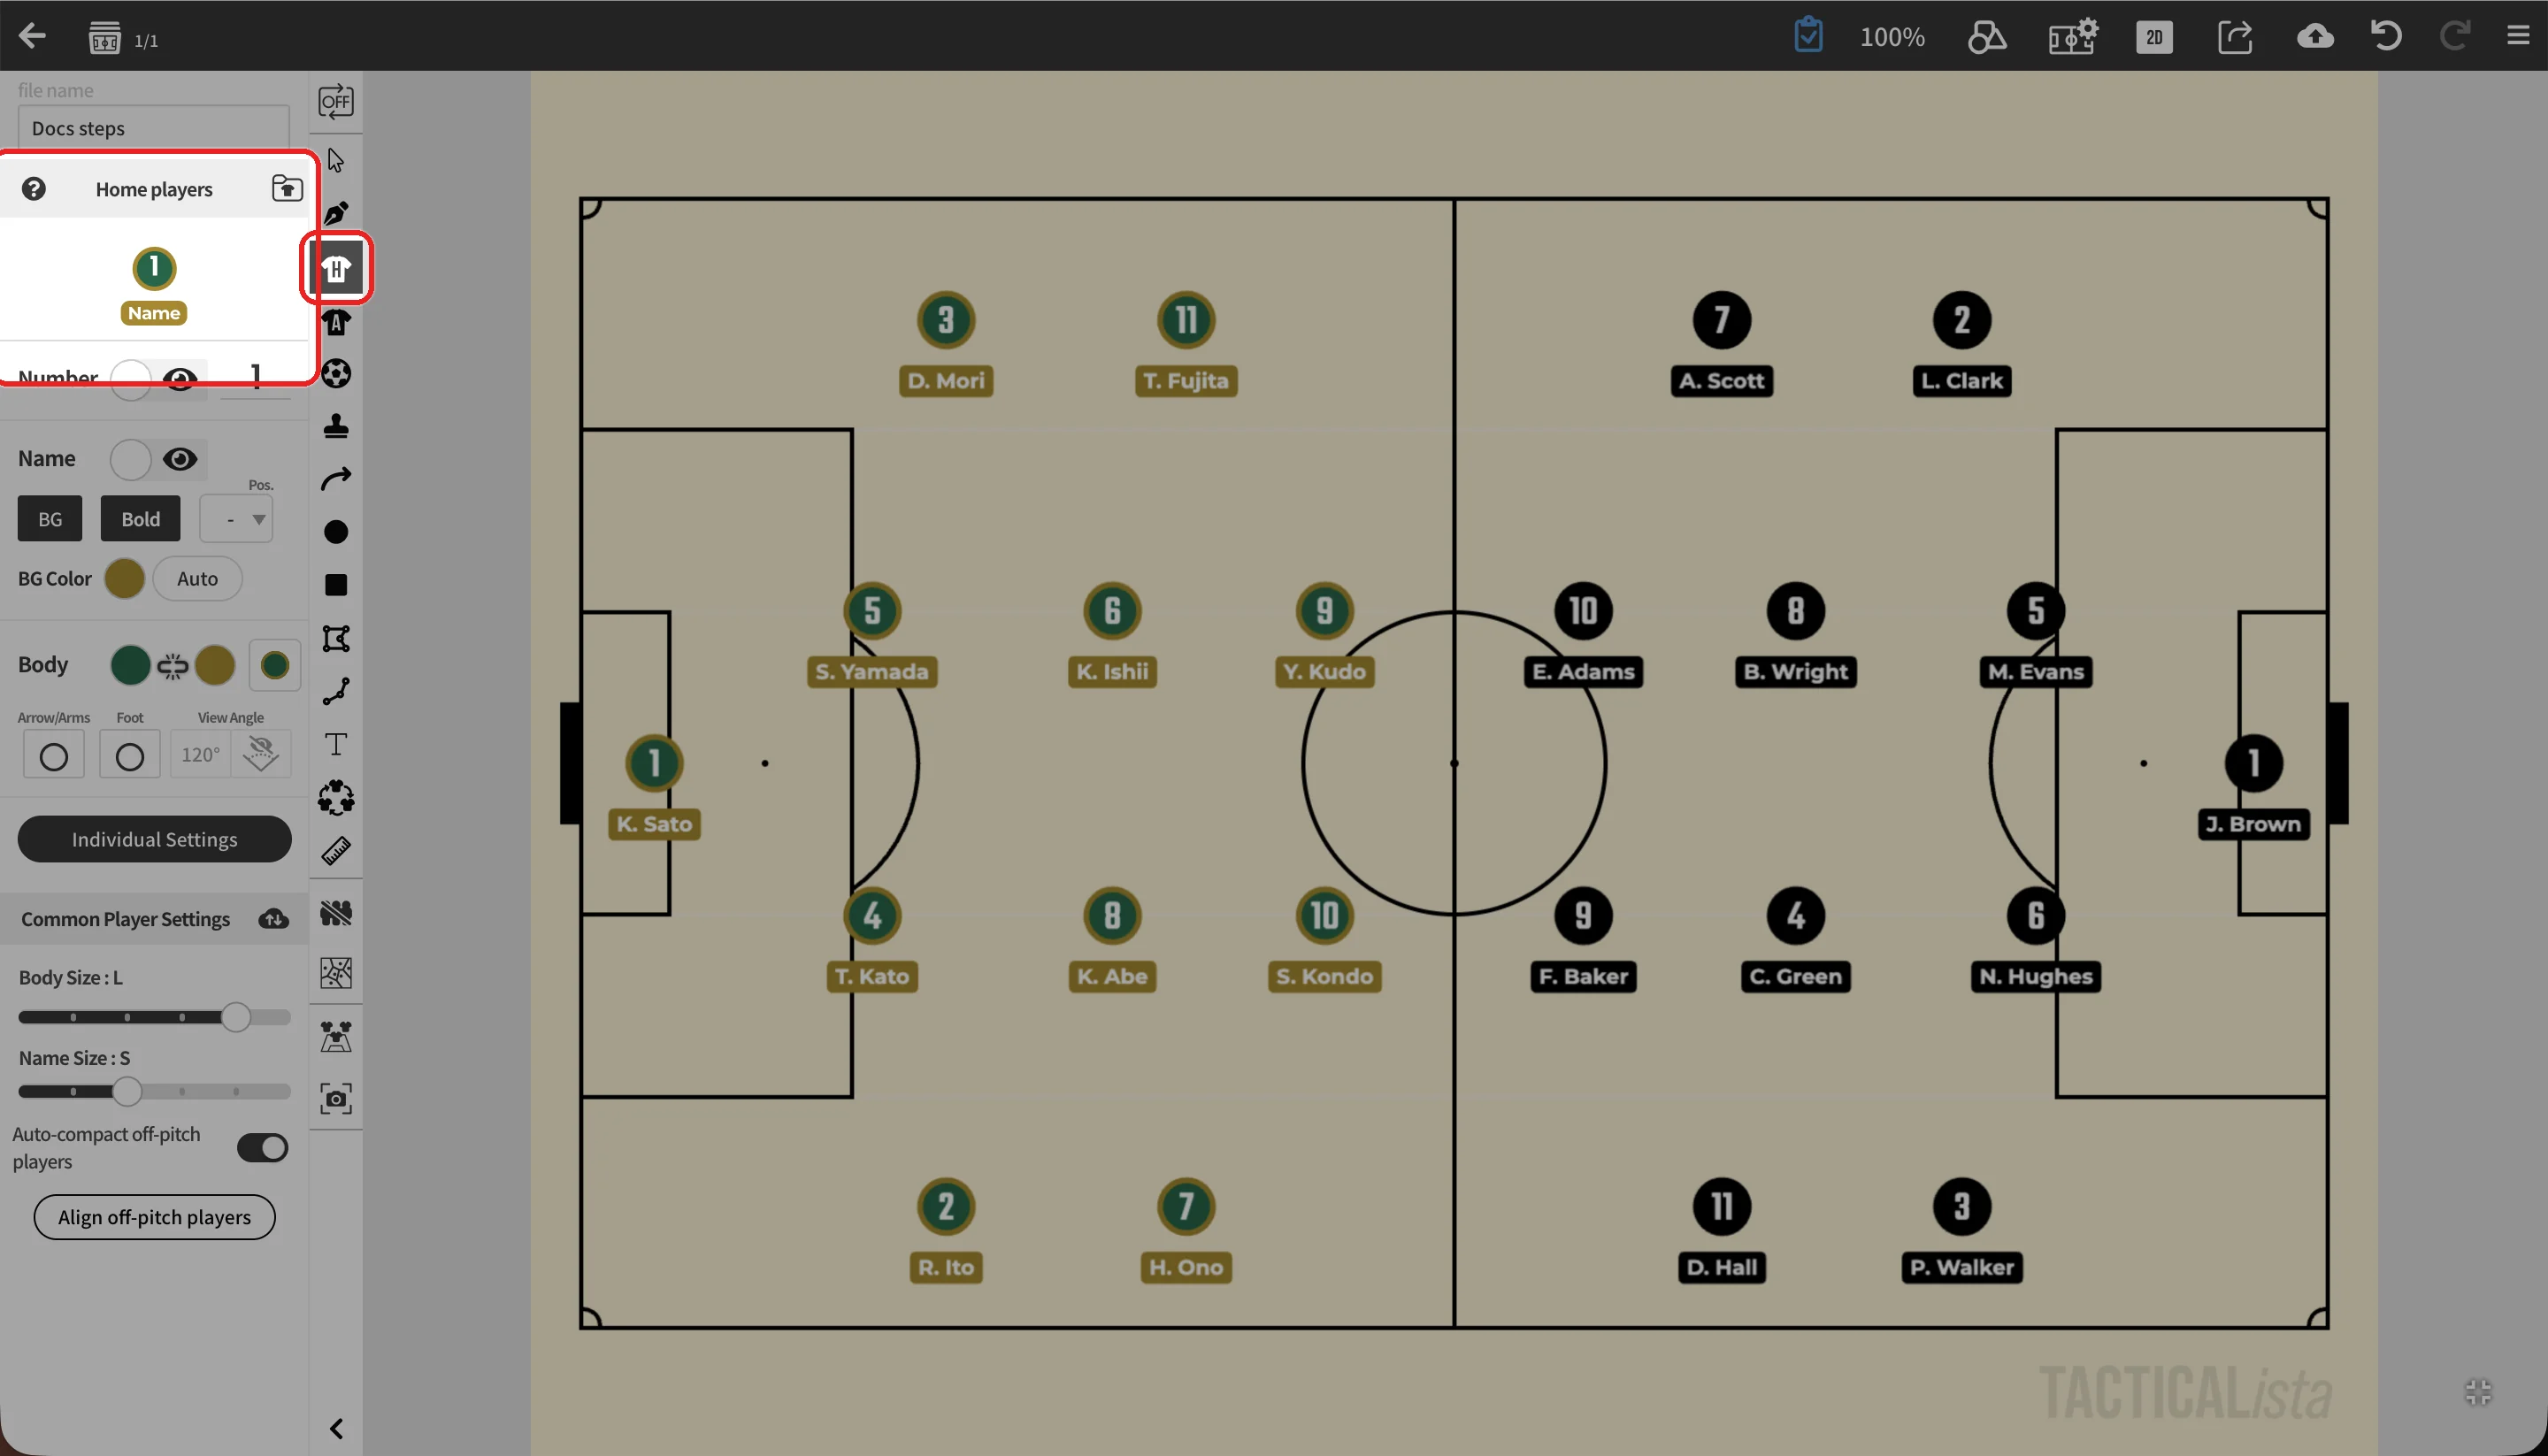
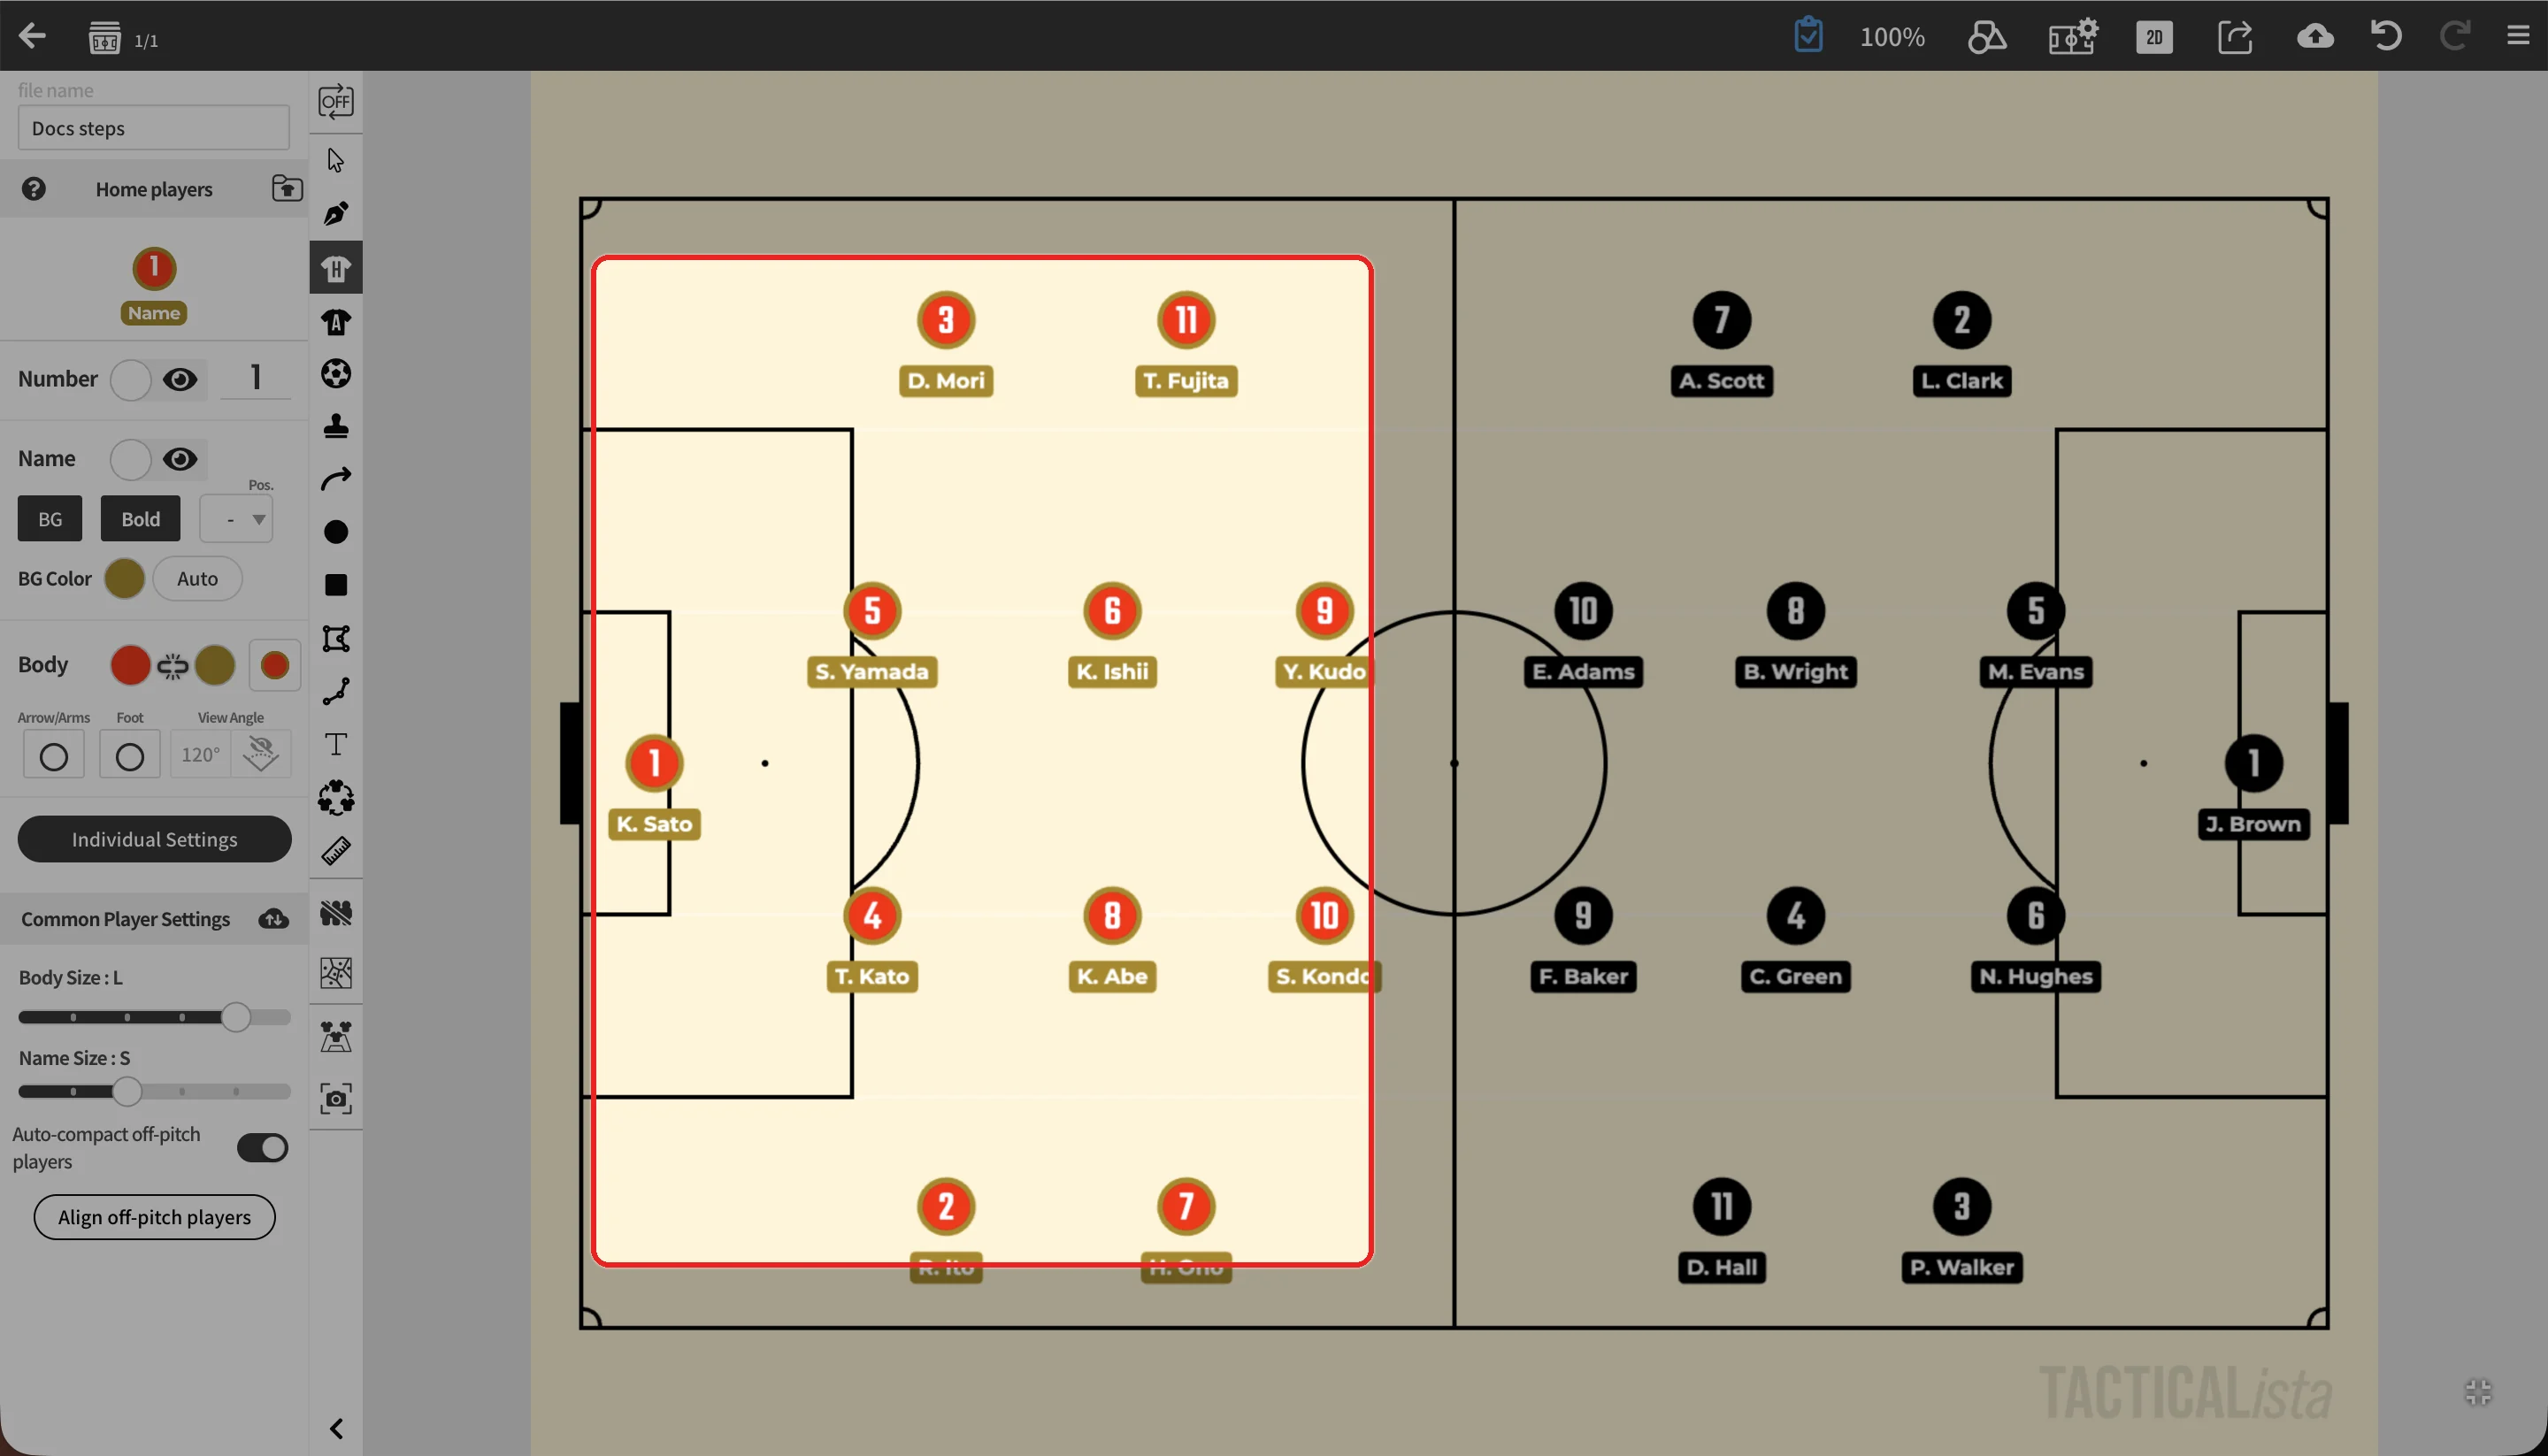
Body size and name size are set under "Common Player Settings" at the bottom of the panel. They apply to every player on the field, home or away.
Changing players one at a time
When you select a player, the panel shows that player's settings and changes apply only to the selection. With several players selected, changes apply to all of them.
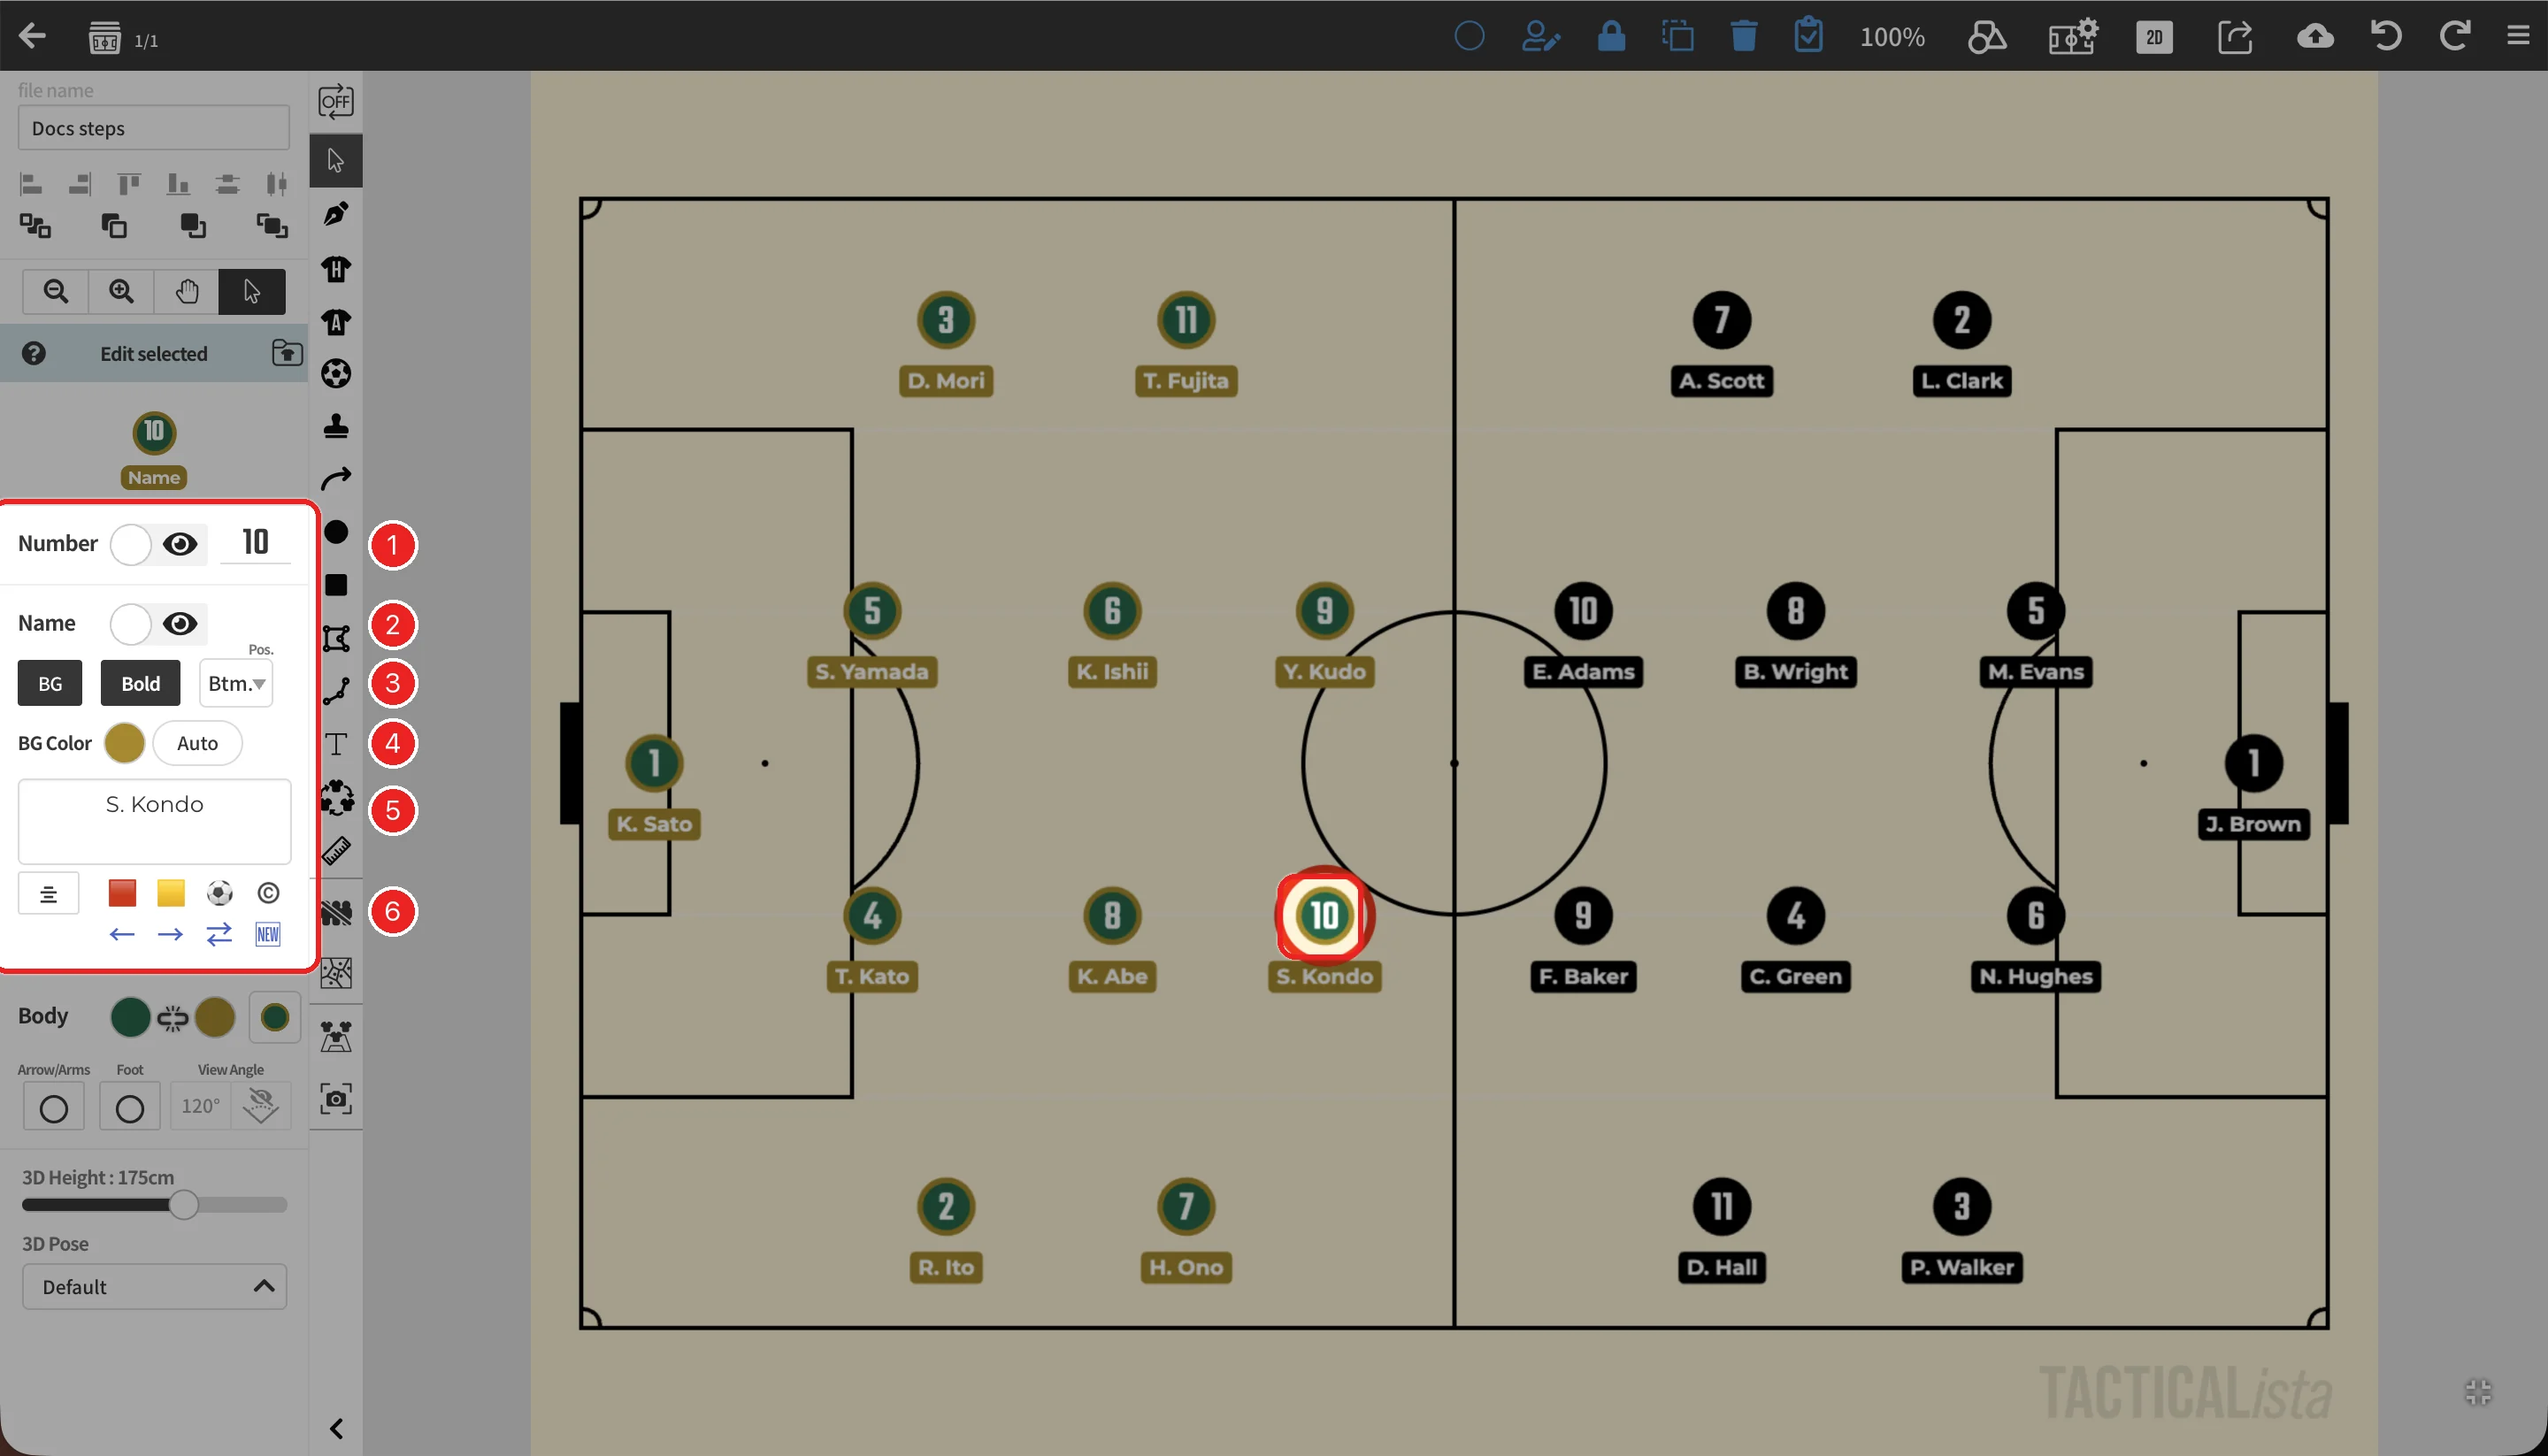
| No. | Item | Description |
|---|---|---|
| 1 | Number | Number color, visibility, and the number itself |
| 2 | Name | Name color and visibility |
| 3 | BG / Bold / Pos. | Name background, bold text, and name position (top, bottom, left, right) |
| 4 | BG Color | Color of the name background. "Auto" picks white or black to suit the field color |
| 5 | Player name | Enter the name. The button on the left changes the text alignment |
| 6 | Symbols | Inserts symbols such as cards, a goal, a captain mark, substitution arrows, or NEW into the name |
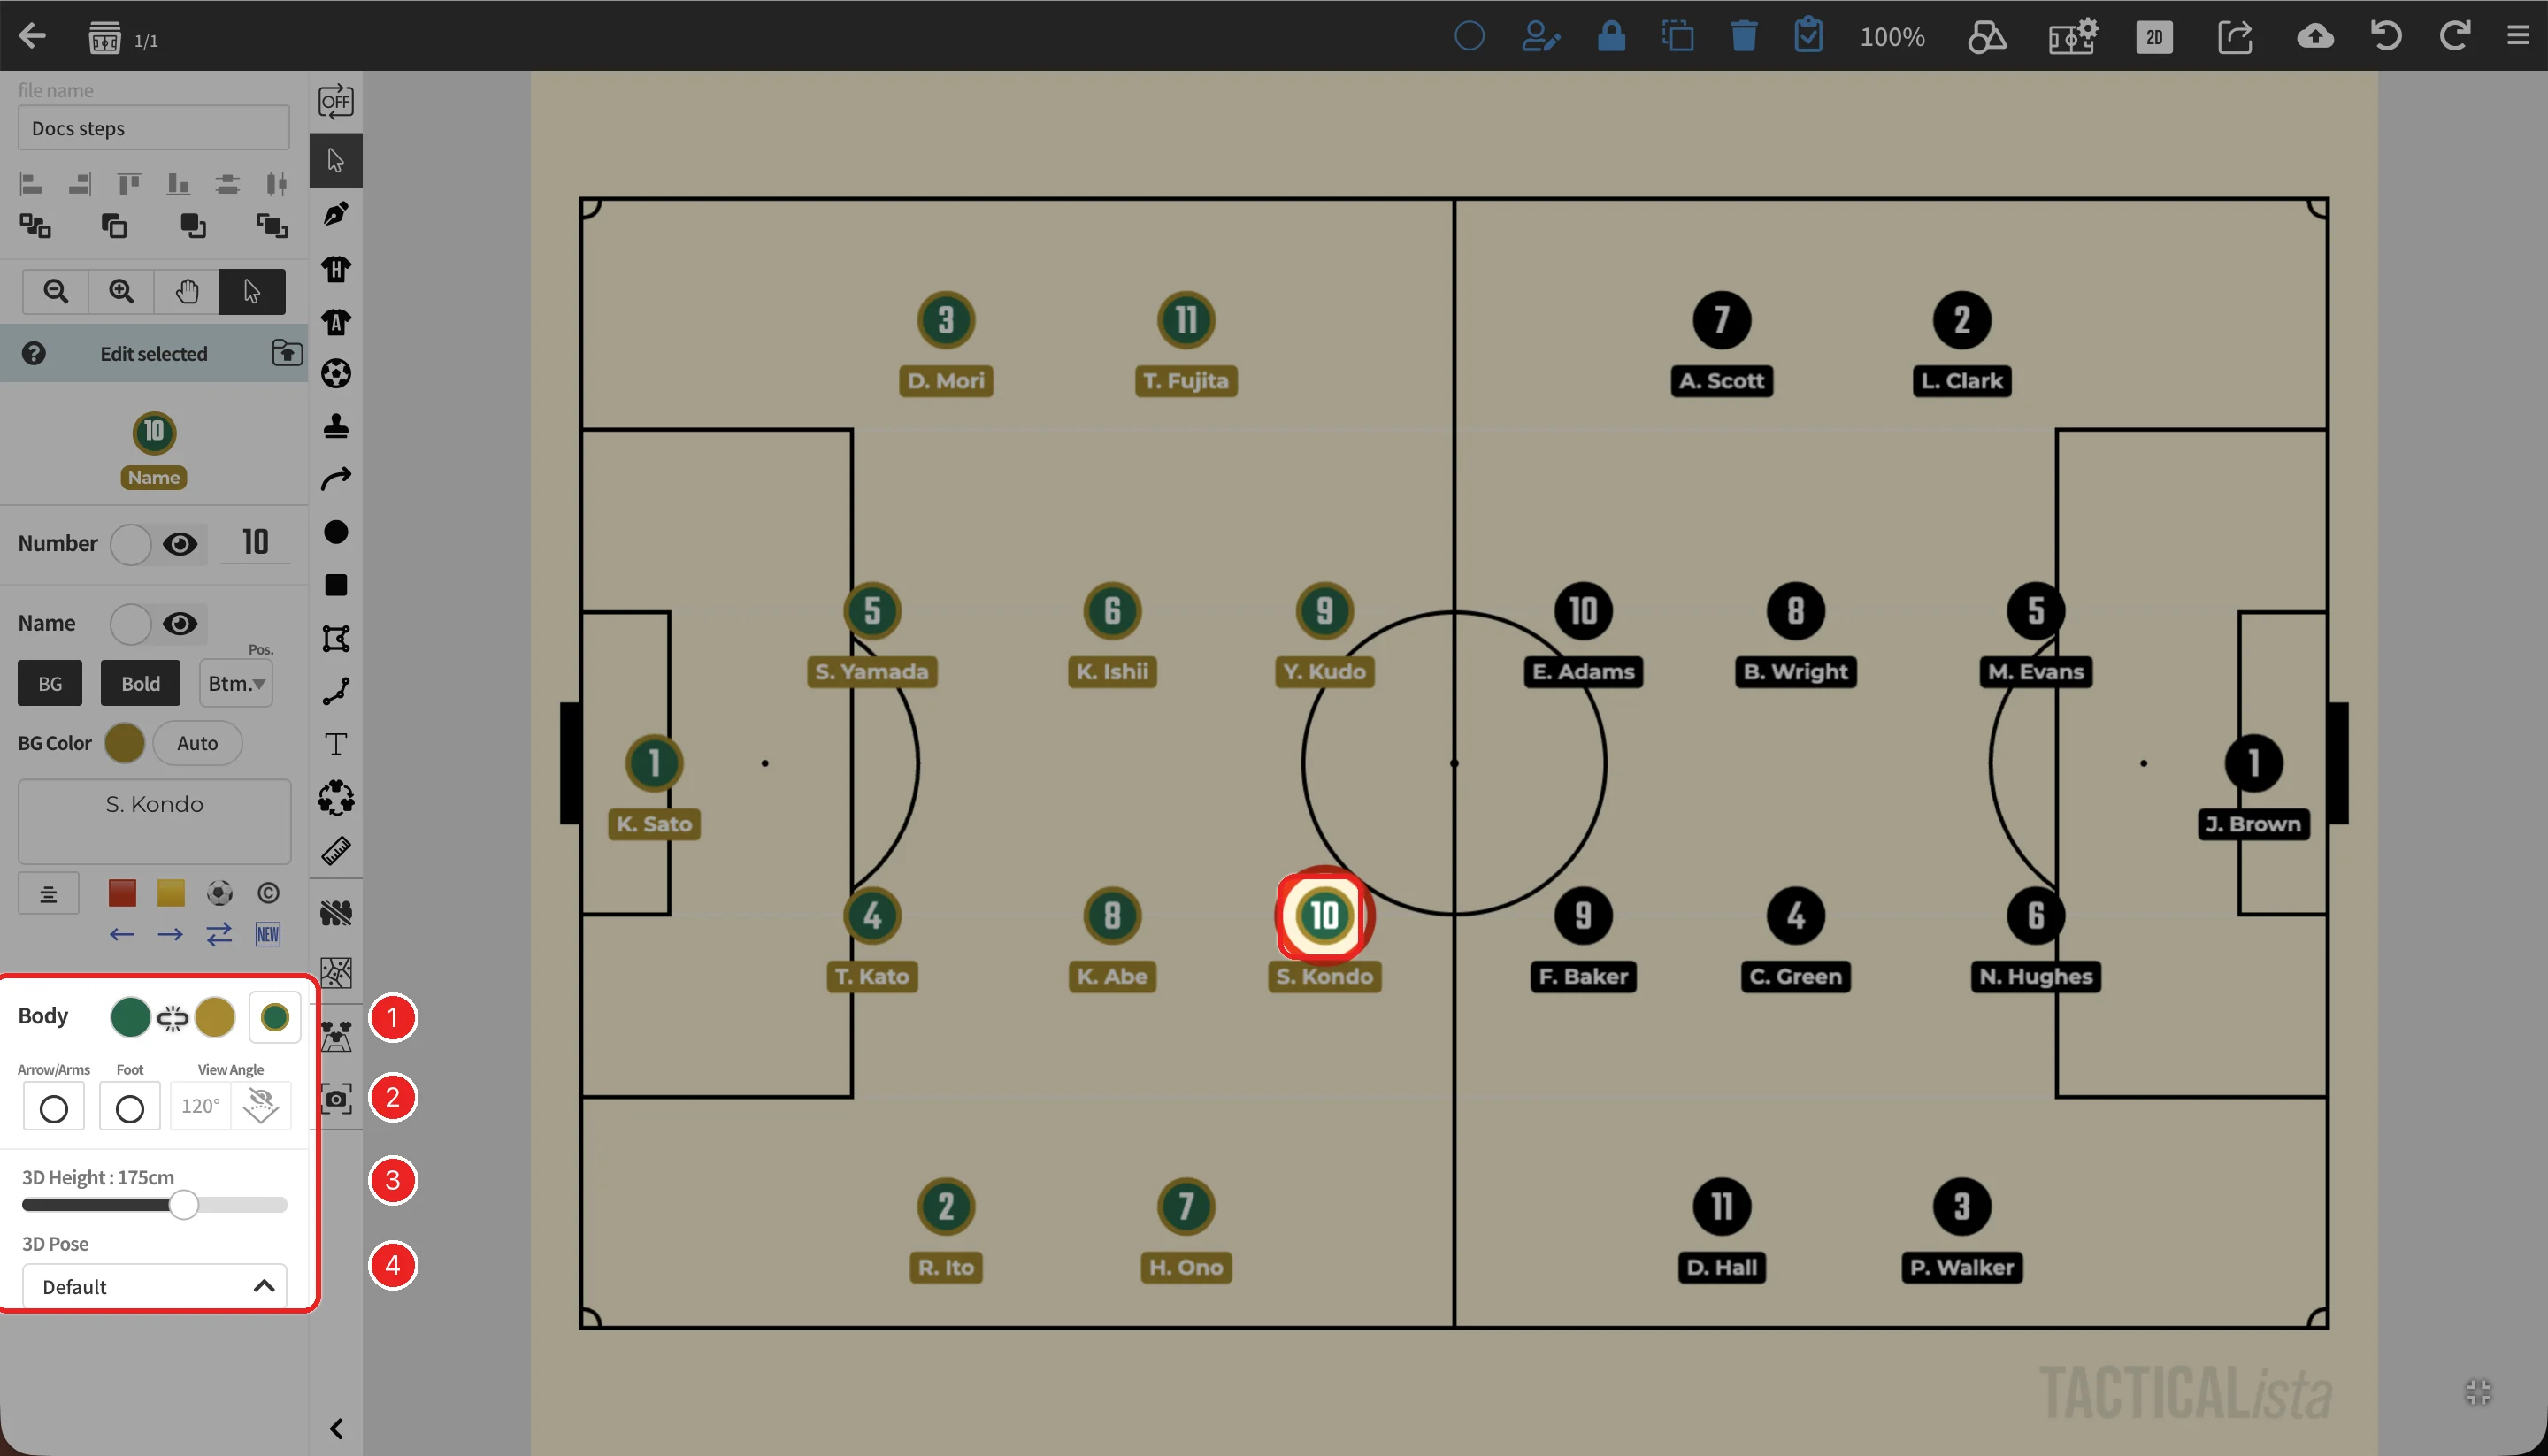
| No. | Item | Description |
|---|---|---|
| 1 | Body | Body color. Two-color bodies and uniform patterns are available on the Basic plan |
| 2 | Arrow/Arms, Foot, View Angle | Shows an arrow or arms for body direction, the preferred foot, and the view angle → Showing direction, Showing the view angle |
| 3 | 3D Height | Height in the 3D view → 3D Player |
| 4 | 3D Pose | Pose in the 3D view → 3D Player |
Uniform patterns Basic
Bodies can be shown in two colors. Press the button to the right of the body colors to open the pattern settings. Combine a type (stripes, line, or half) with direction, thickness, and count to get close to a real kit. If a pattern makes the number hard to read, an outline is added to the number automatically.
| Type | Settings |
|---|---|
| Stripes | Count, direction (vertical, horizontal, or diagonal), and Thick/Thin (wide bands or thin lines) |
| Line | Direction and thickness. For thin lines, you choose a position (center or edge) instead of a direction |
| Half | Which way the body is split (left/right, top/bottom, or diagonal) |
Editing names and numbers together
"Individual Settings" lists every home (or away) player so you can edit them in one place.
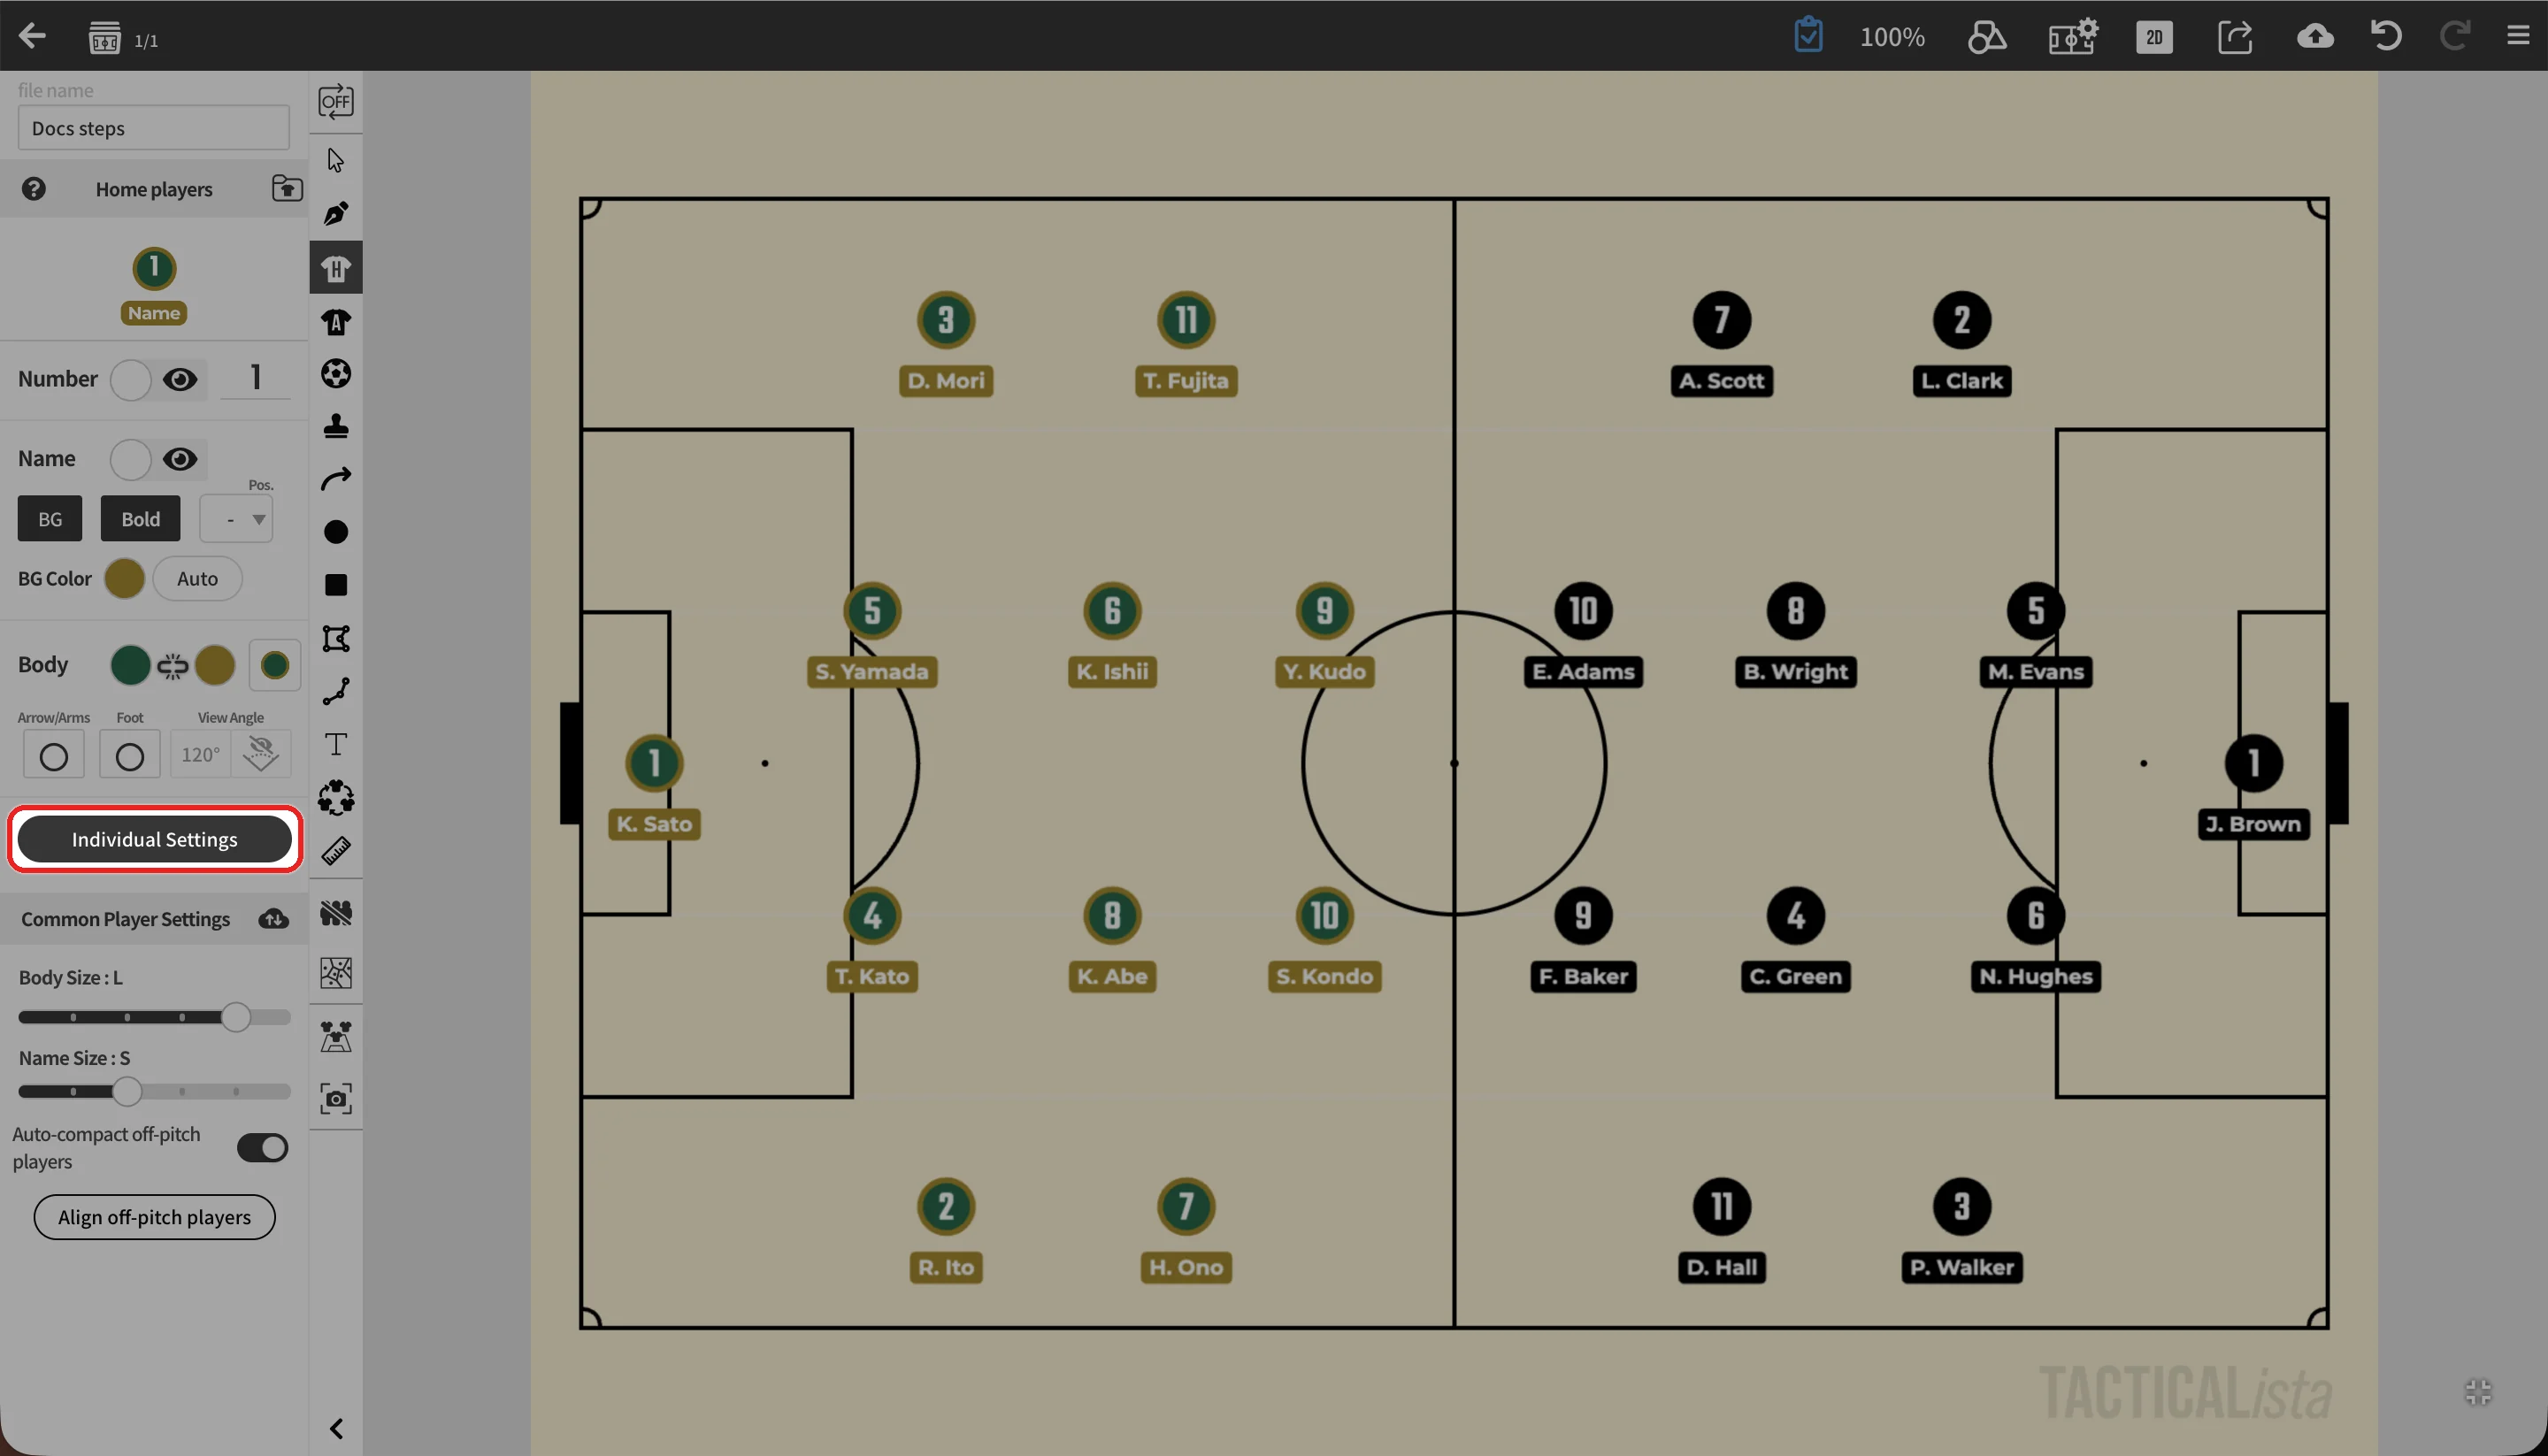
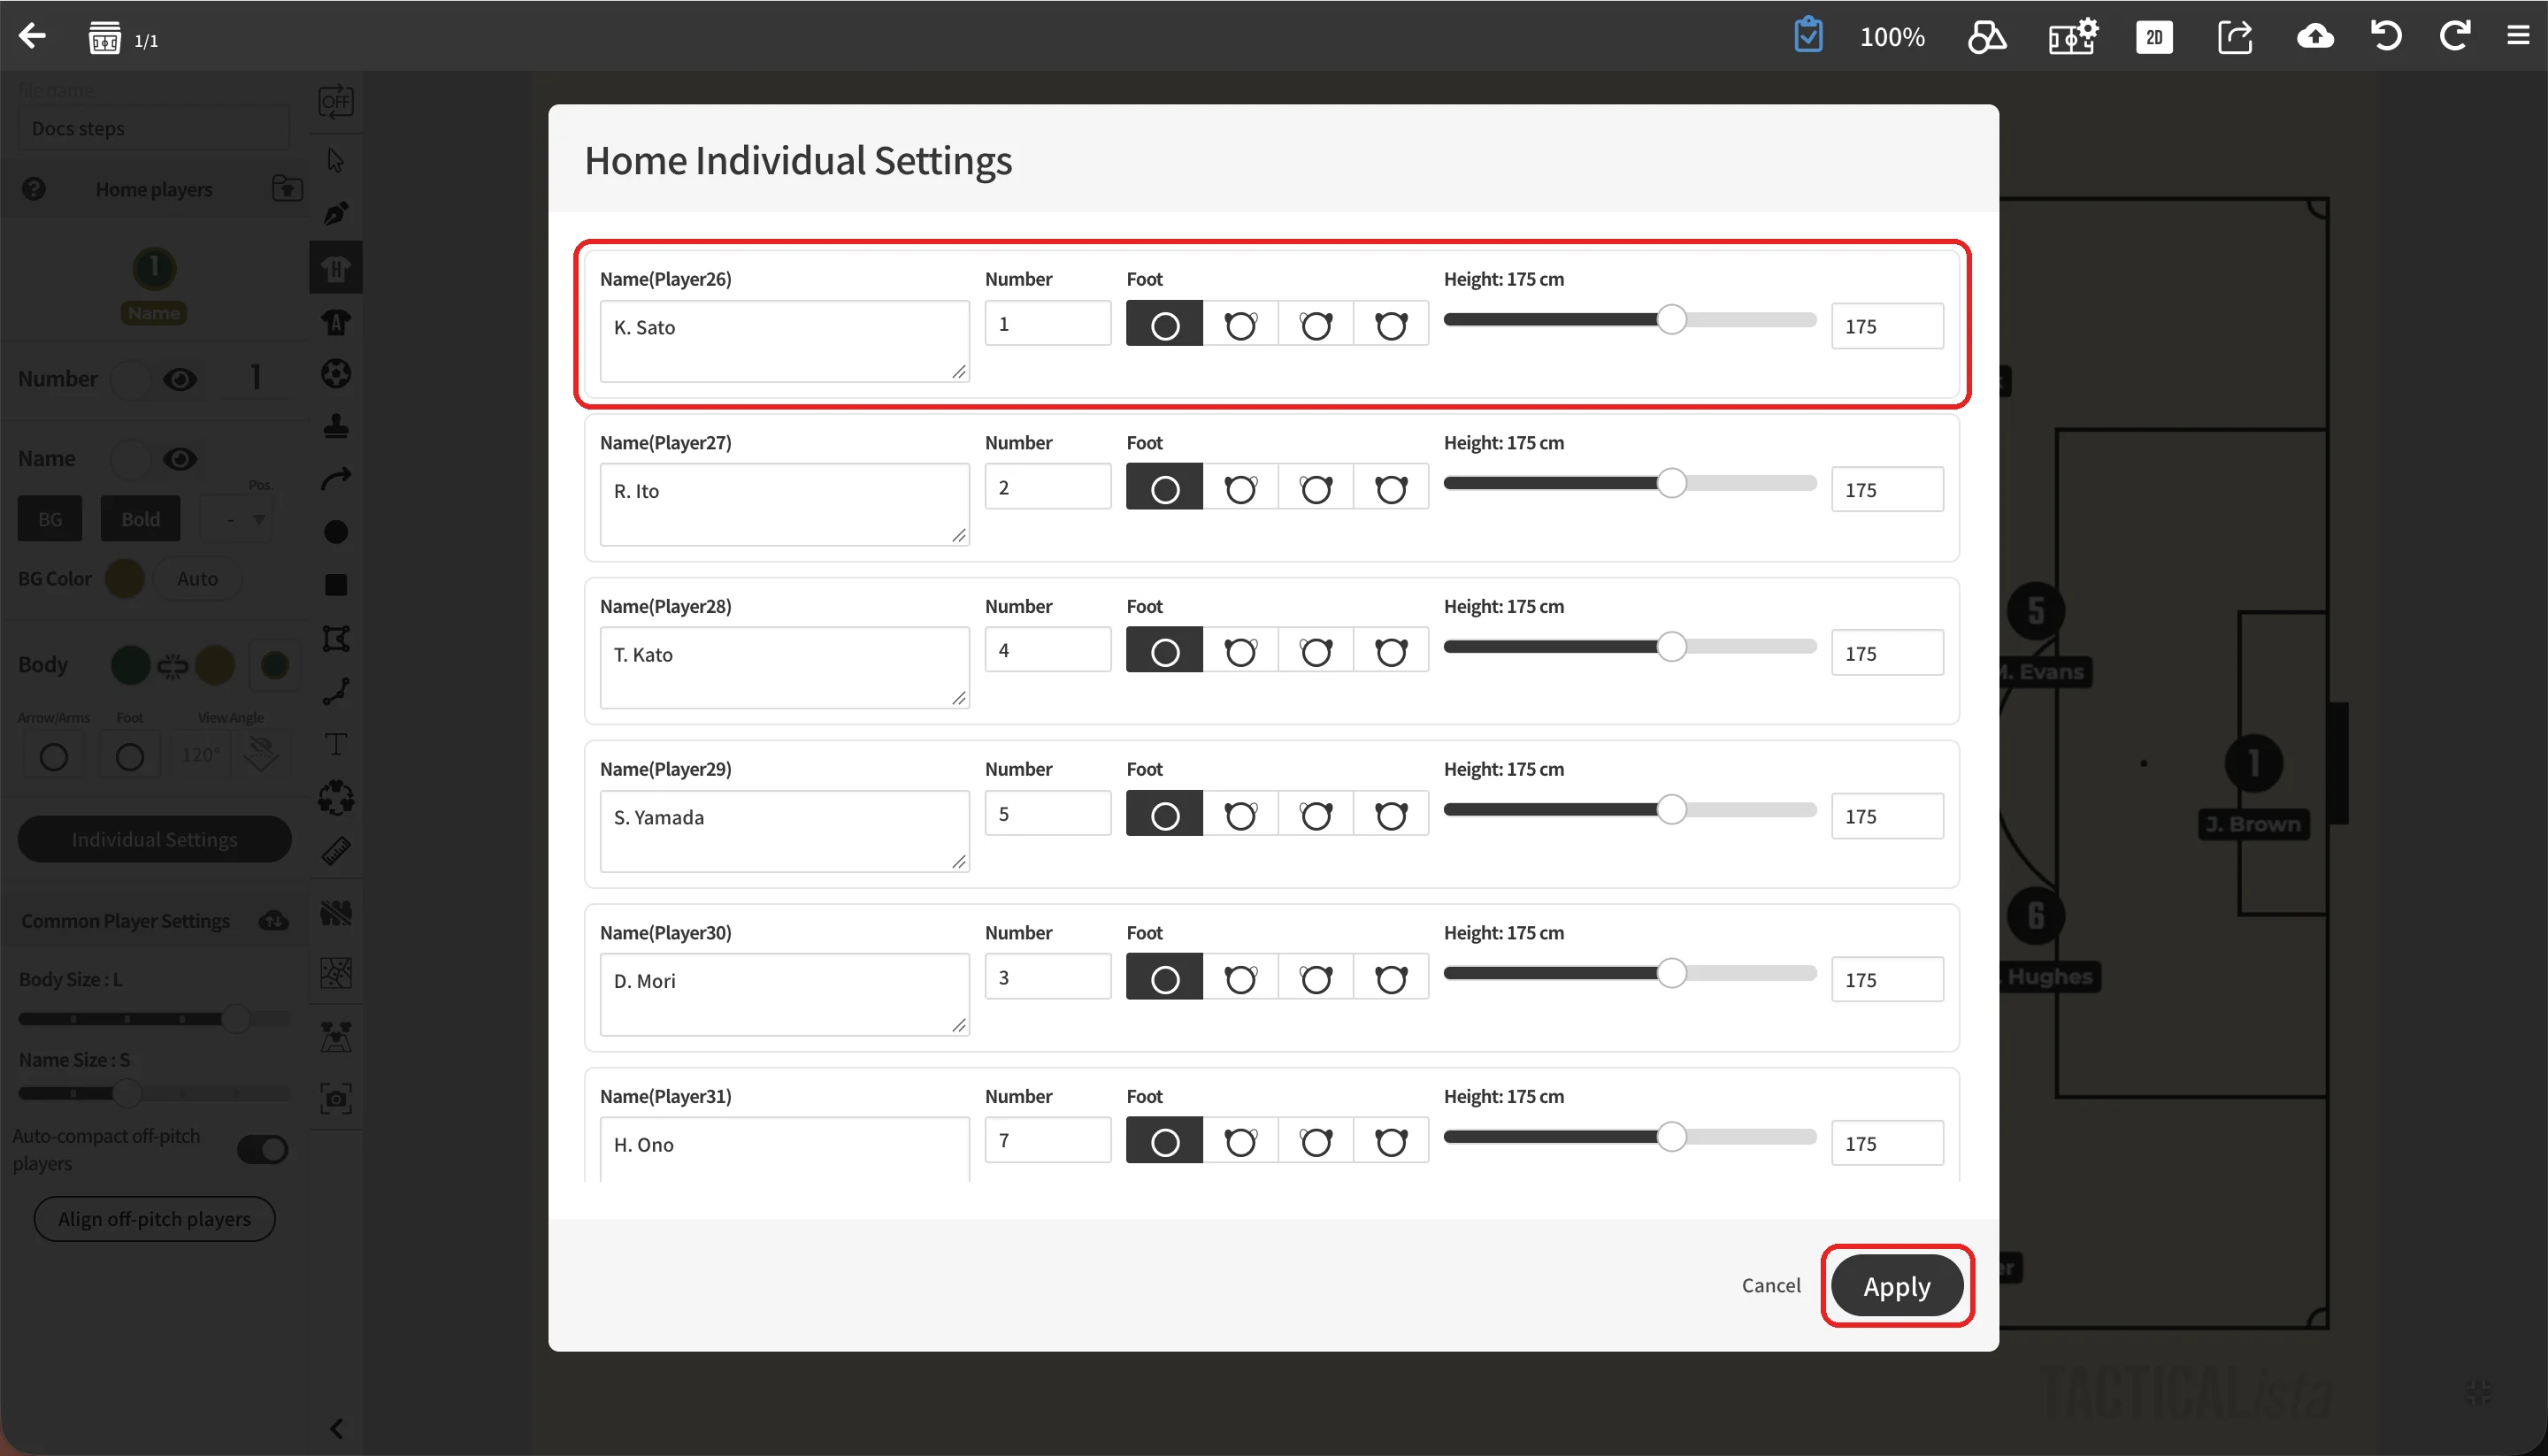
Closing with "Cancel" discards the changes.
Editing everything for one player
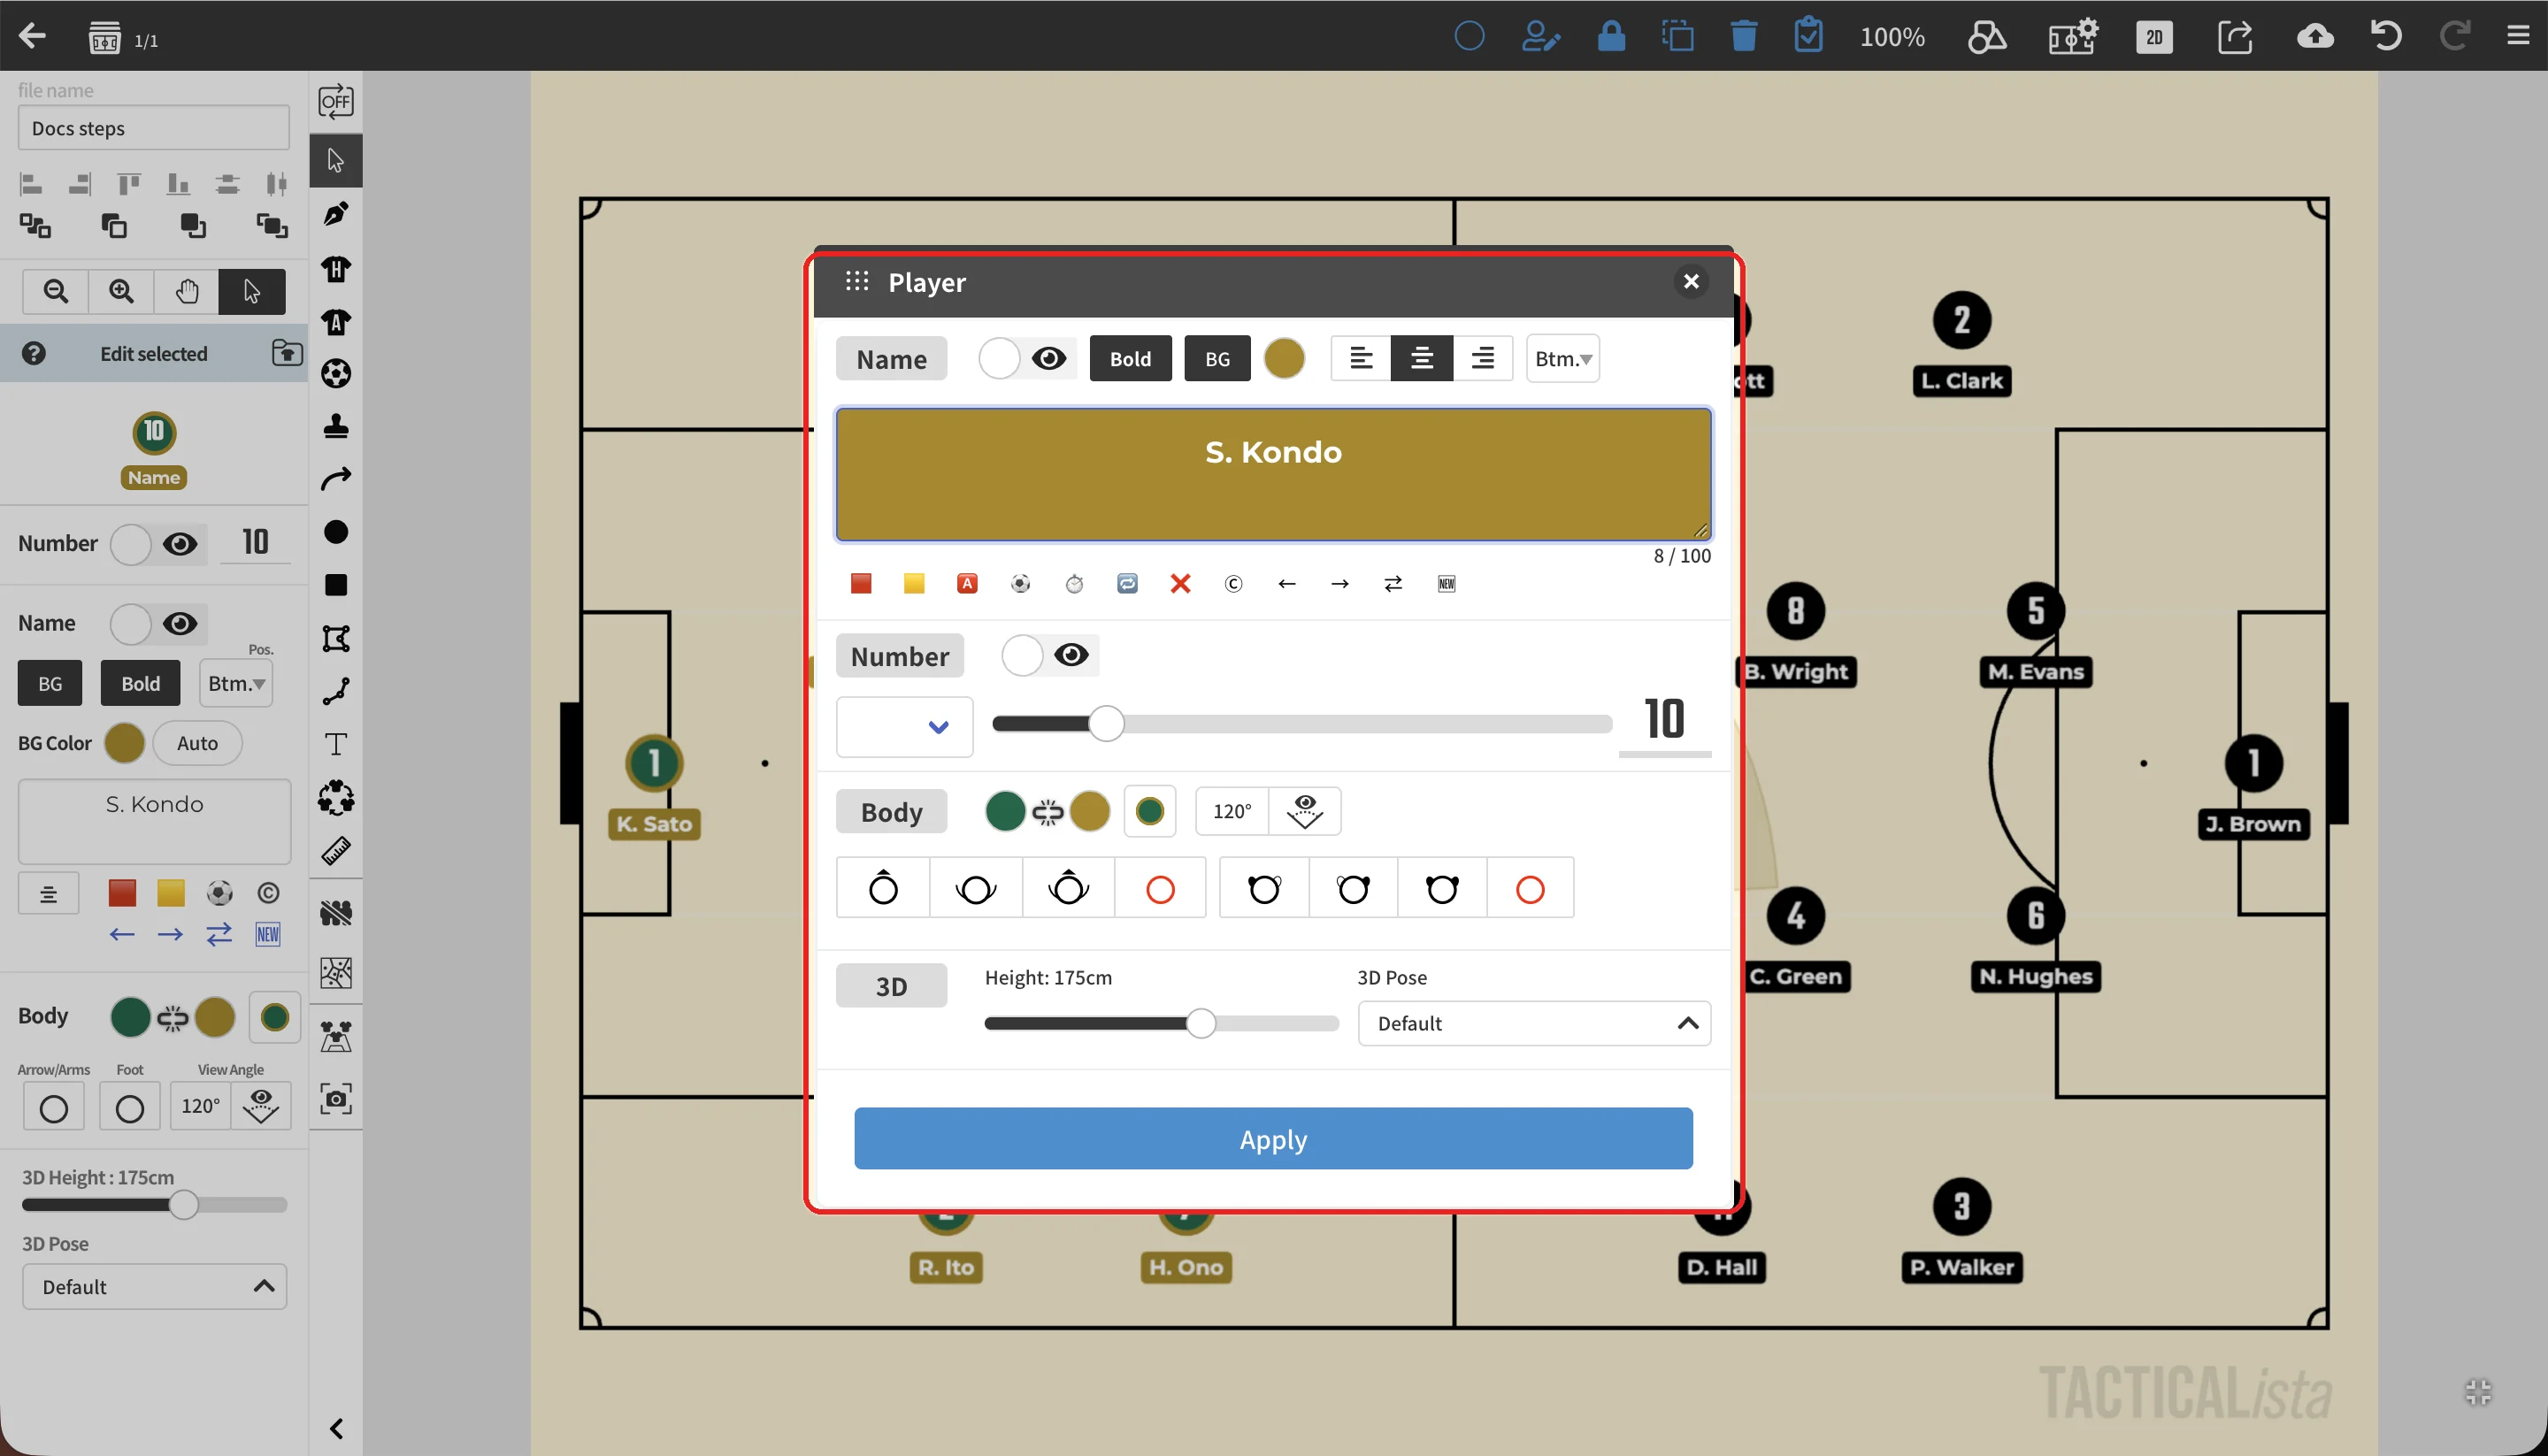
You can also open it with "Edit player" in the context menu or in the header. With several players selected, only settings they can share, such as colors and visibility toggles, are shown.
Showing direction
Use "Arrow/Arms" and "Foot" in the panel to choose how a player's direction is shown. You can set them for every home (or away) player at once, or only for the selected players.
| Item | Options |
|---|---|
| Arrow/Arms | Arrow, Arms, Arrow and arms, None |
| Foot | Left, Right, Both, None |
Players showing any of these can be turned with the handle (a red dot) when selected.
Arrow
Arms
To show the arrow as well, choose .
Foot
Choosing fills in both feet. You can also enter the preferred foot for the whole team in Individual Settings.
Turning players
Players showing an arrow, arms, foot, or view angle get a rotation handle (a red dot) when selected. Drag the handle to turn the player.
Making players face the ball
Select the ball and press in the header. The players turn to face the ball.
Showing the view angle
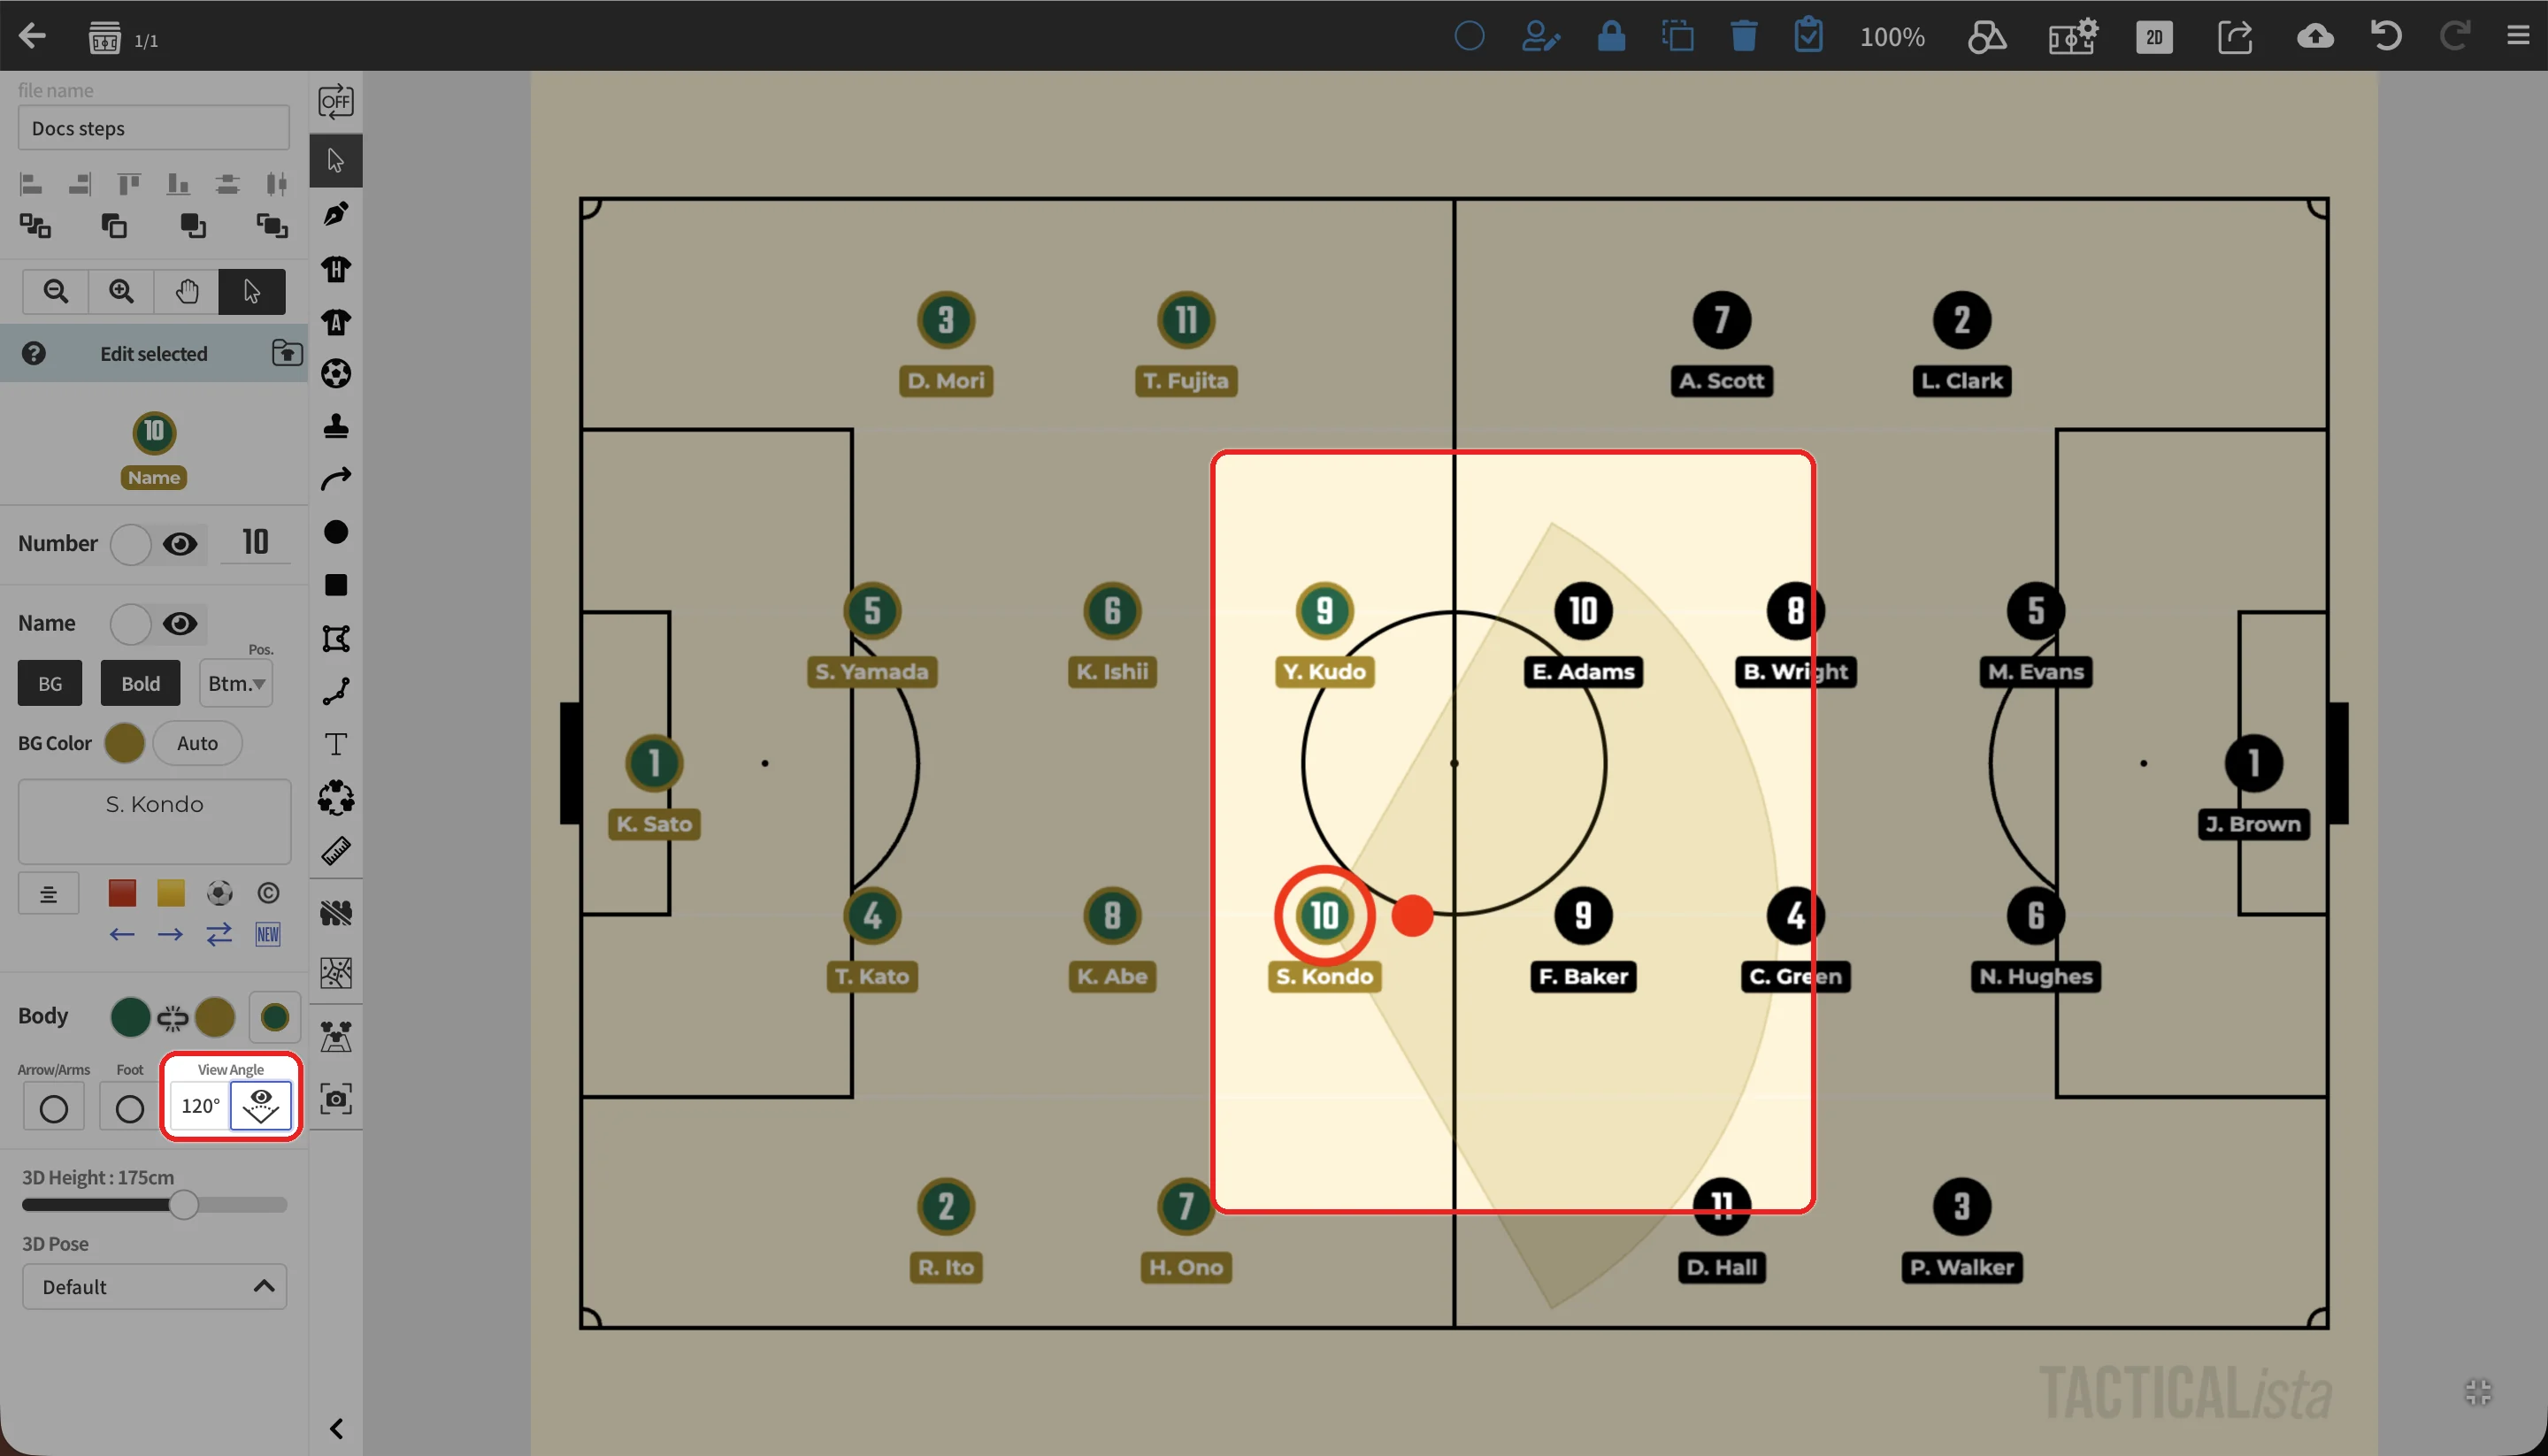
- The angle can be set from 15° to 220°.
- The view angle follows the player's direction. When you turn the player or move it in an animation, the cone moves with it.
- With several players selected, the same visibility and angle apply to all of them.
- On animation boards, visibility and angle can change from frame to frame.
- The same view angle is shown in the 3D view. → 3D Player
Related pages
- Basics of Objects
- 3D Player: model and piece display, poses, and height
- Batch Formation Placement, Team Manager, Importing Match Data, Importing Players from a Photo: ways to place players with names and numbers