
Basics of Objects
Tacticalista has player, ball, marker, line, oval, rectangle, polygon, polyline, text, and handwriting objects. Every object is placed by choosing it in the toolbar on the left and then placing it on the field.
Adding an object
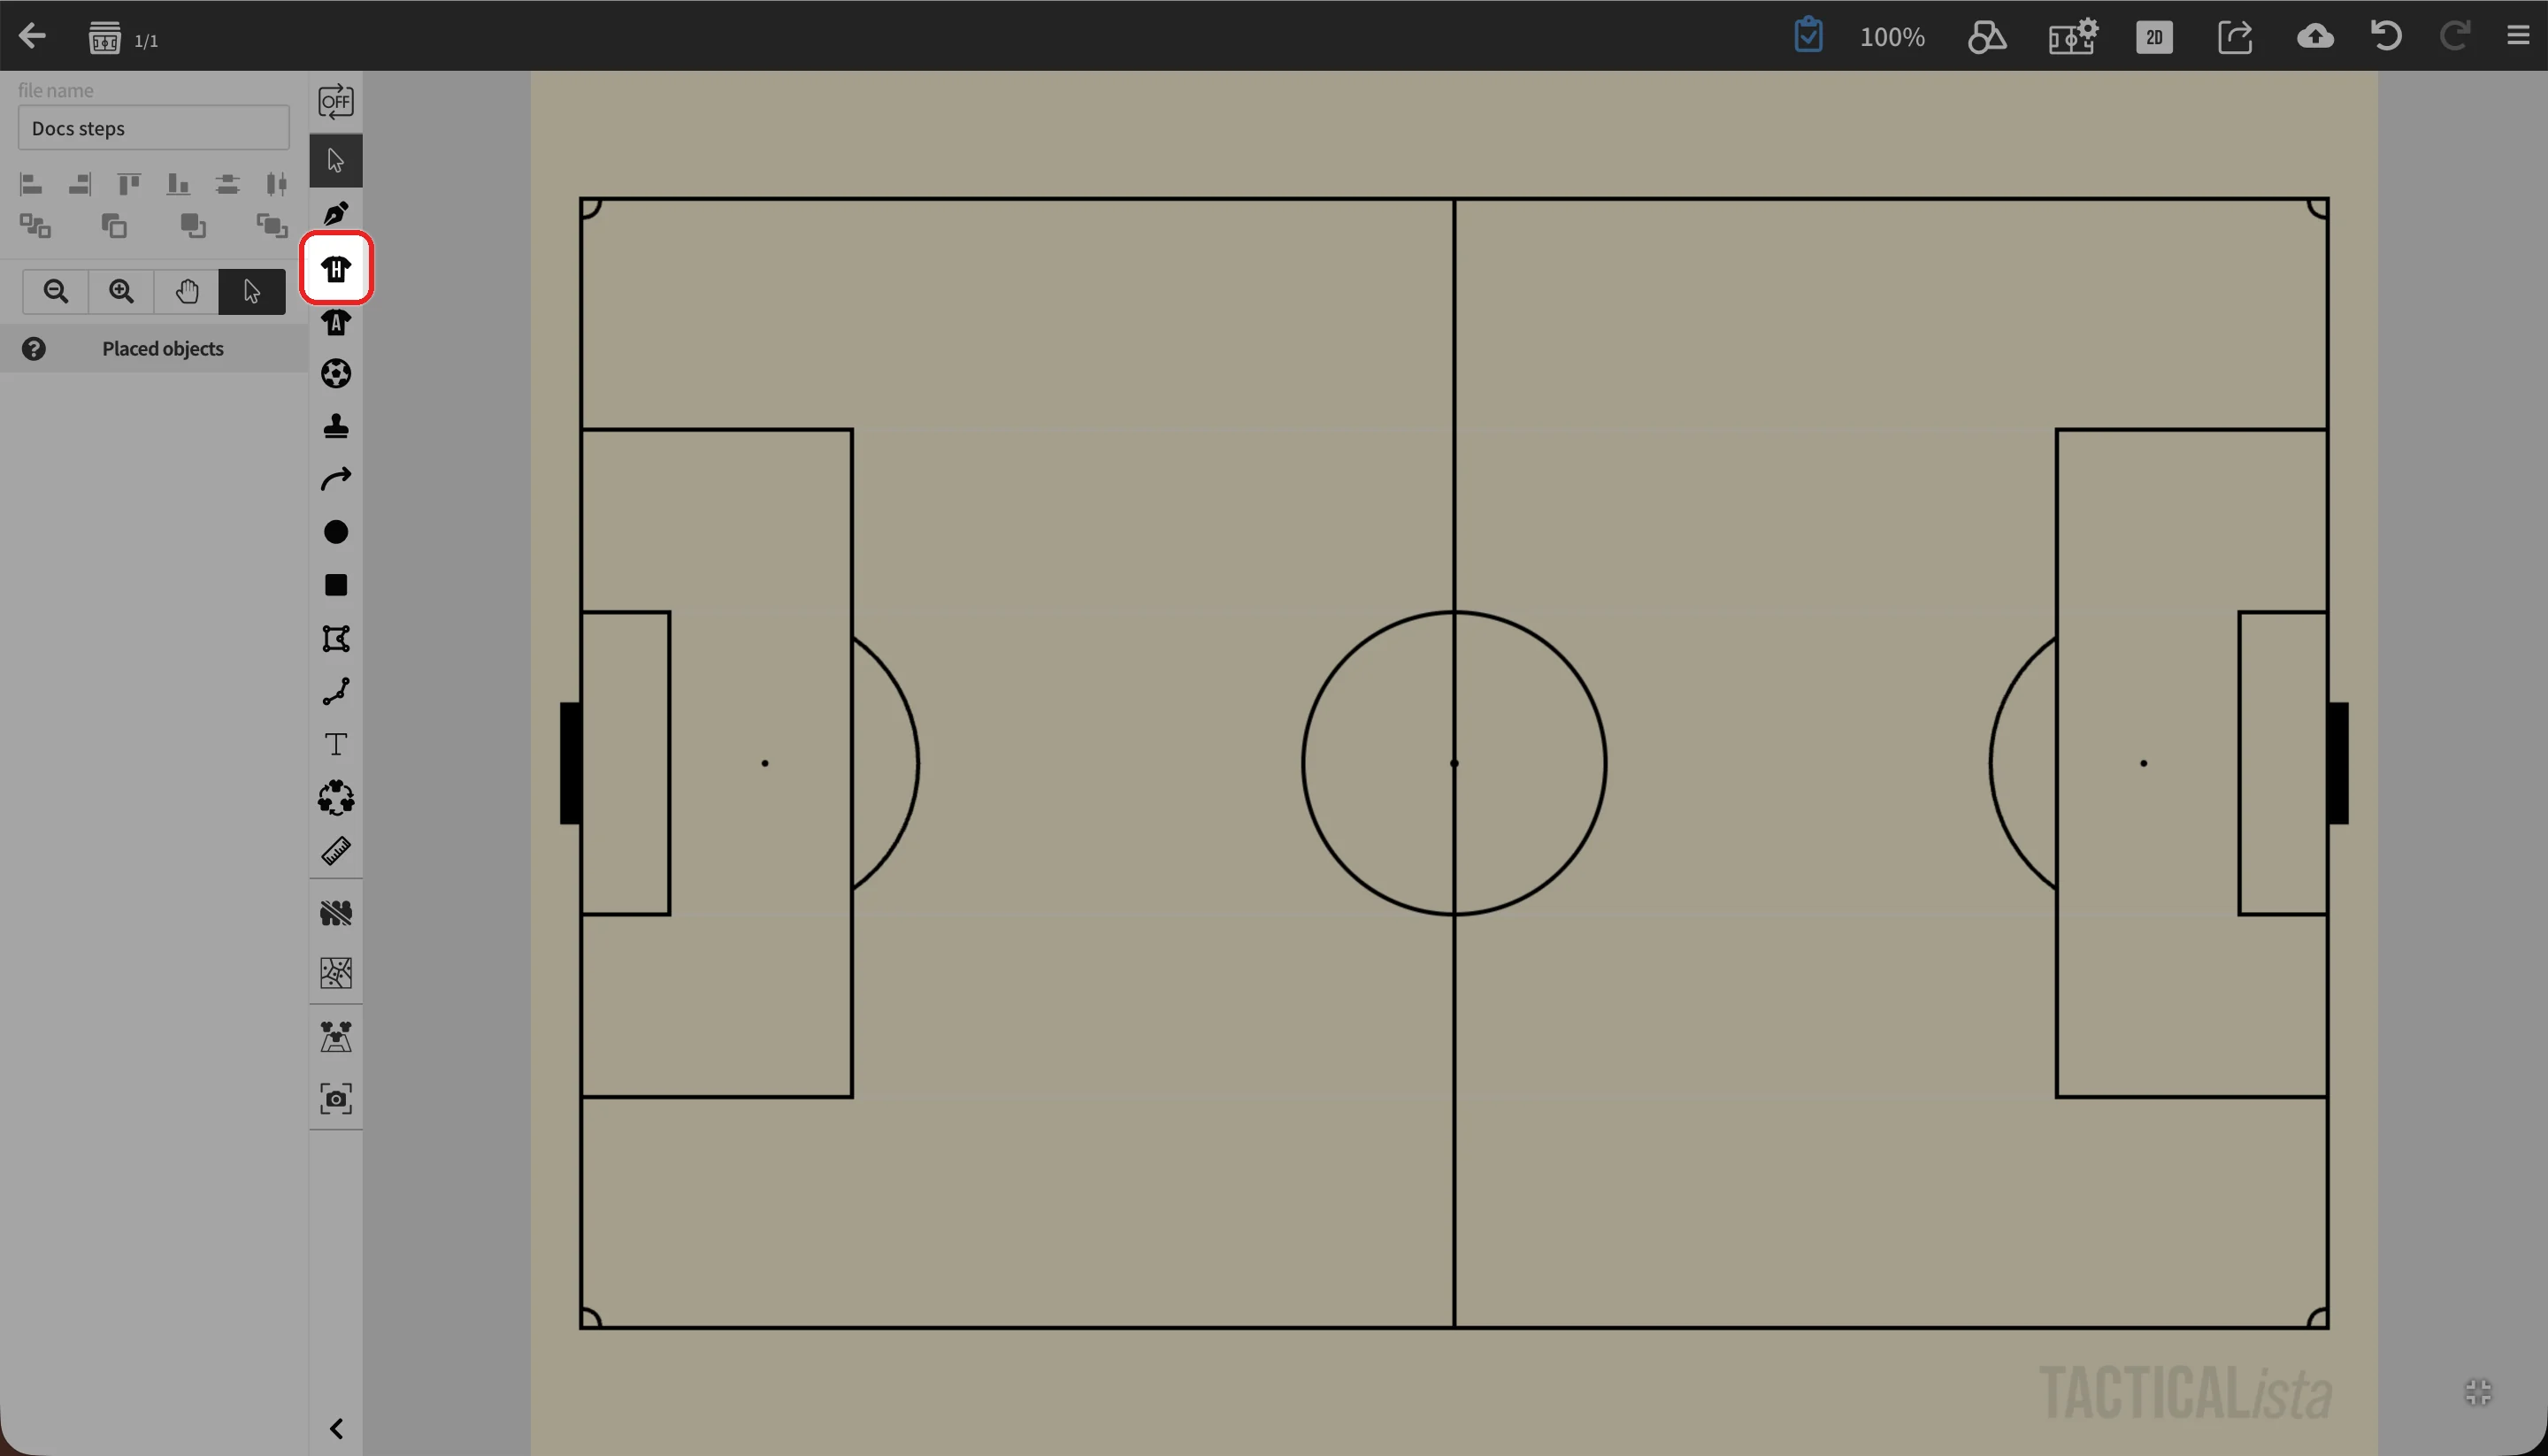
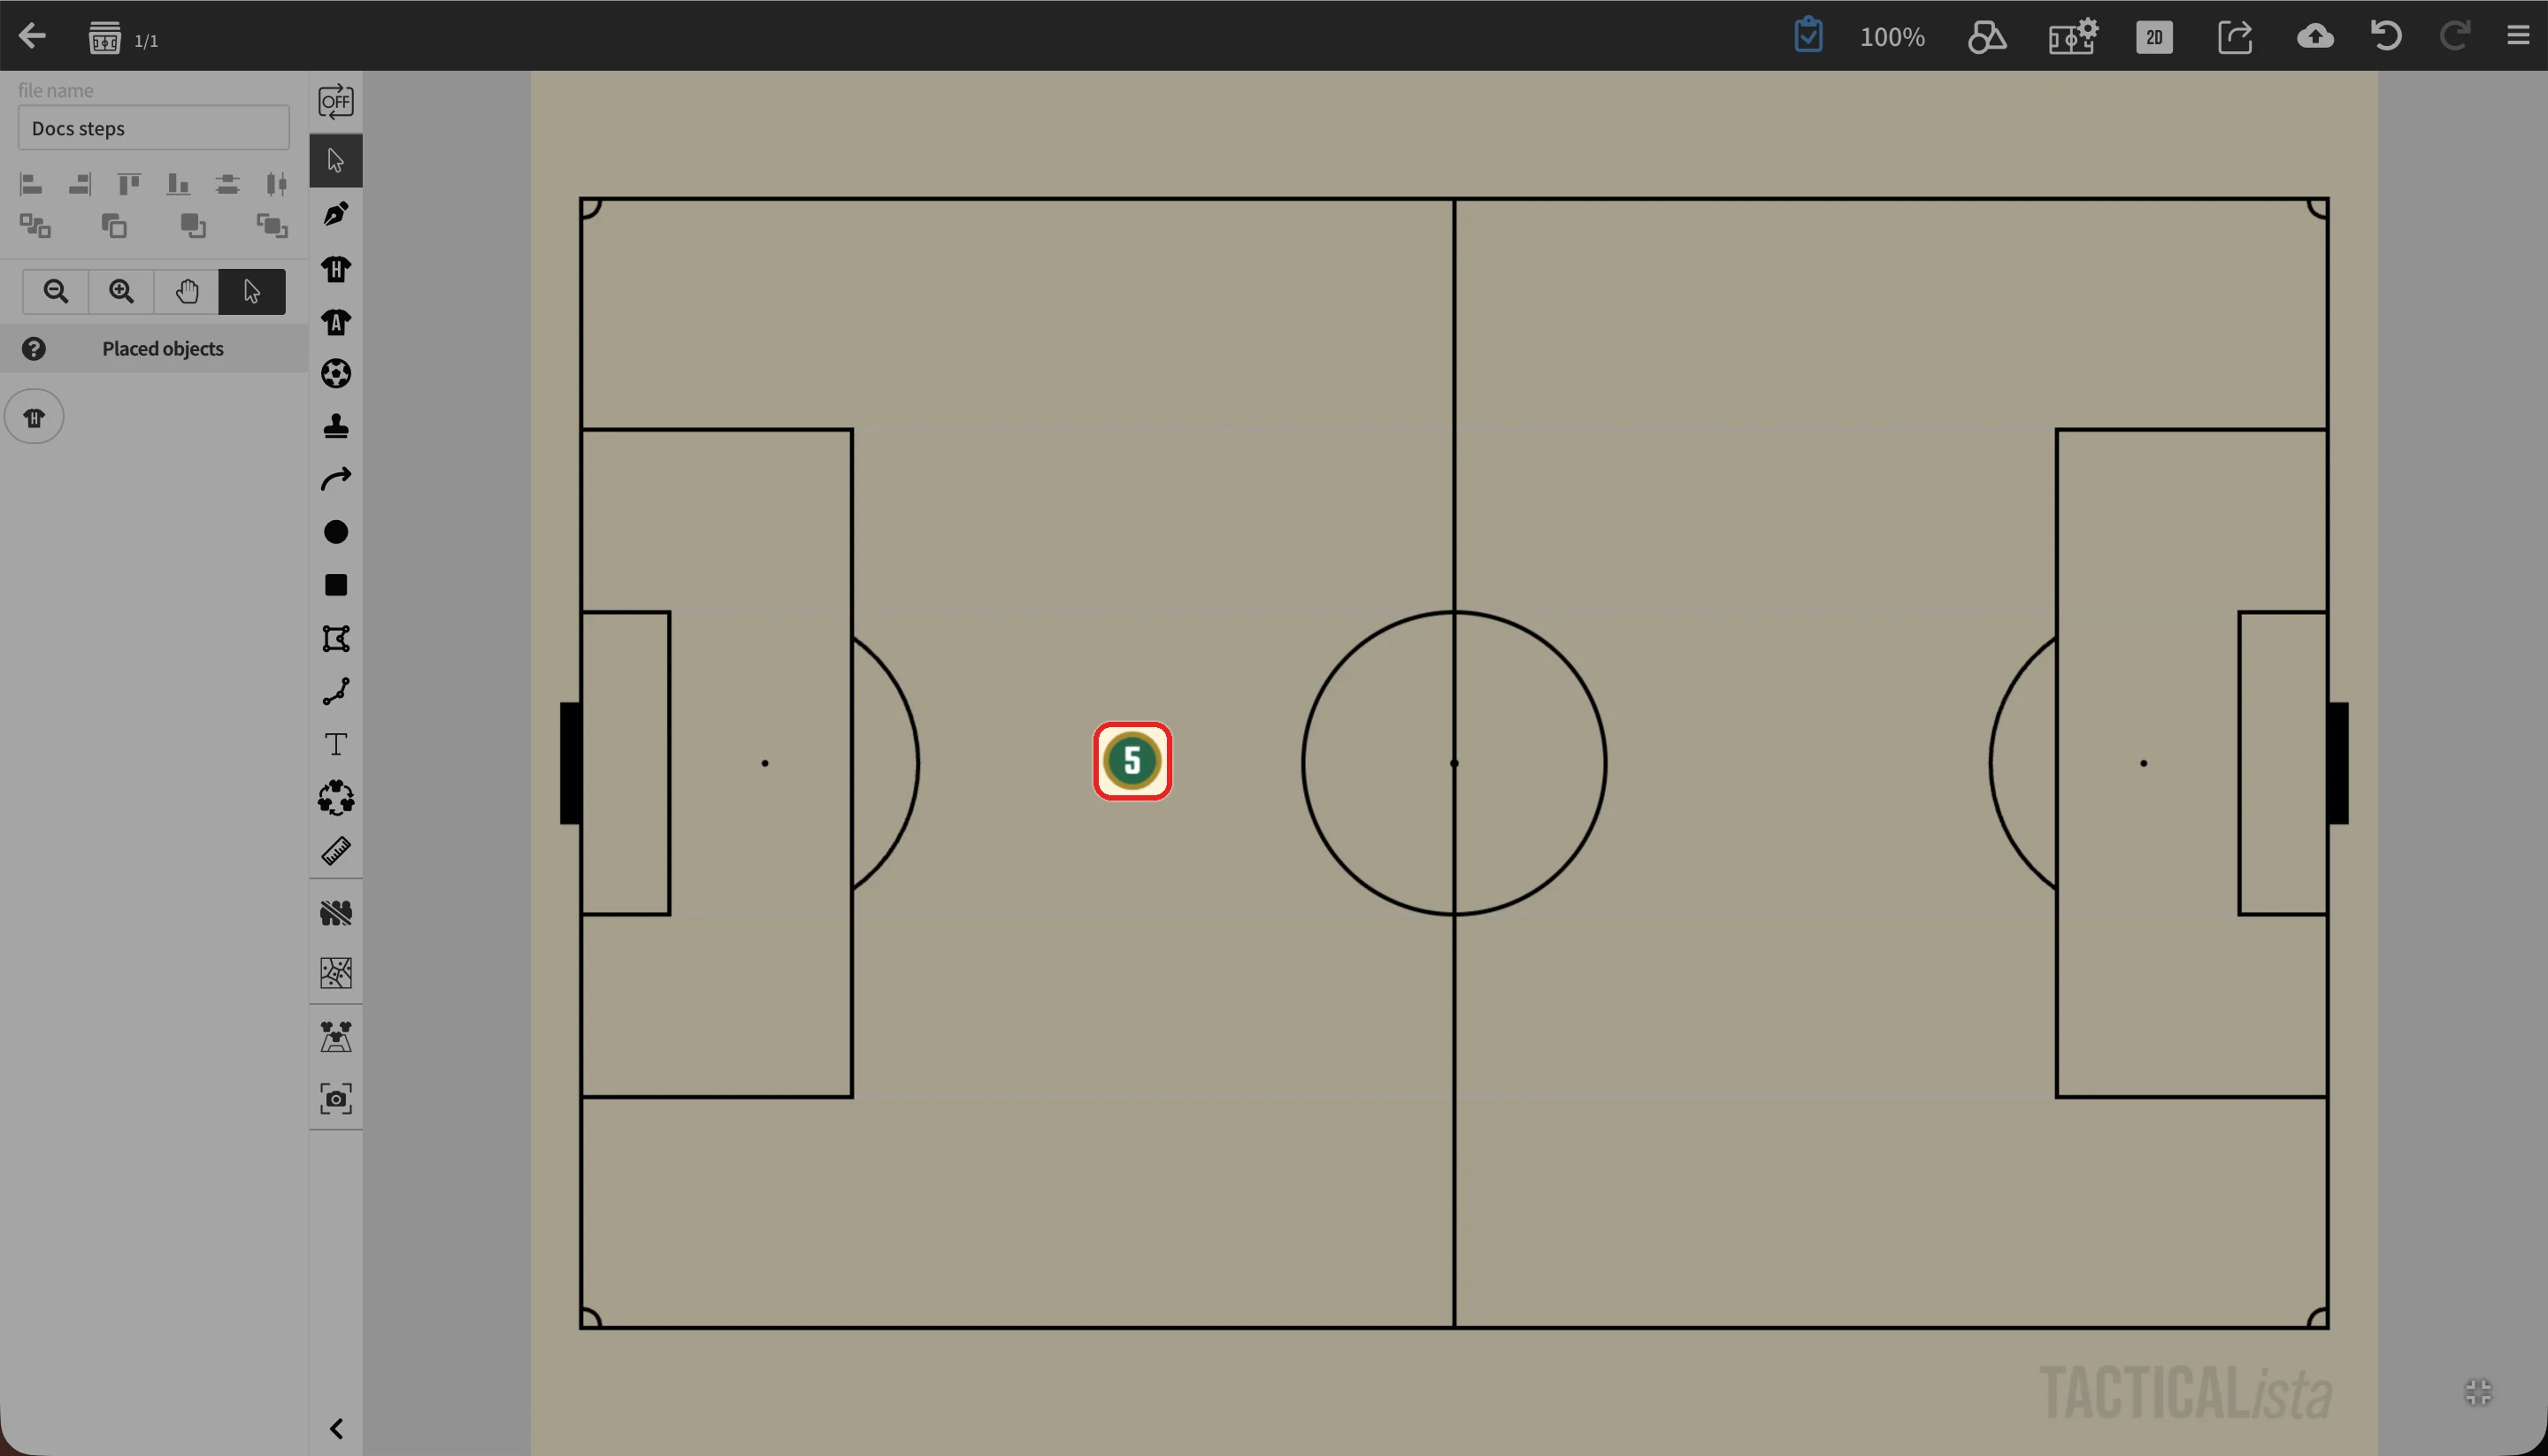
- Lines, ovals, rectangles, polygons, and polylines can be sized by dragging on the field.
- On desktop, the cursor shows the object's icon while an add tool is selected.
Placing the same object repeatedly
Press at the top of the toolbar to turn on repeat placement . The tool then stays on the same object so you can keep placing it. Press it again to turn it off.
Number of objects
- Starter plan: You can place up to 30 objects (15 on futsal boards and 22 on 8-a-side boards). When you reach the limit, "The maximum number of objects that can be placed has been reached." appears.
- Basic plan: You can place objects up to the limit determined by the project's file size.
Deleting an object
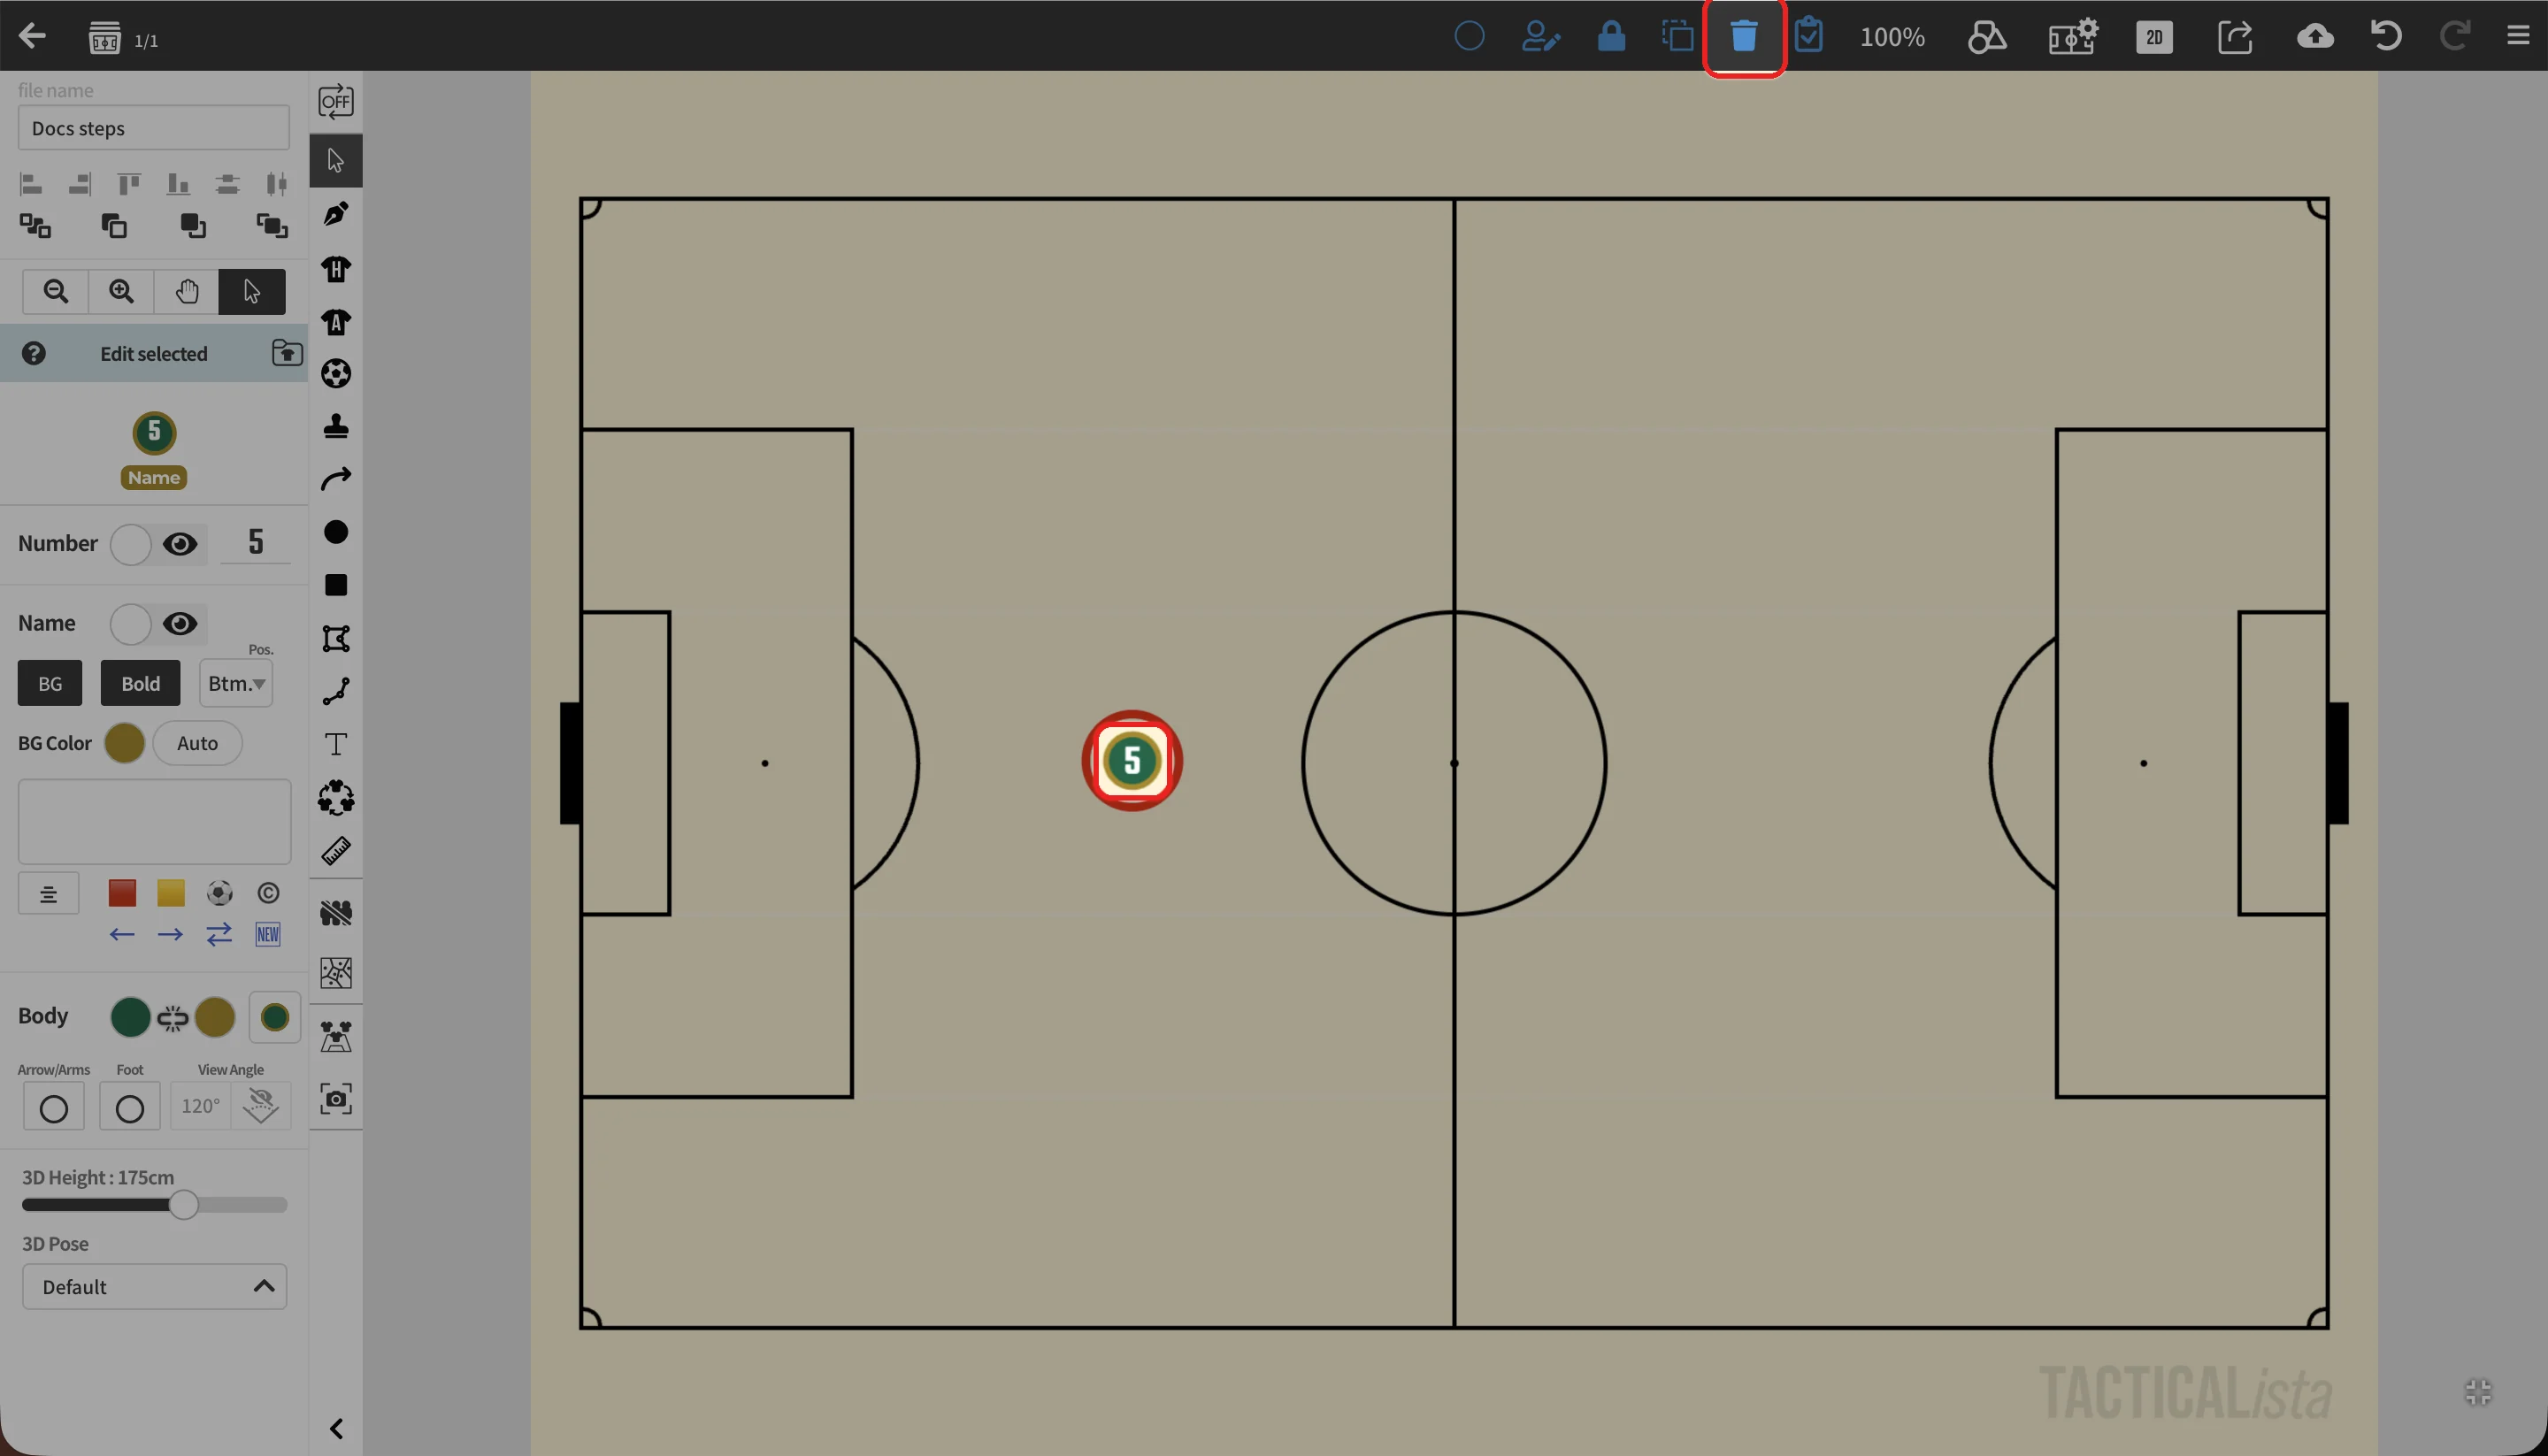
On desktop, you can also press Backspace or Delete after selecting it.
Selecting multiple objects
- Hold Shift and click objects to add them to the selection. On smartphones and tablets without a keyboard, press on the screen first.
- With the select tool, the object-type buttons in the panel select all objects of that type at once.
Buttons for selected objects
When objects are selected, action buttons appear in the header.
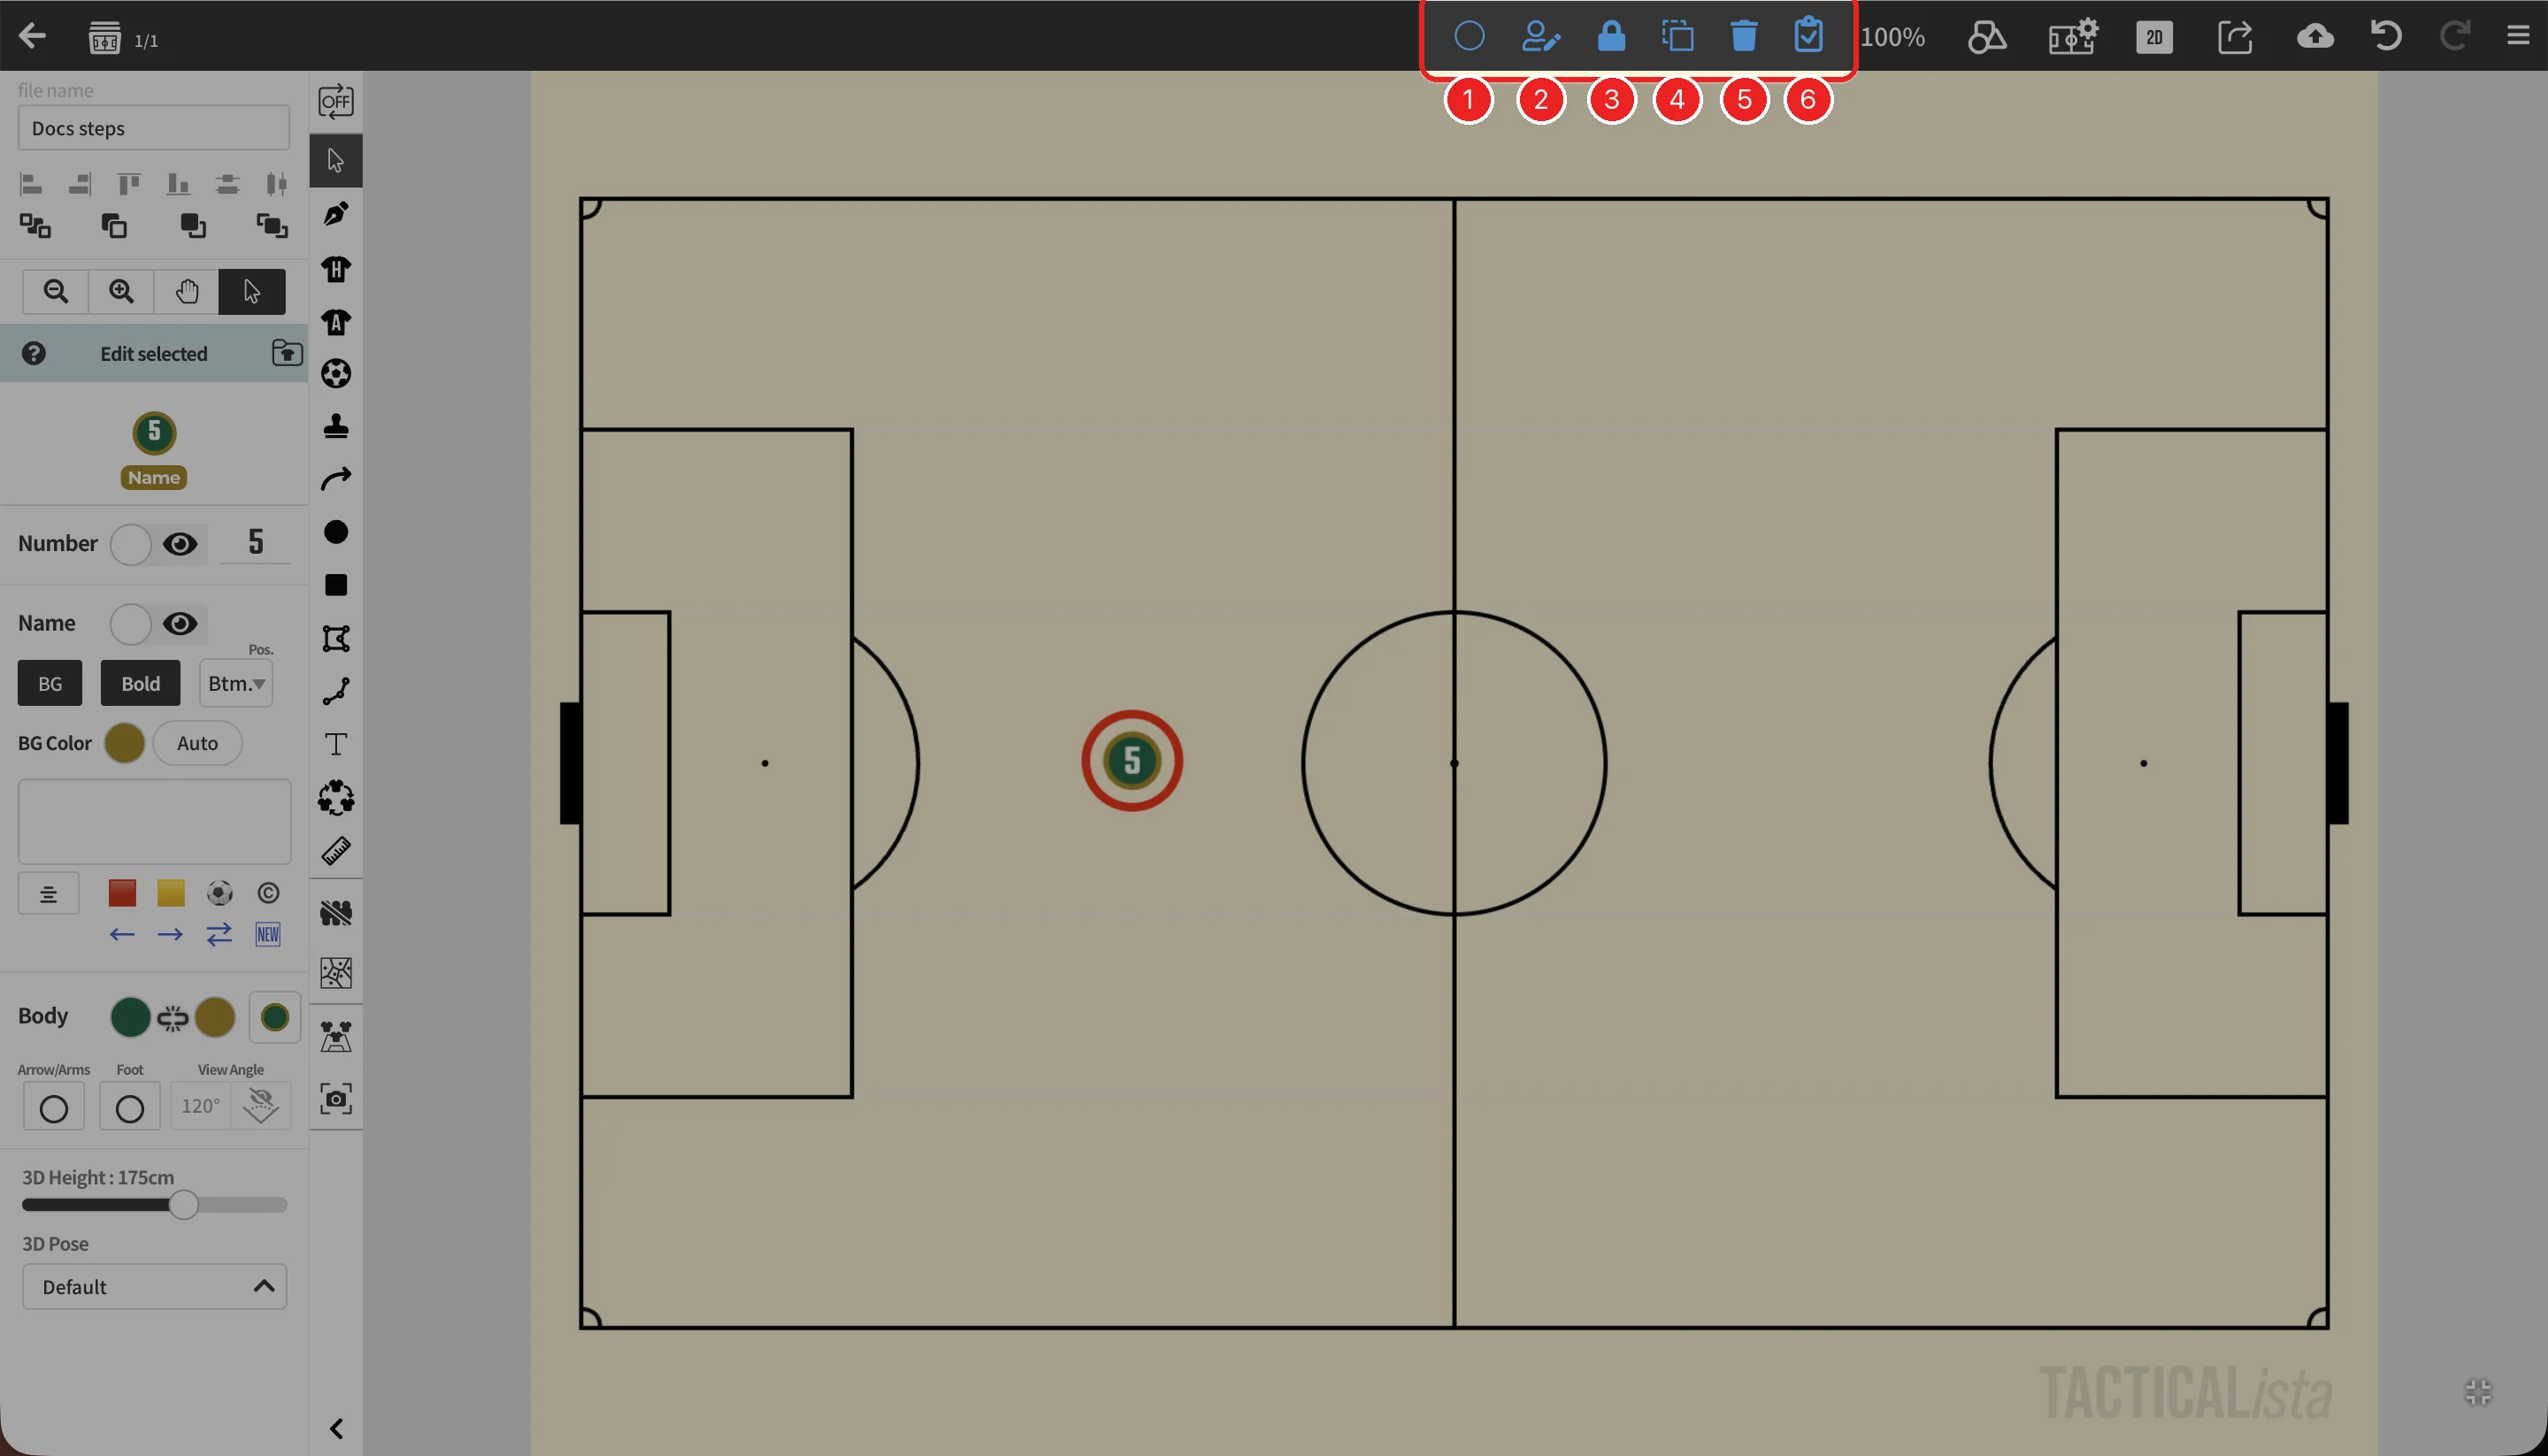
| No. | Button | Action |
|---|---|---|
| 1 | Places a circle behind each player (Ctrl+O). → Highlighting players with shapes | |
| 2 | Edits the name, number, and appearance together. → Editing everything for one player | |
| 3 | Locks the selected objects so they cannot be moved. | |
| 4 | Duplicates the selected objects (Ctrl/Cmd+D). | |
| 5 | Deletes the selected objects. | |
| 6 | Opens the copy, cut, and paste menu. → Copy, cut, and paste |
When several players are selected, buttons to surround them with a polygon, polyline, or rectangle also appear.
Changing the selection color
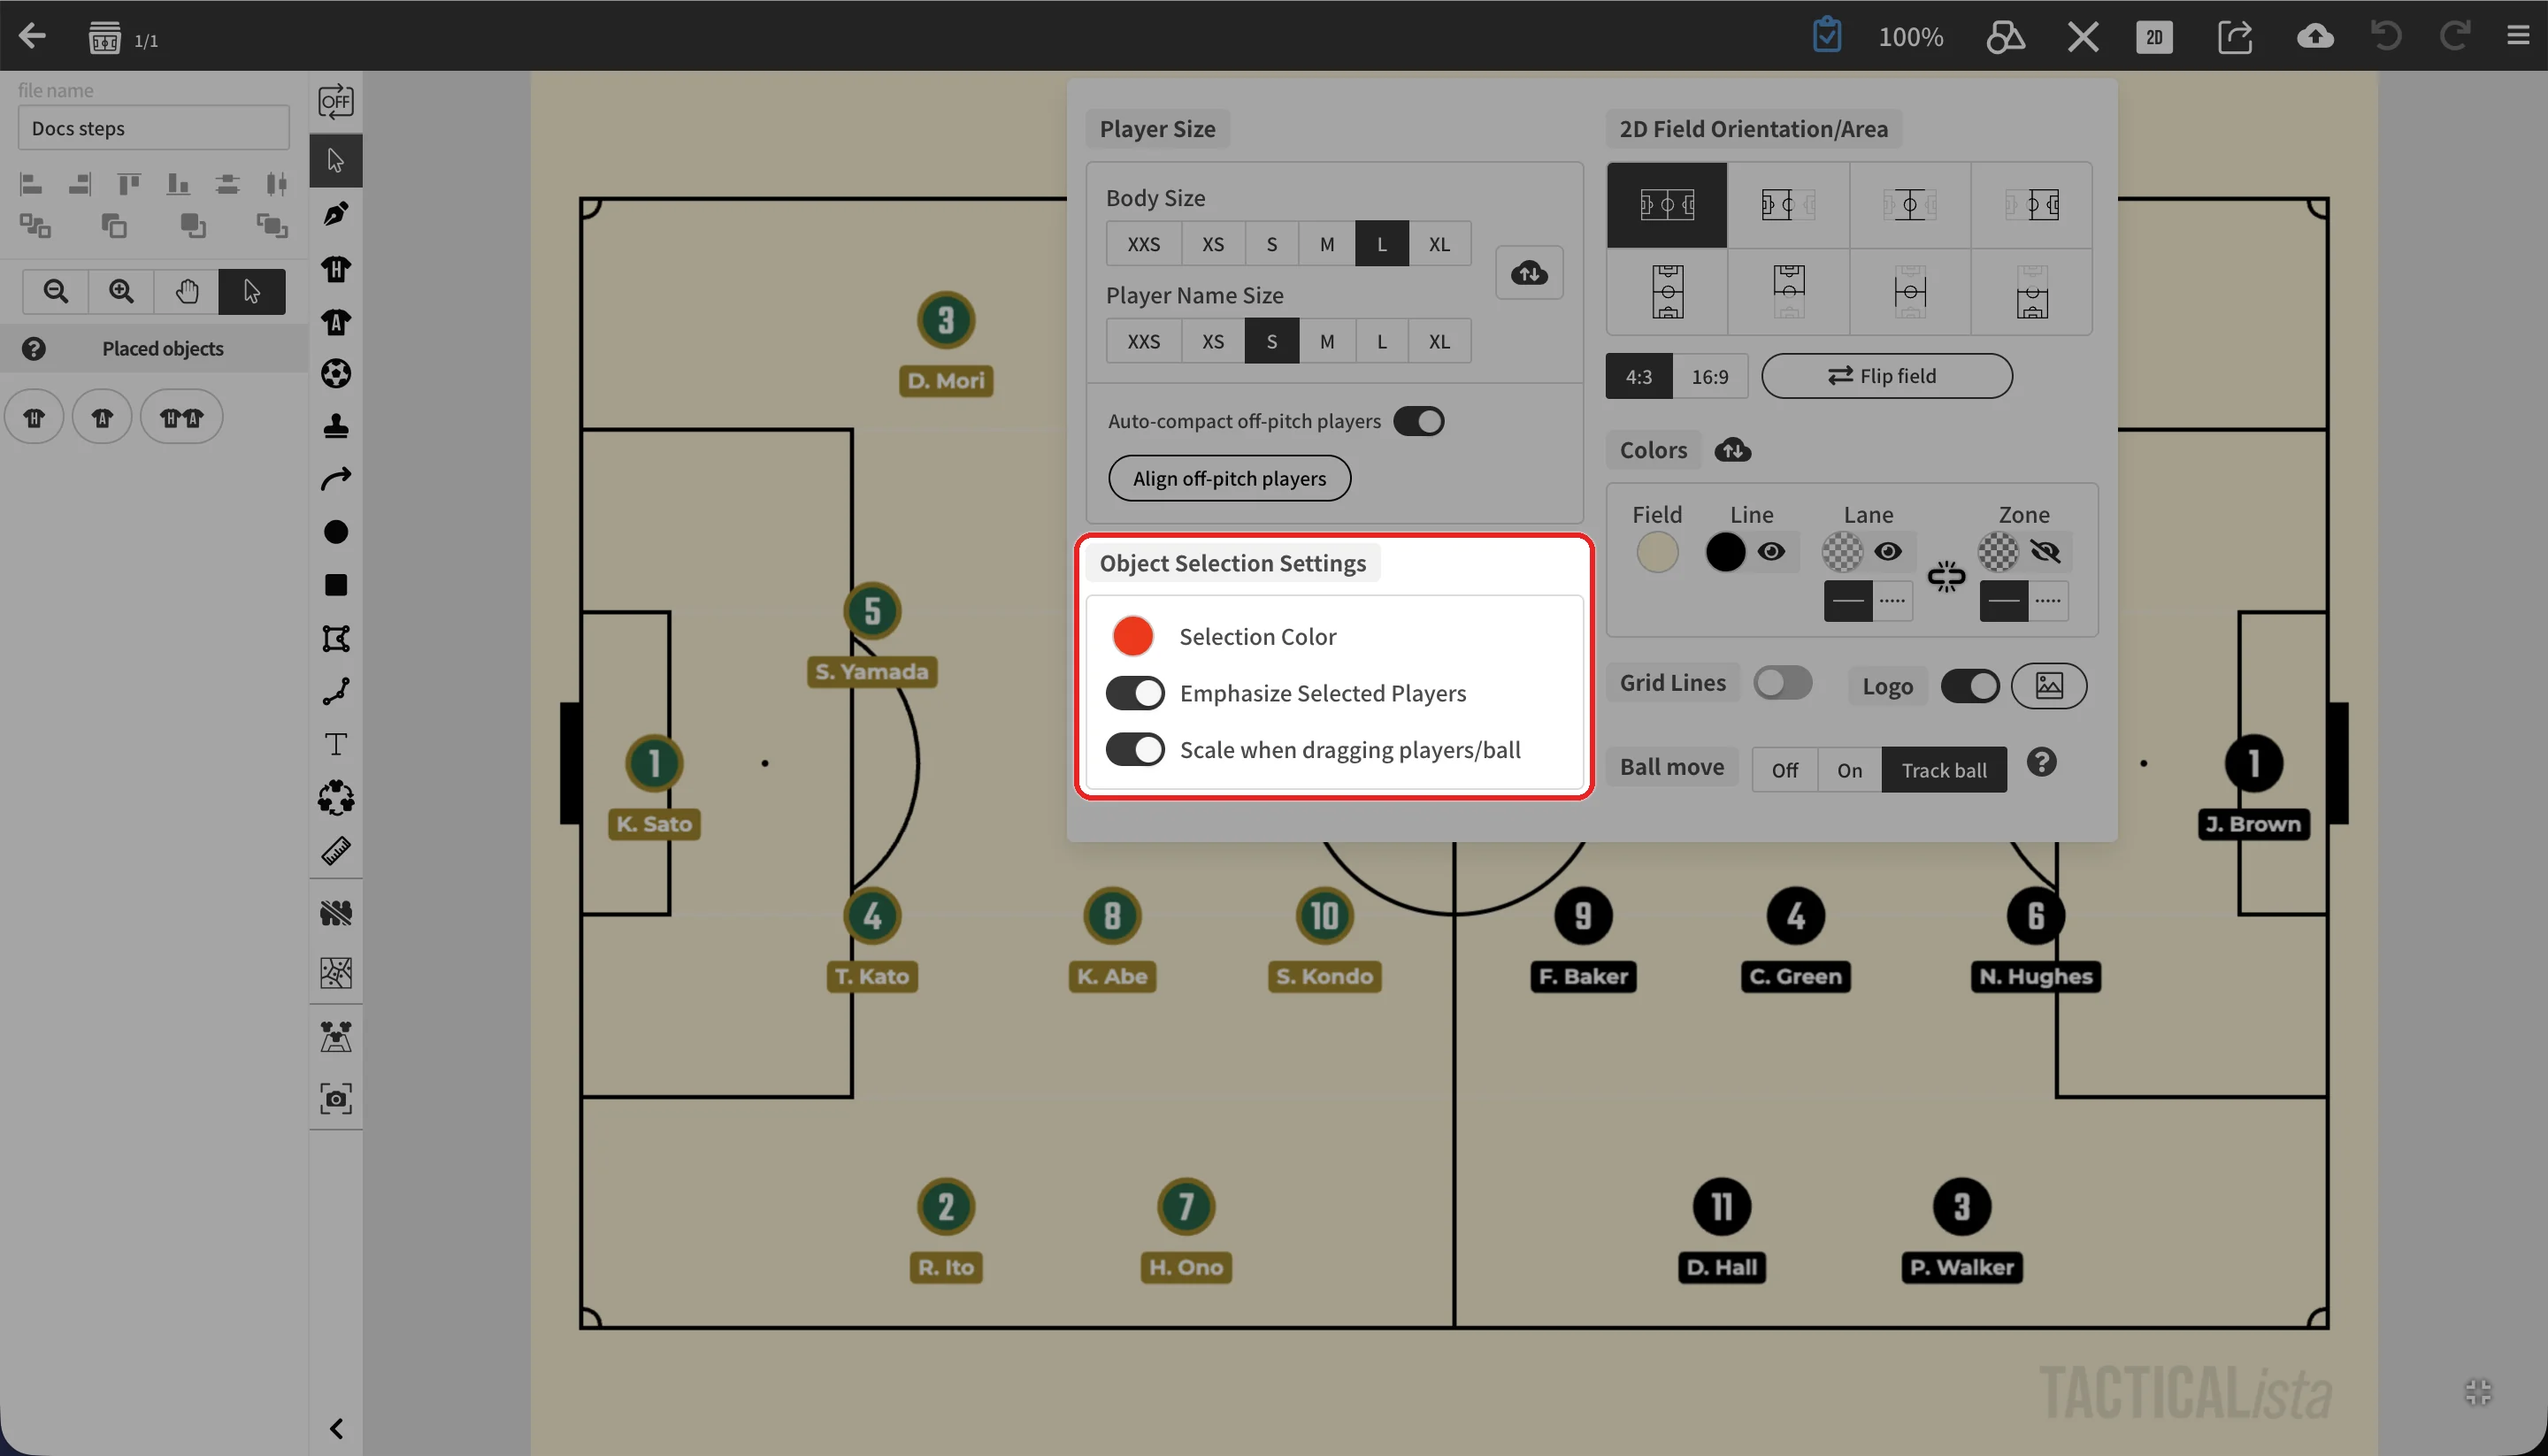
- Selection Color: Changes the color of the frame around selected objects.
- Emphasize Selected Players: Draws a thicker frame around selected players so they stand out.
- Scale when dragging players/ball: Shows players and the ball slightly larger while you drag them.
See Field Settings for how to open the Field Settings panel.
Aligning objects
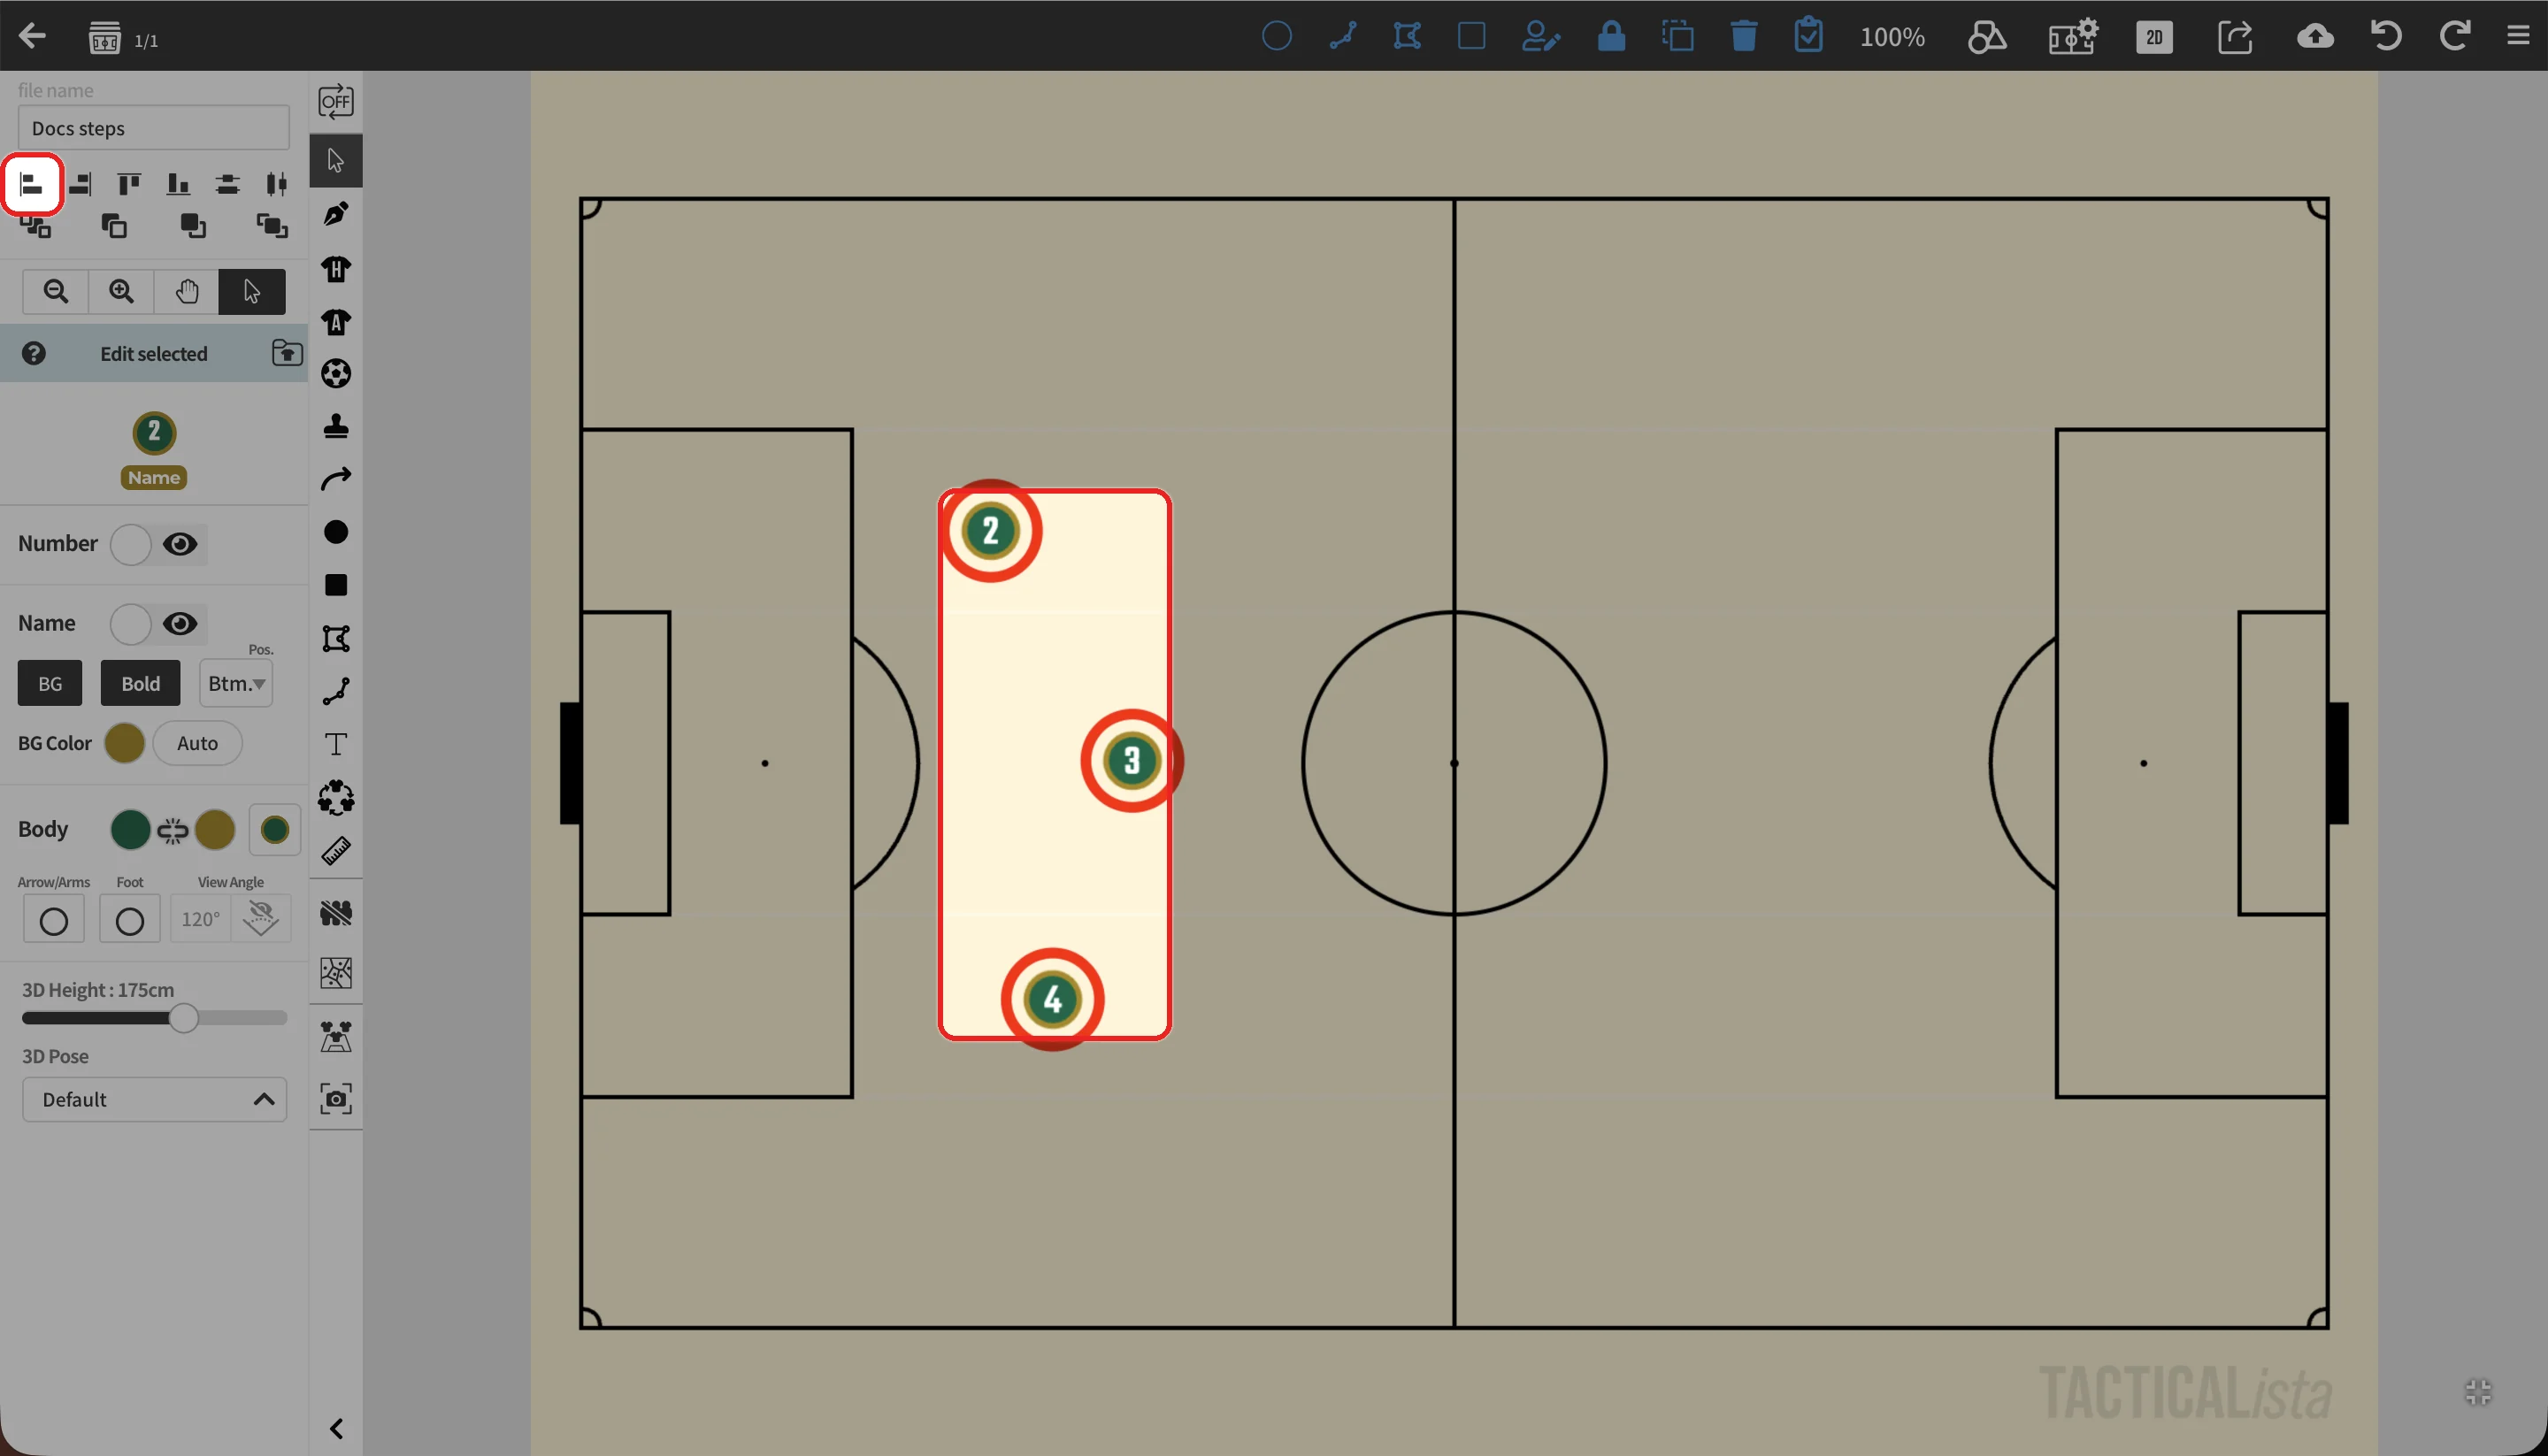
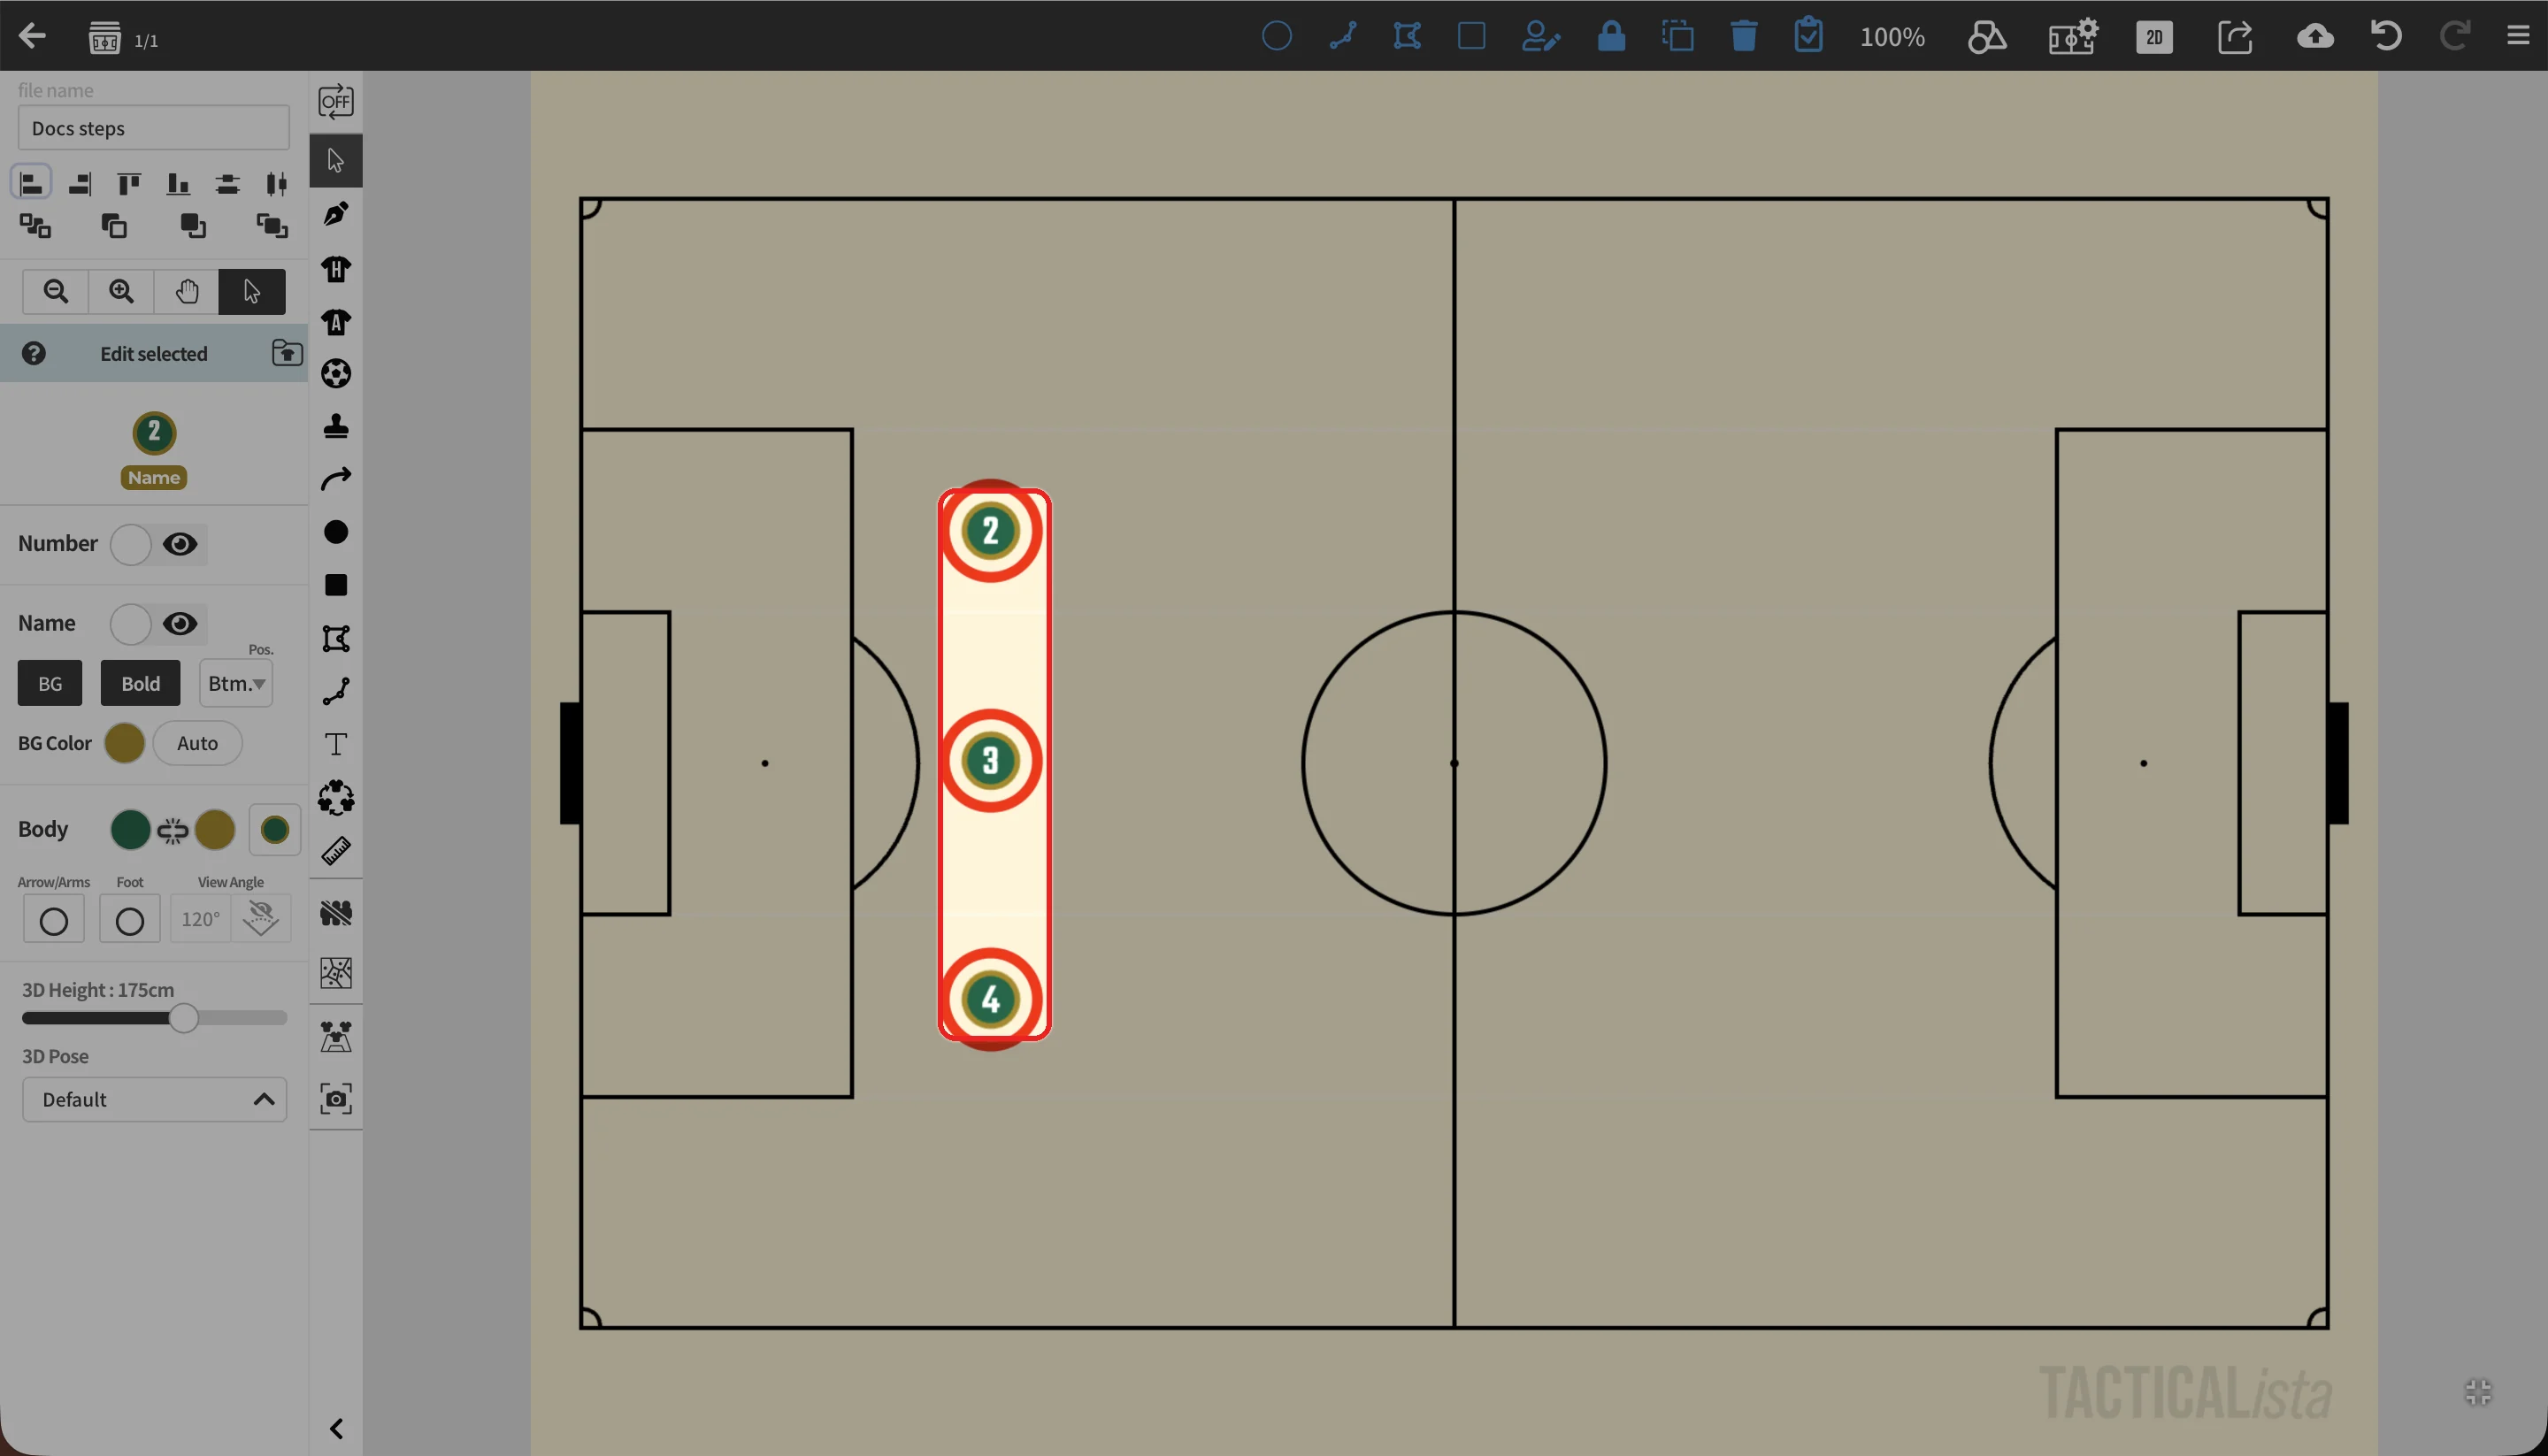
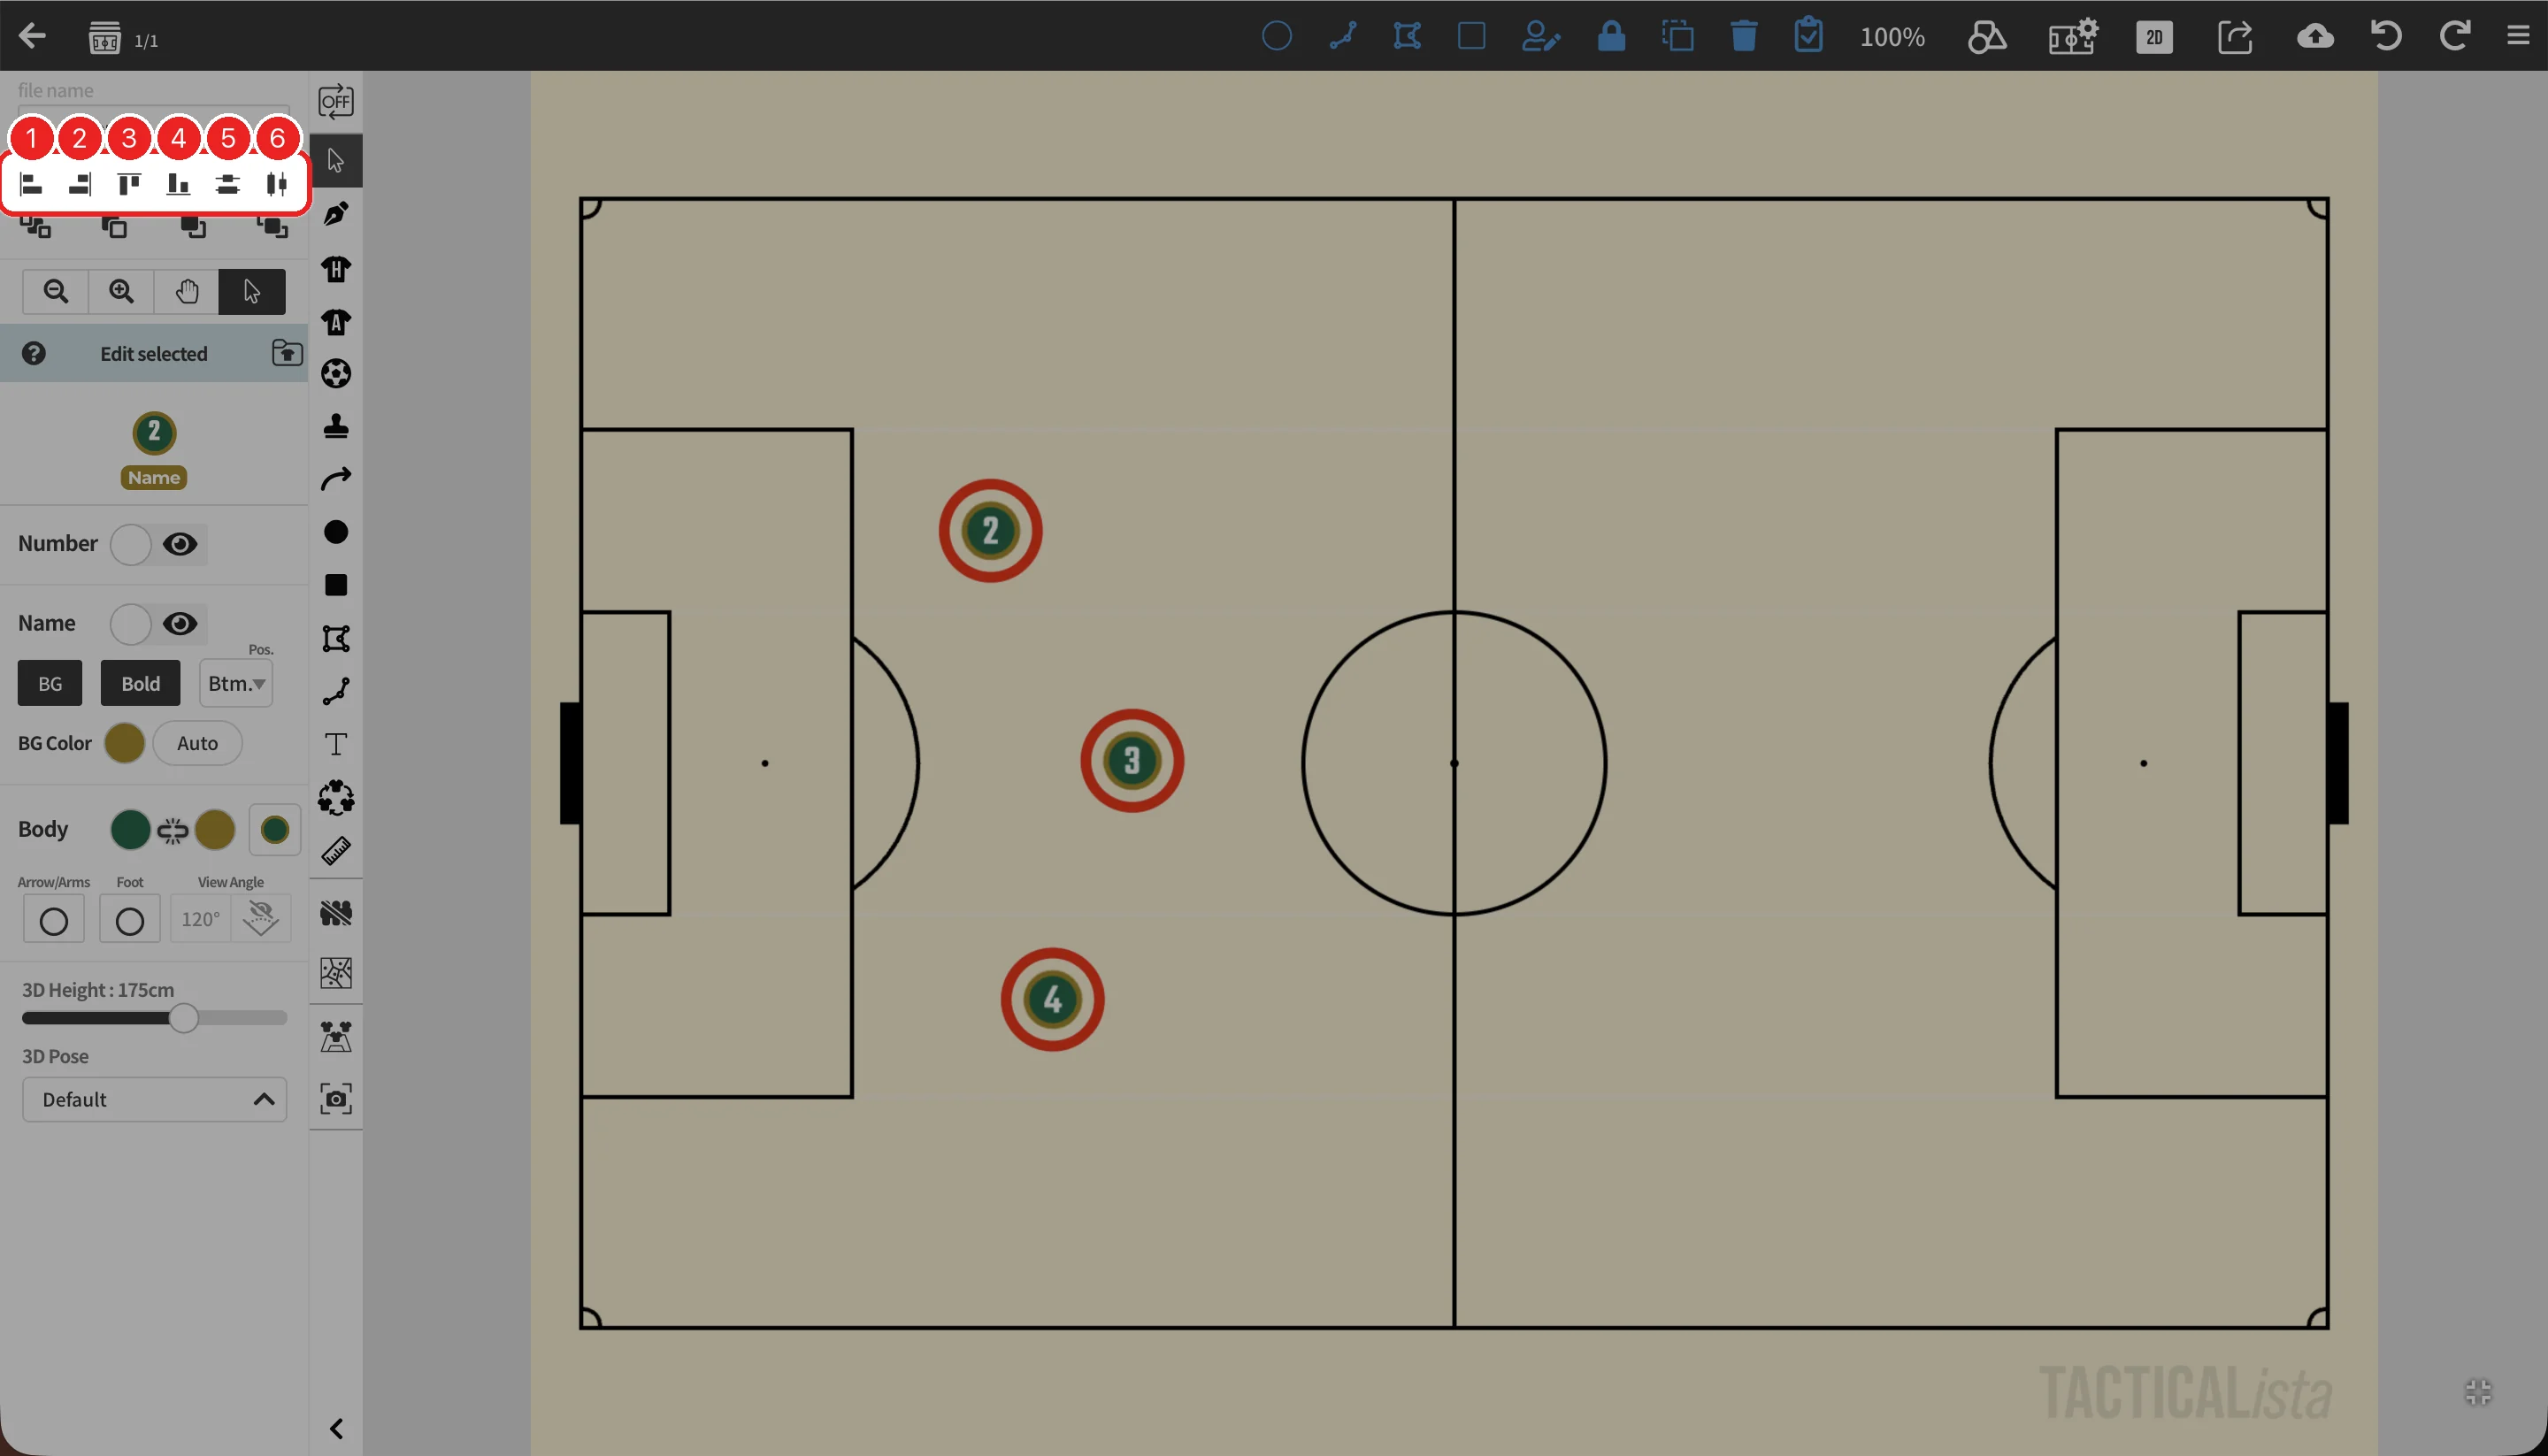
Players, markers, and balls can be lined up by selecting several of them and pressing an alignment button.
| No. | Button | Action |
|---|---|---|
| 1 | Align left | Lines up with the leftmost object. |
| 2 | Align right | Lines up with the rightmost object. |
| 3 | Align top | Lines up with the topmost object. |
| 4 | Align bottom | Lines up with the bottommost object. |
| 5 | Vertical equal spacing | Spaces the objects evenly from top to bottom. |
| 6 | Horizontal equal spacing | Spaces the objects evenly from left to right. |
Changing the stacking order
Select the object whose stacking order you want to change and press one of the stacking buttons at the top of the panel.
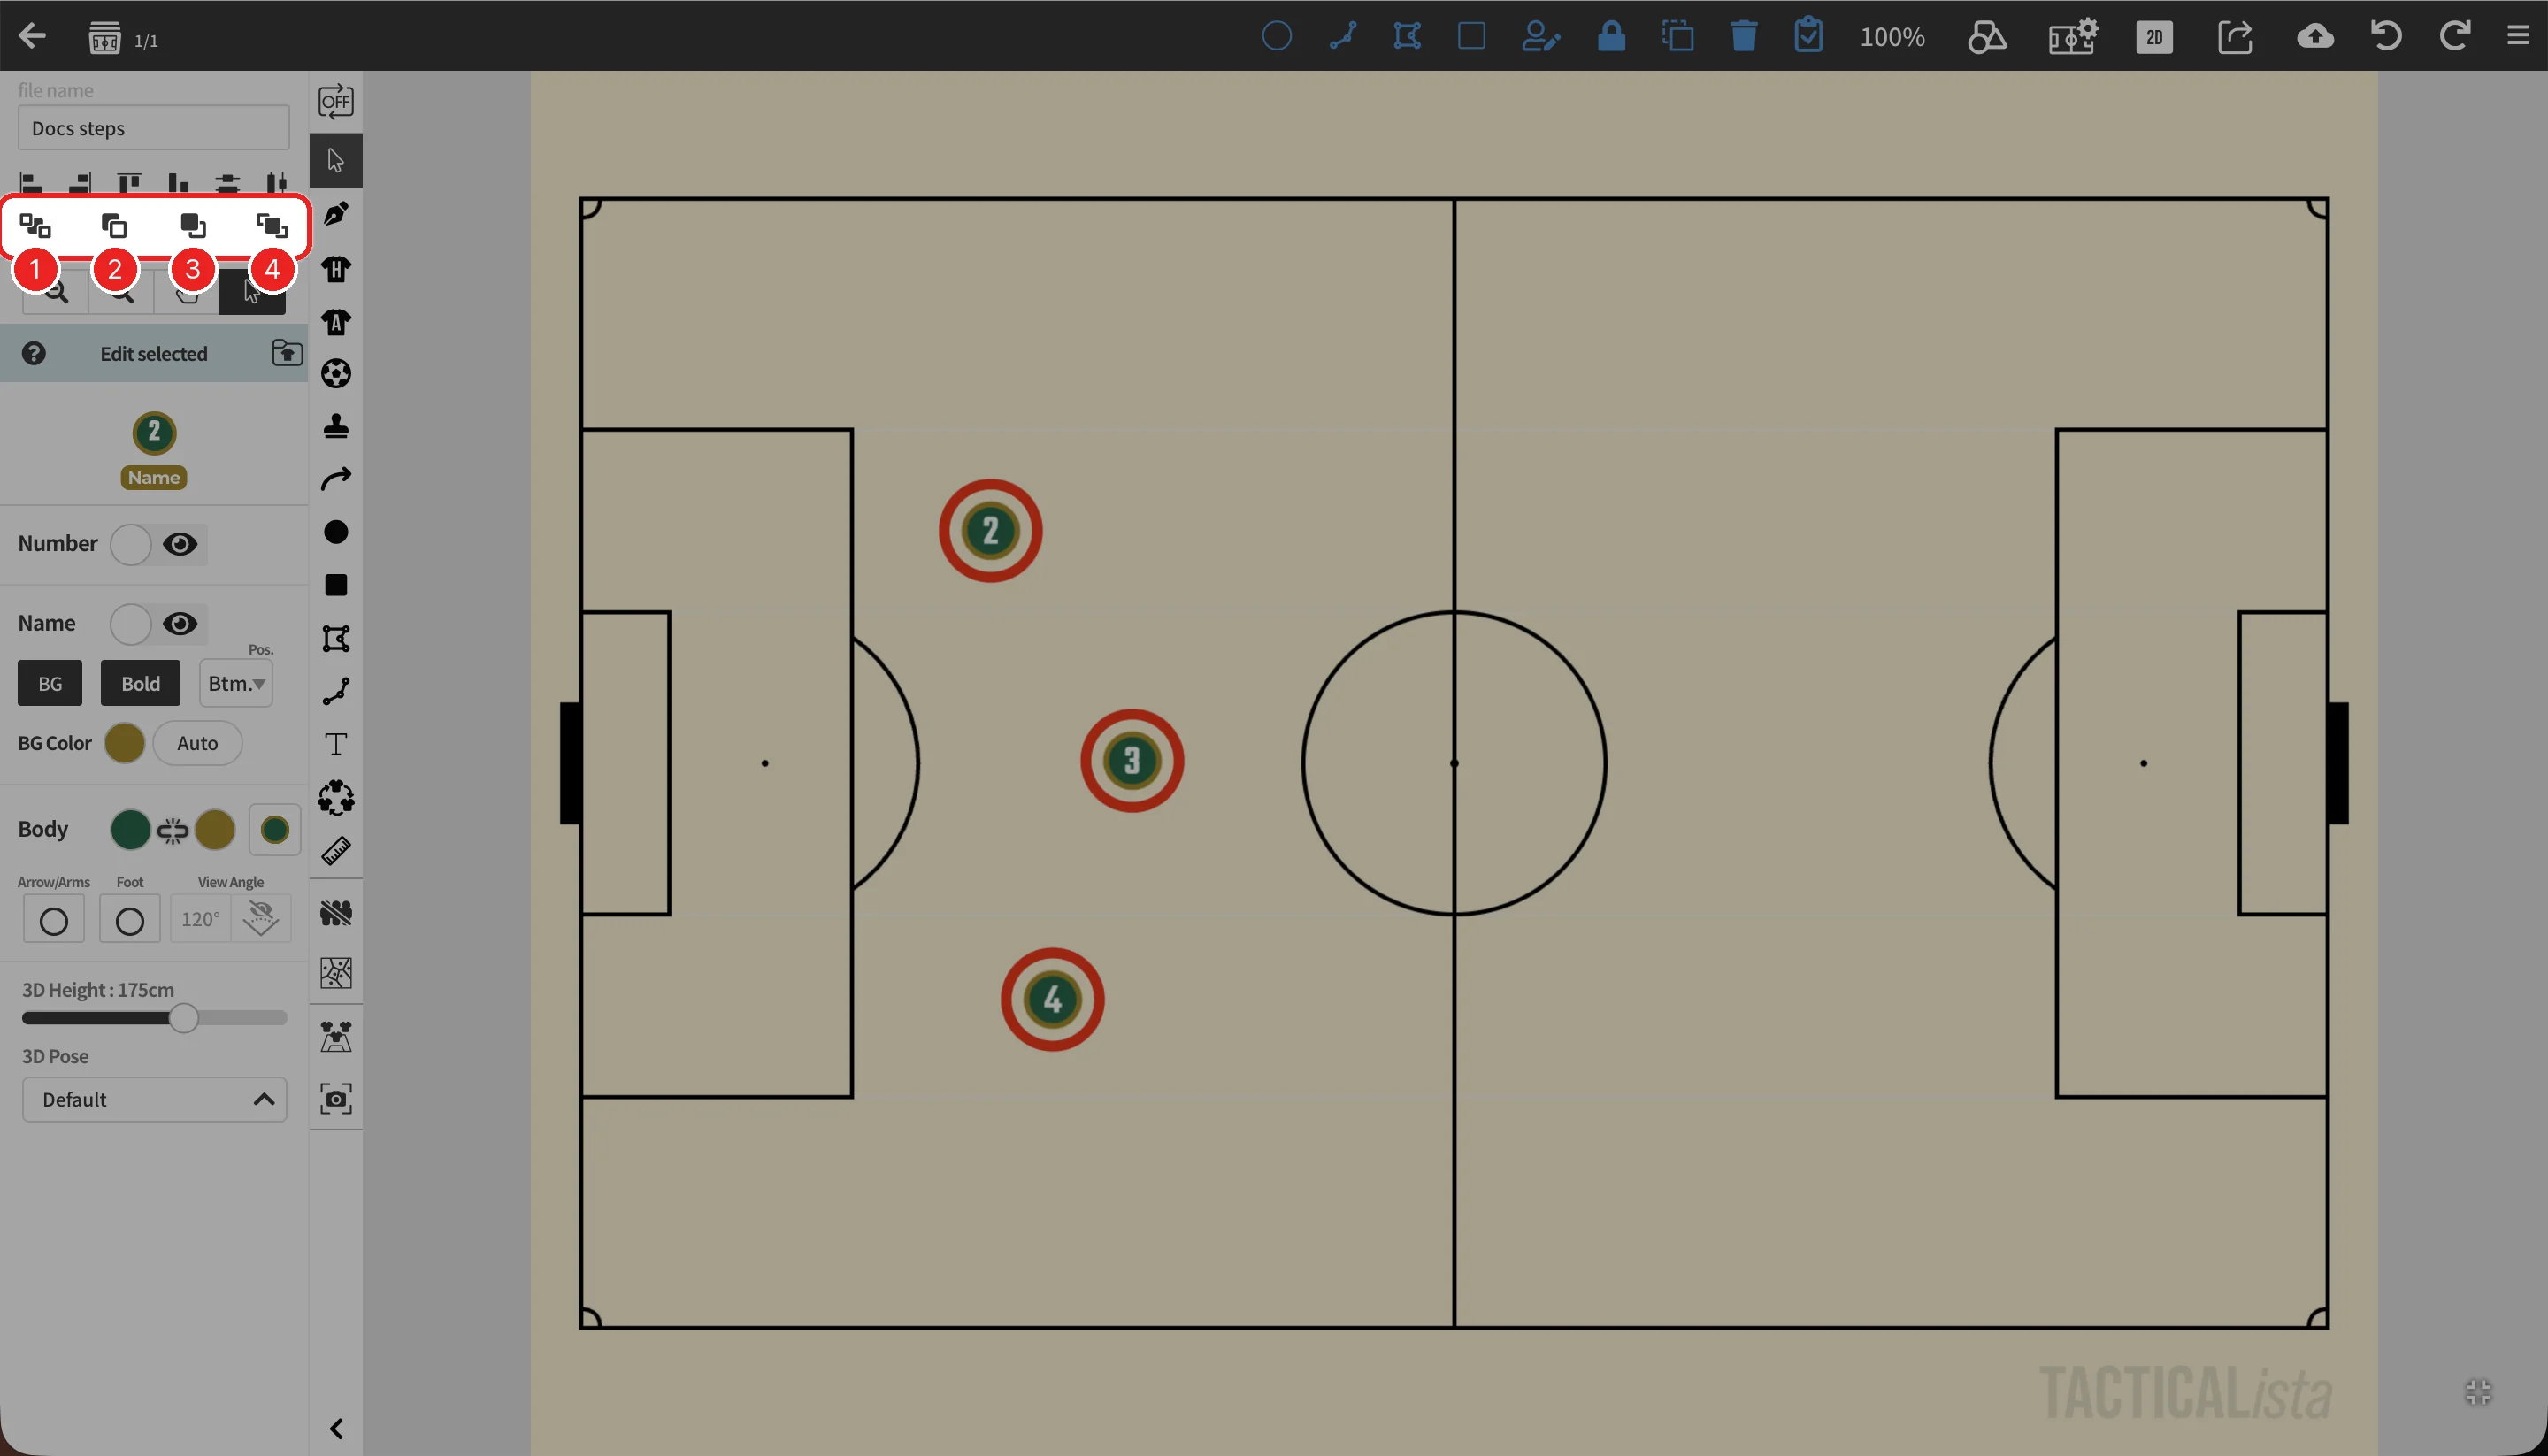
| No. | Button | Action |
|---|---|---|
| 1 | Sends to the back. | |
| 2 | Sends backward one level. | |
| 3 | Brings forward one level. | |
| 4 | Brings to the front. |
New objects are stacked automatically by type. From the top, the order is handwriting, text, ball, players, and other shapes (markers, lines, ovals, and rectangles), so shapes you add later never hide players or the ball. Polygons and polylines are the exception: they are added on top so their vertices are easy to edit. Any stacking order you change by hand is kept.
Duplicating
Select an object and press in the header to duplicate it. The keyboard shortcut is Ctrl/Cmd+D. When several objects are selected, all of them are duplicated.
Copy, cut, and paste
Press in the header to open the clipboard menu. Copied objects are stored in the app's clipboard, and pasted objects appear at the same position they were copied from.
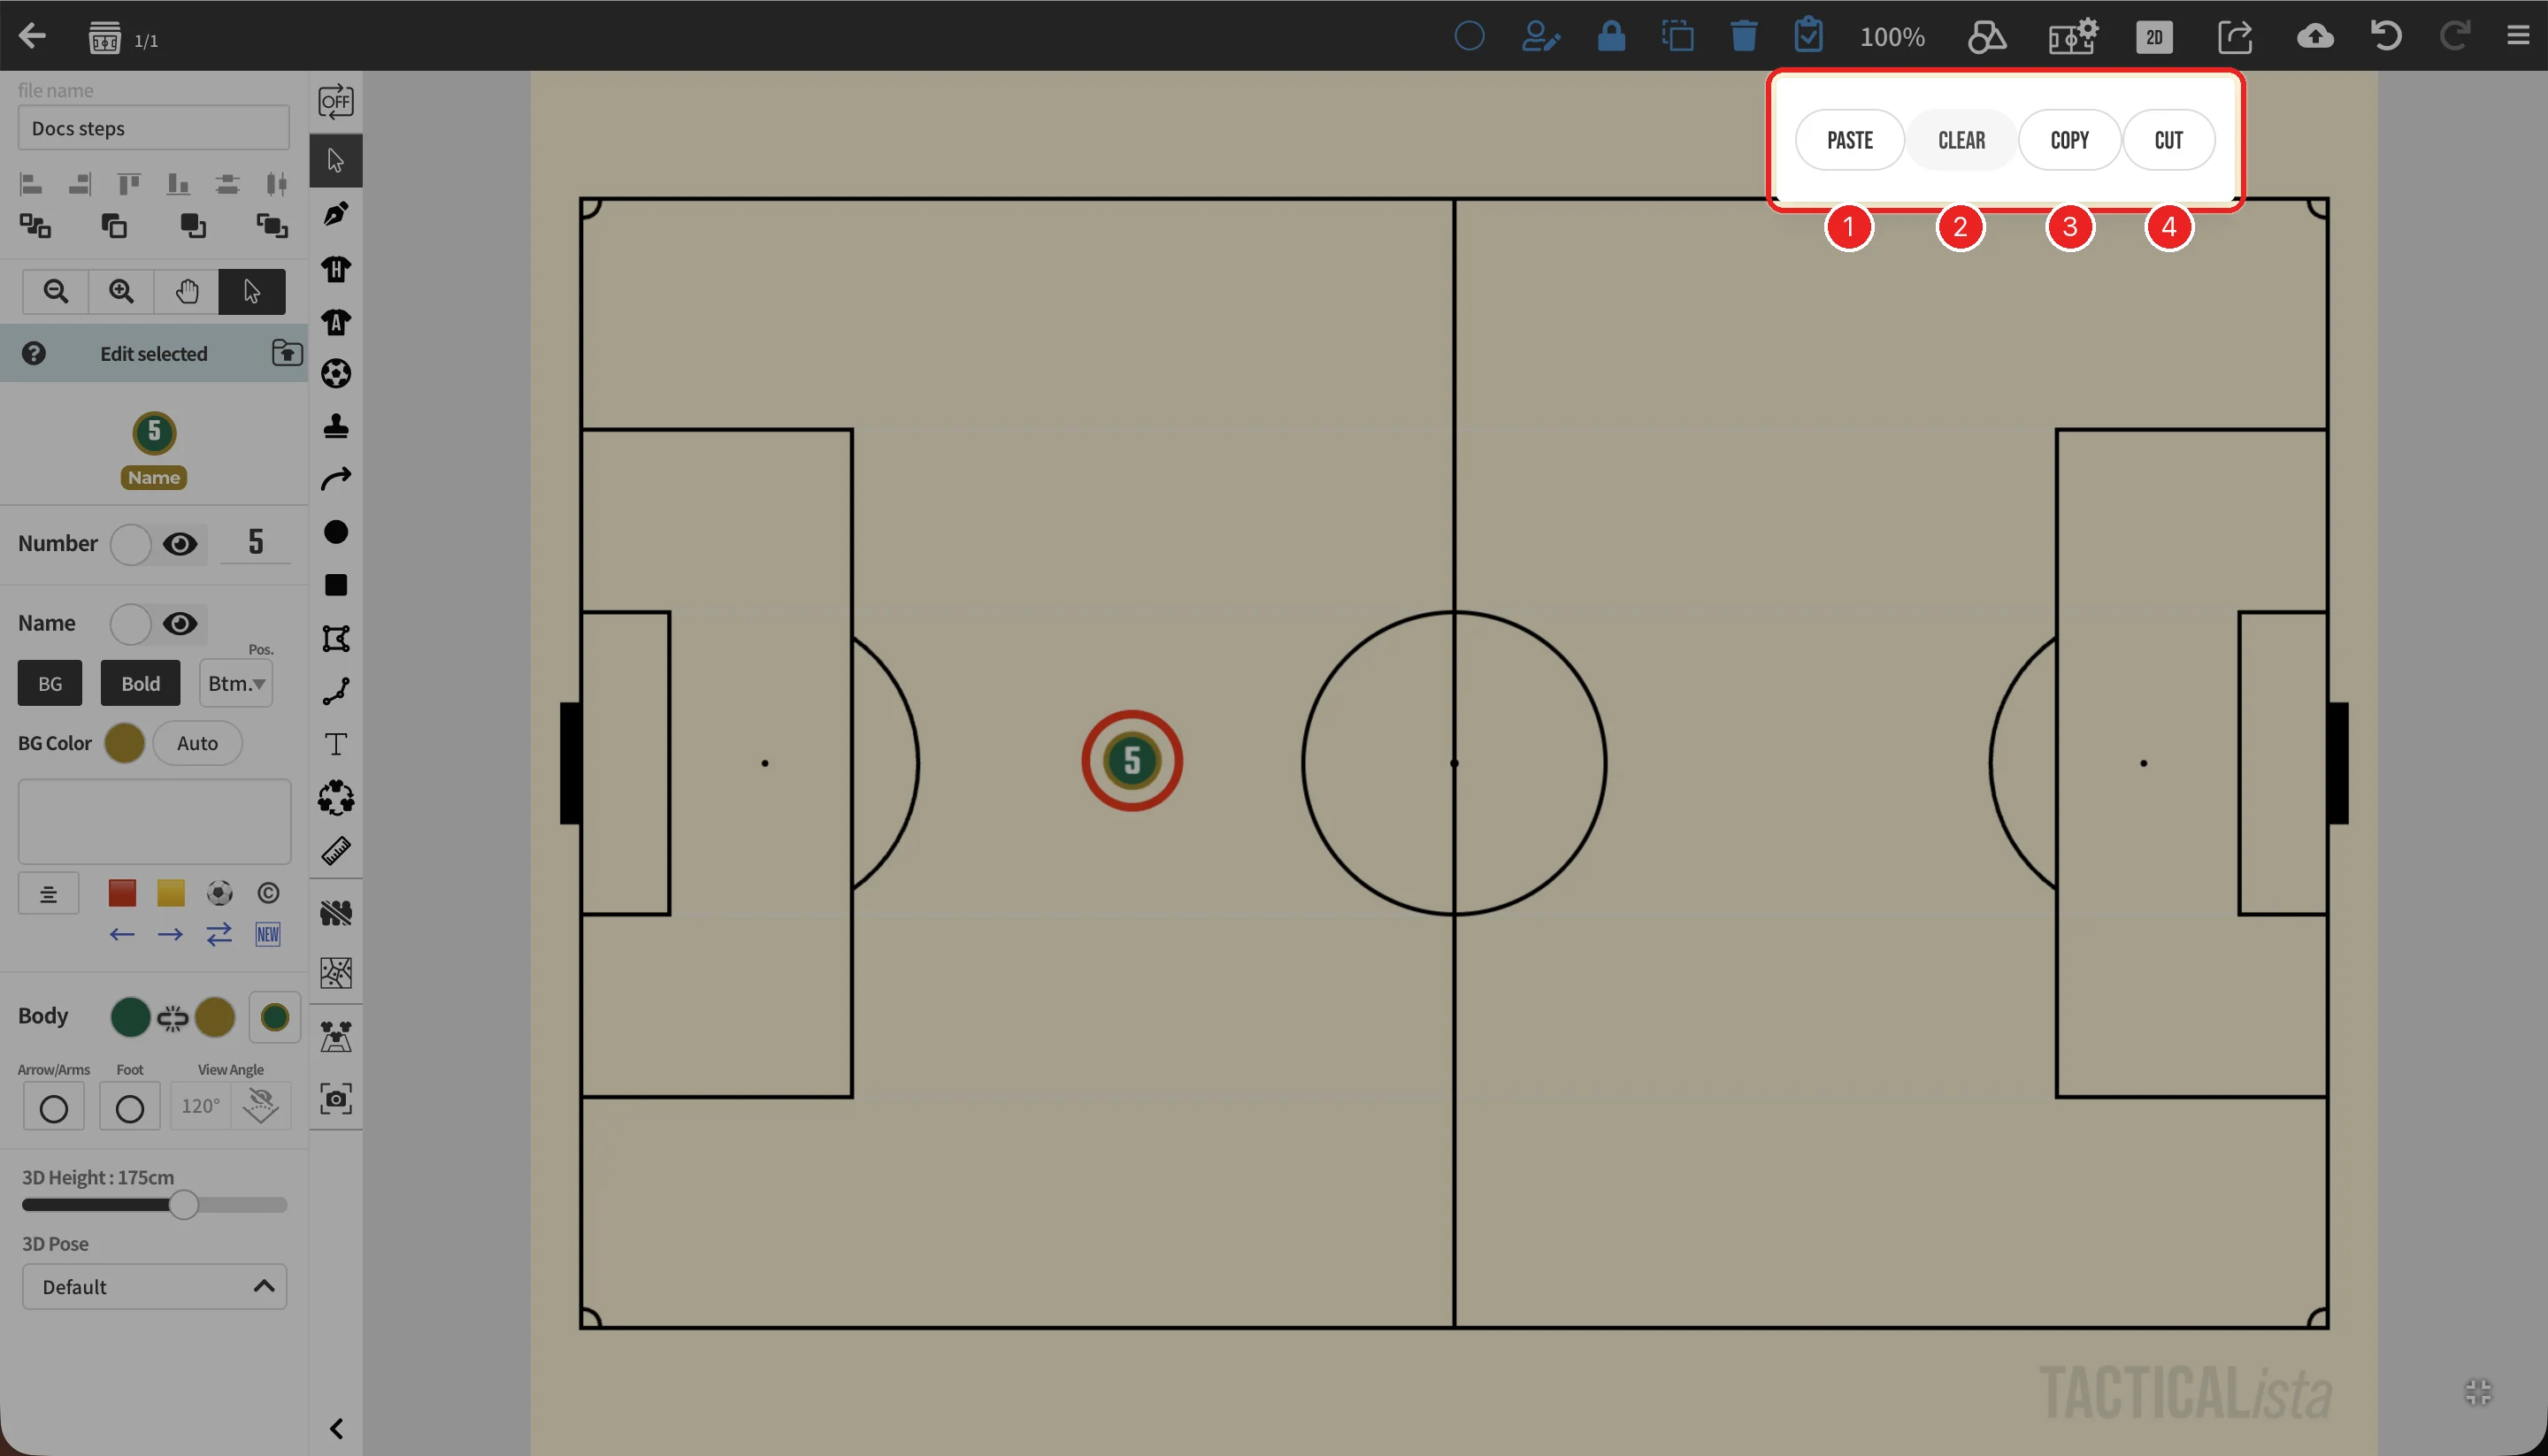
| No. | Menu | Action | Keyboard |
|---|---|---|---|
| 1 | PASTE | Pastes the objects in the clipboard. | Ctrl/Cmd+V |
| 2 | CLEAR | Empties the clipboard. | |
| 3 | COPY | Copies the selected objects. | Ctrl/Cmd+C |
| 4 | CUT | Copies the selected objects and deletes them. | Ctrl/Cmd+X |
Saving and reusing appearances Basic
You can save several appearance settings for each object type and apply them later.
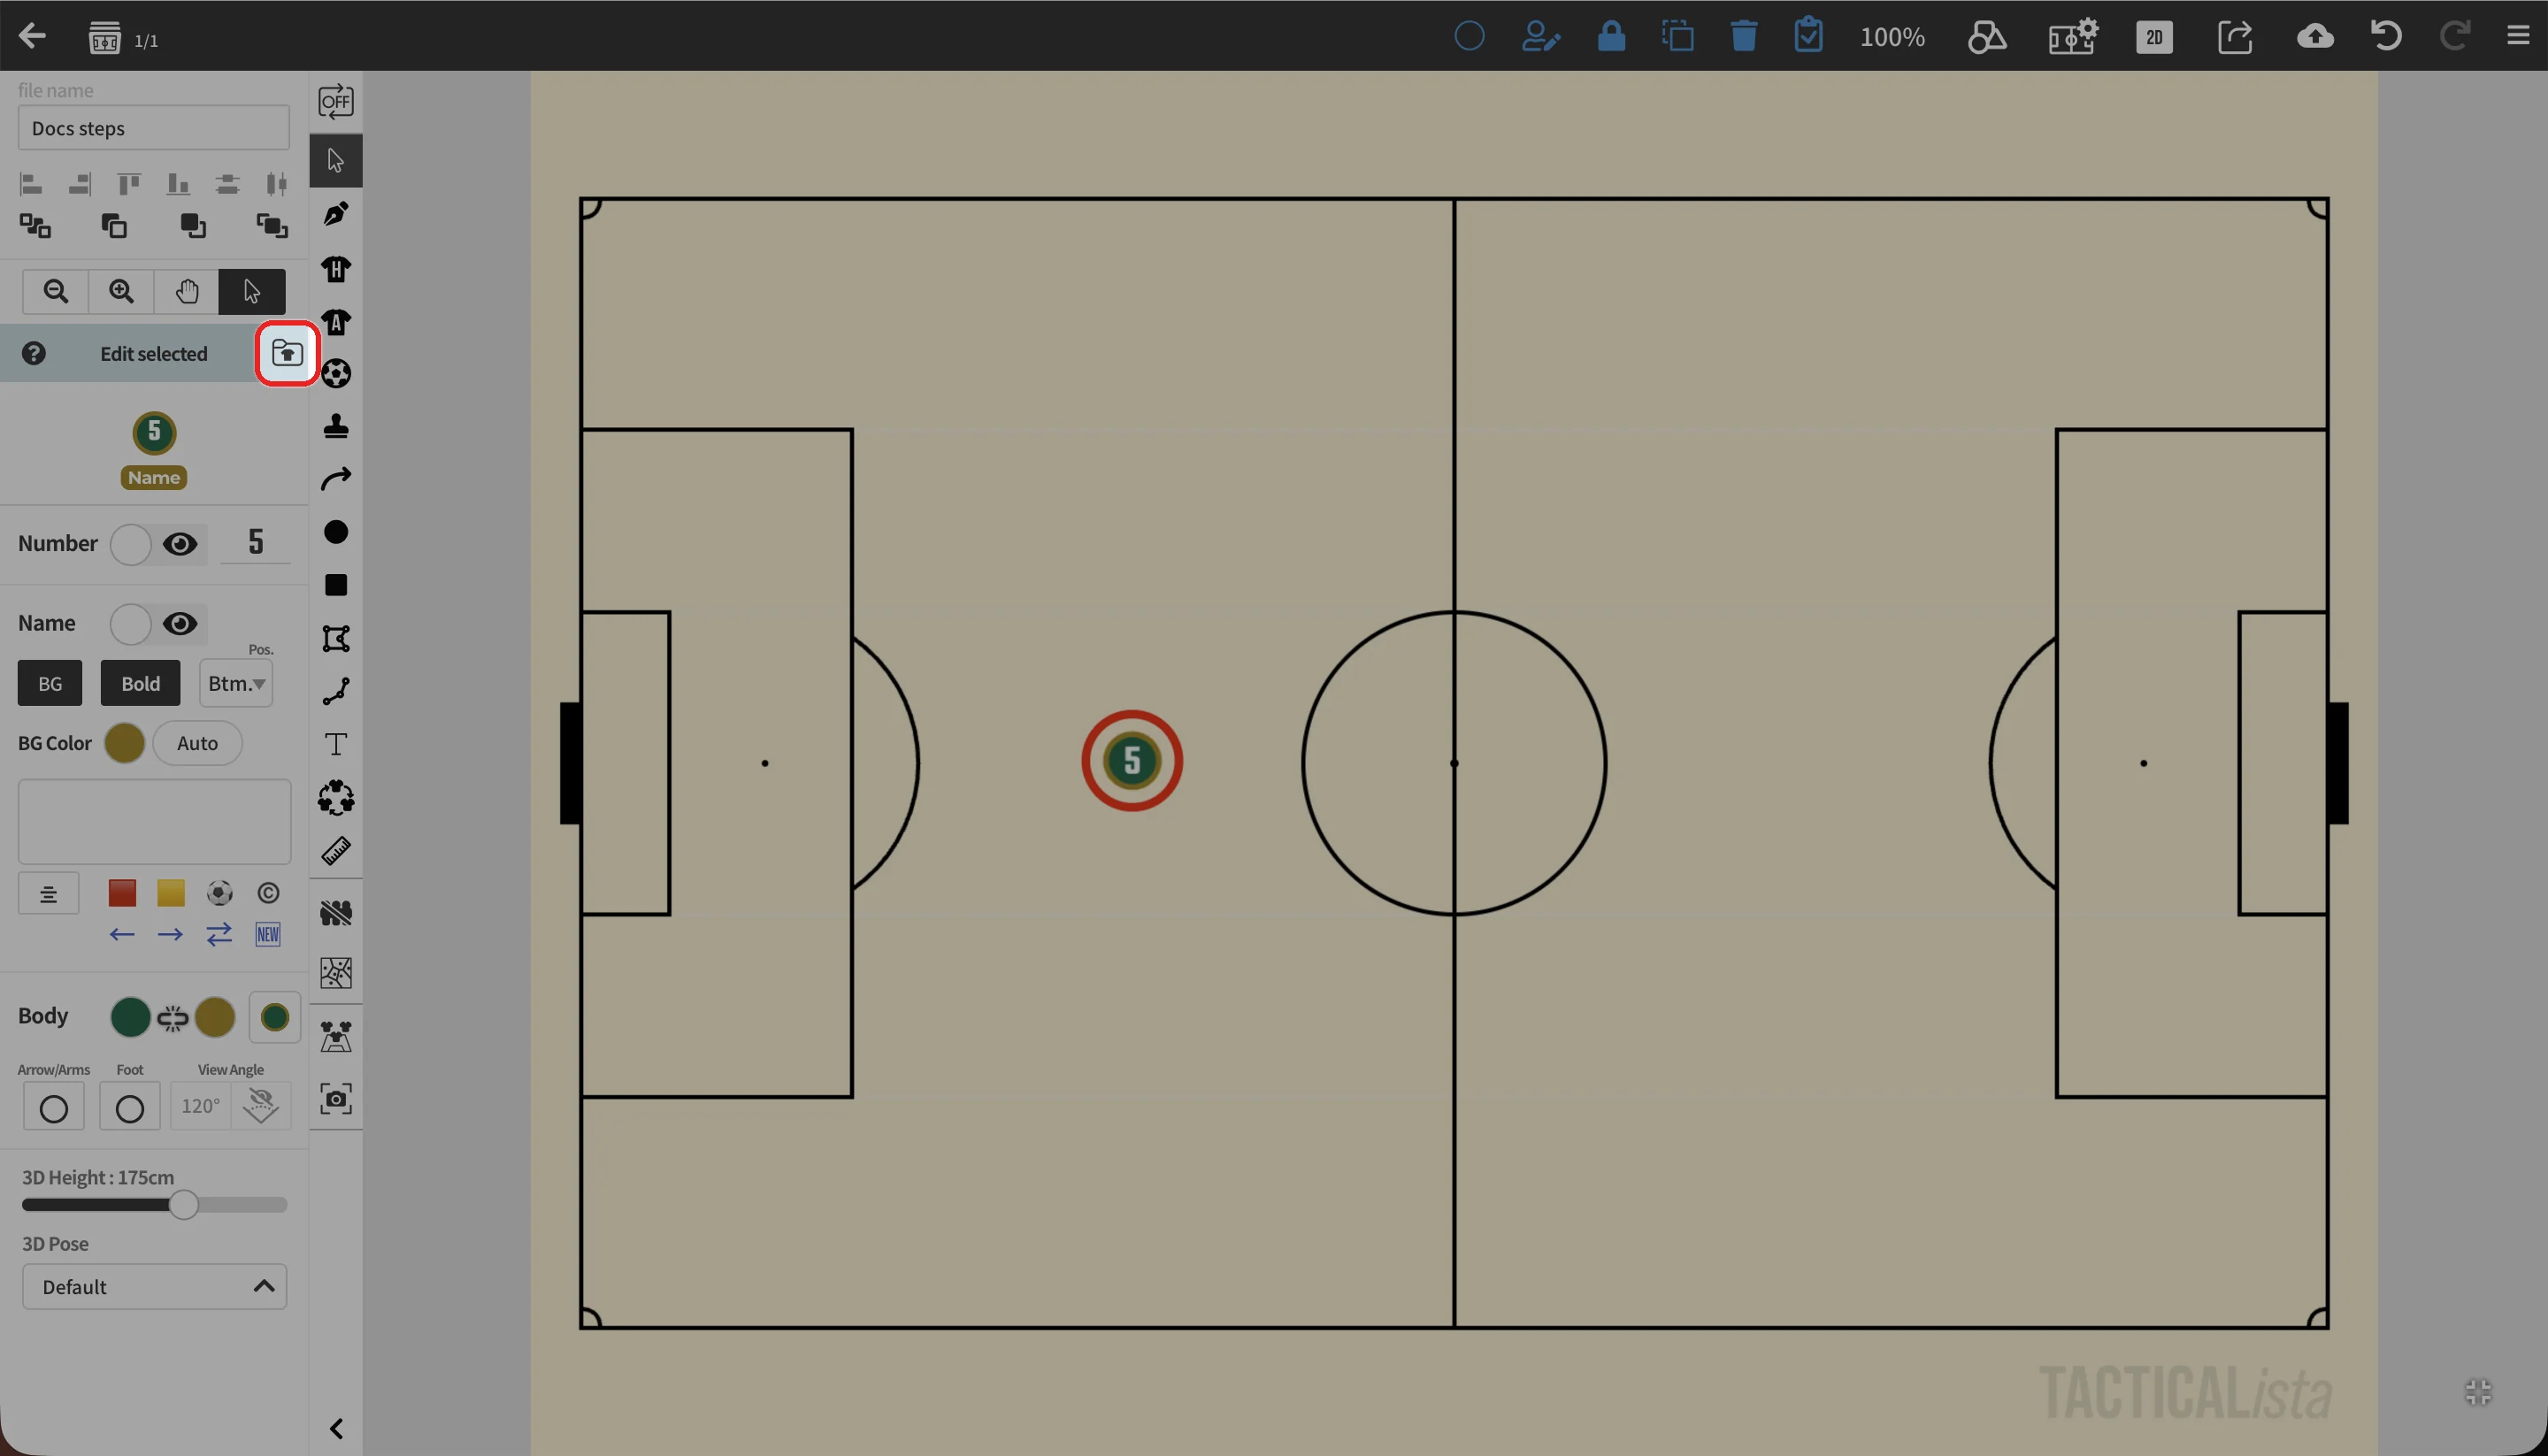
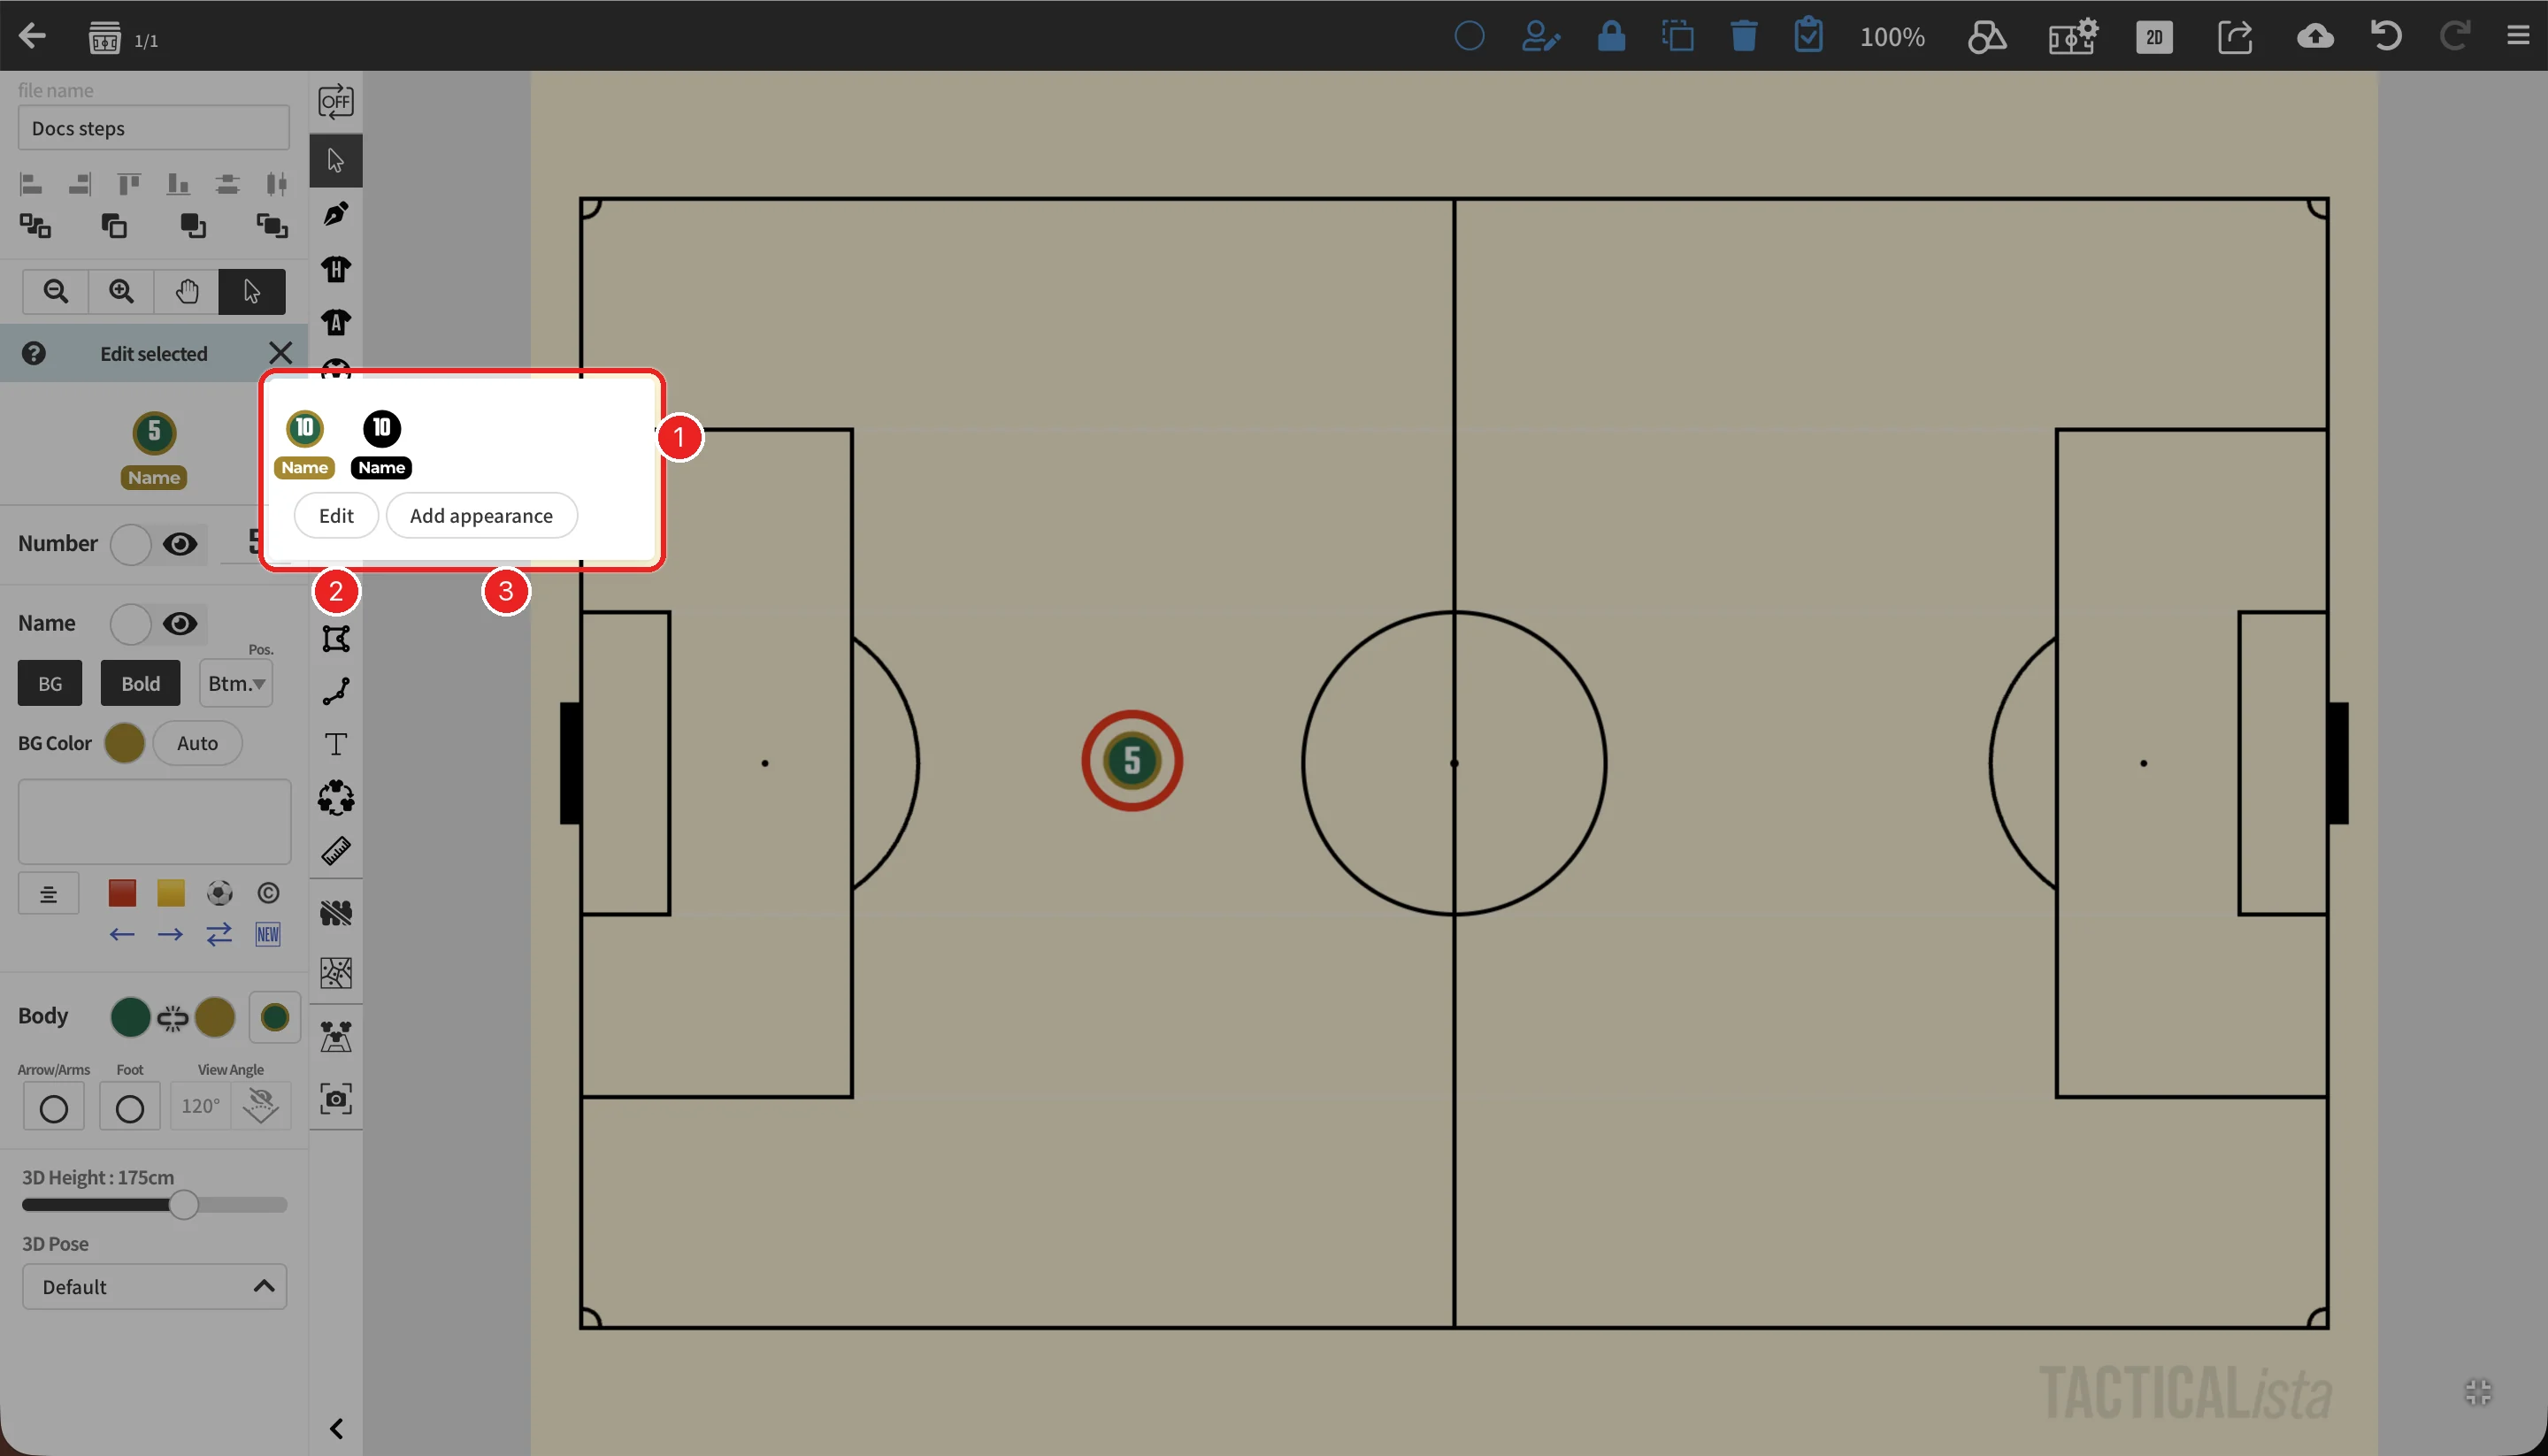
| No. | Item | Action |
|---|---|---|
| 1 | Saved appearances | Applies that appearance to the selected objects. |
| 2 | Edit | Reorders and deletes saved appearances. |
| 3 | Add appearance | Saves the appearance of the selected object. |
Default from saved appearances
Saved appearances are used as the default appearance for new objects.
- The first saved appearance is applied by default when you add that object.
- For players, the first is the default for home and the second for away.
To reorder, press "Edit", then drag the appearances. "Done" saves the order and "Cancel" restores the previous one. The new order is used for new objects from the next time you open the project.