
Field Settings
The field's orientation, display area, aspect ratio, colors, grid lines, and logo visibility are changed in the Field Settings panel.
Opening the Field Settings panel
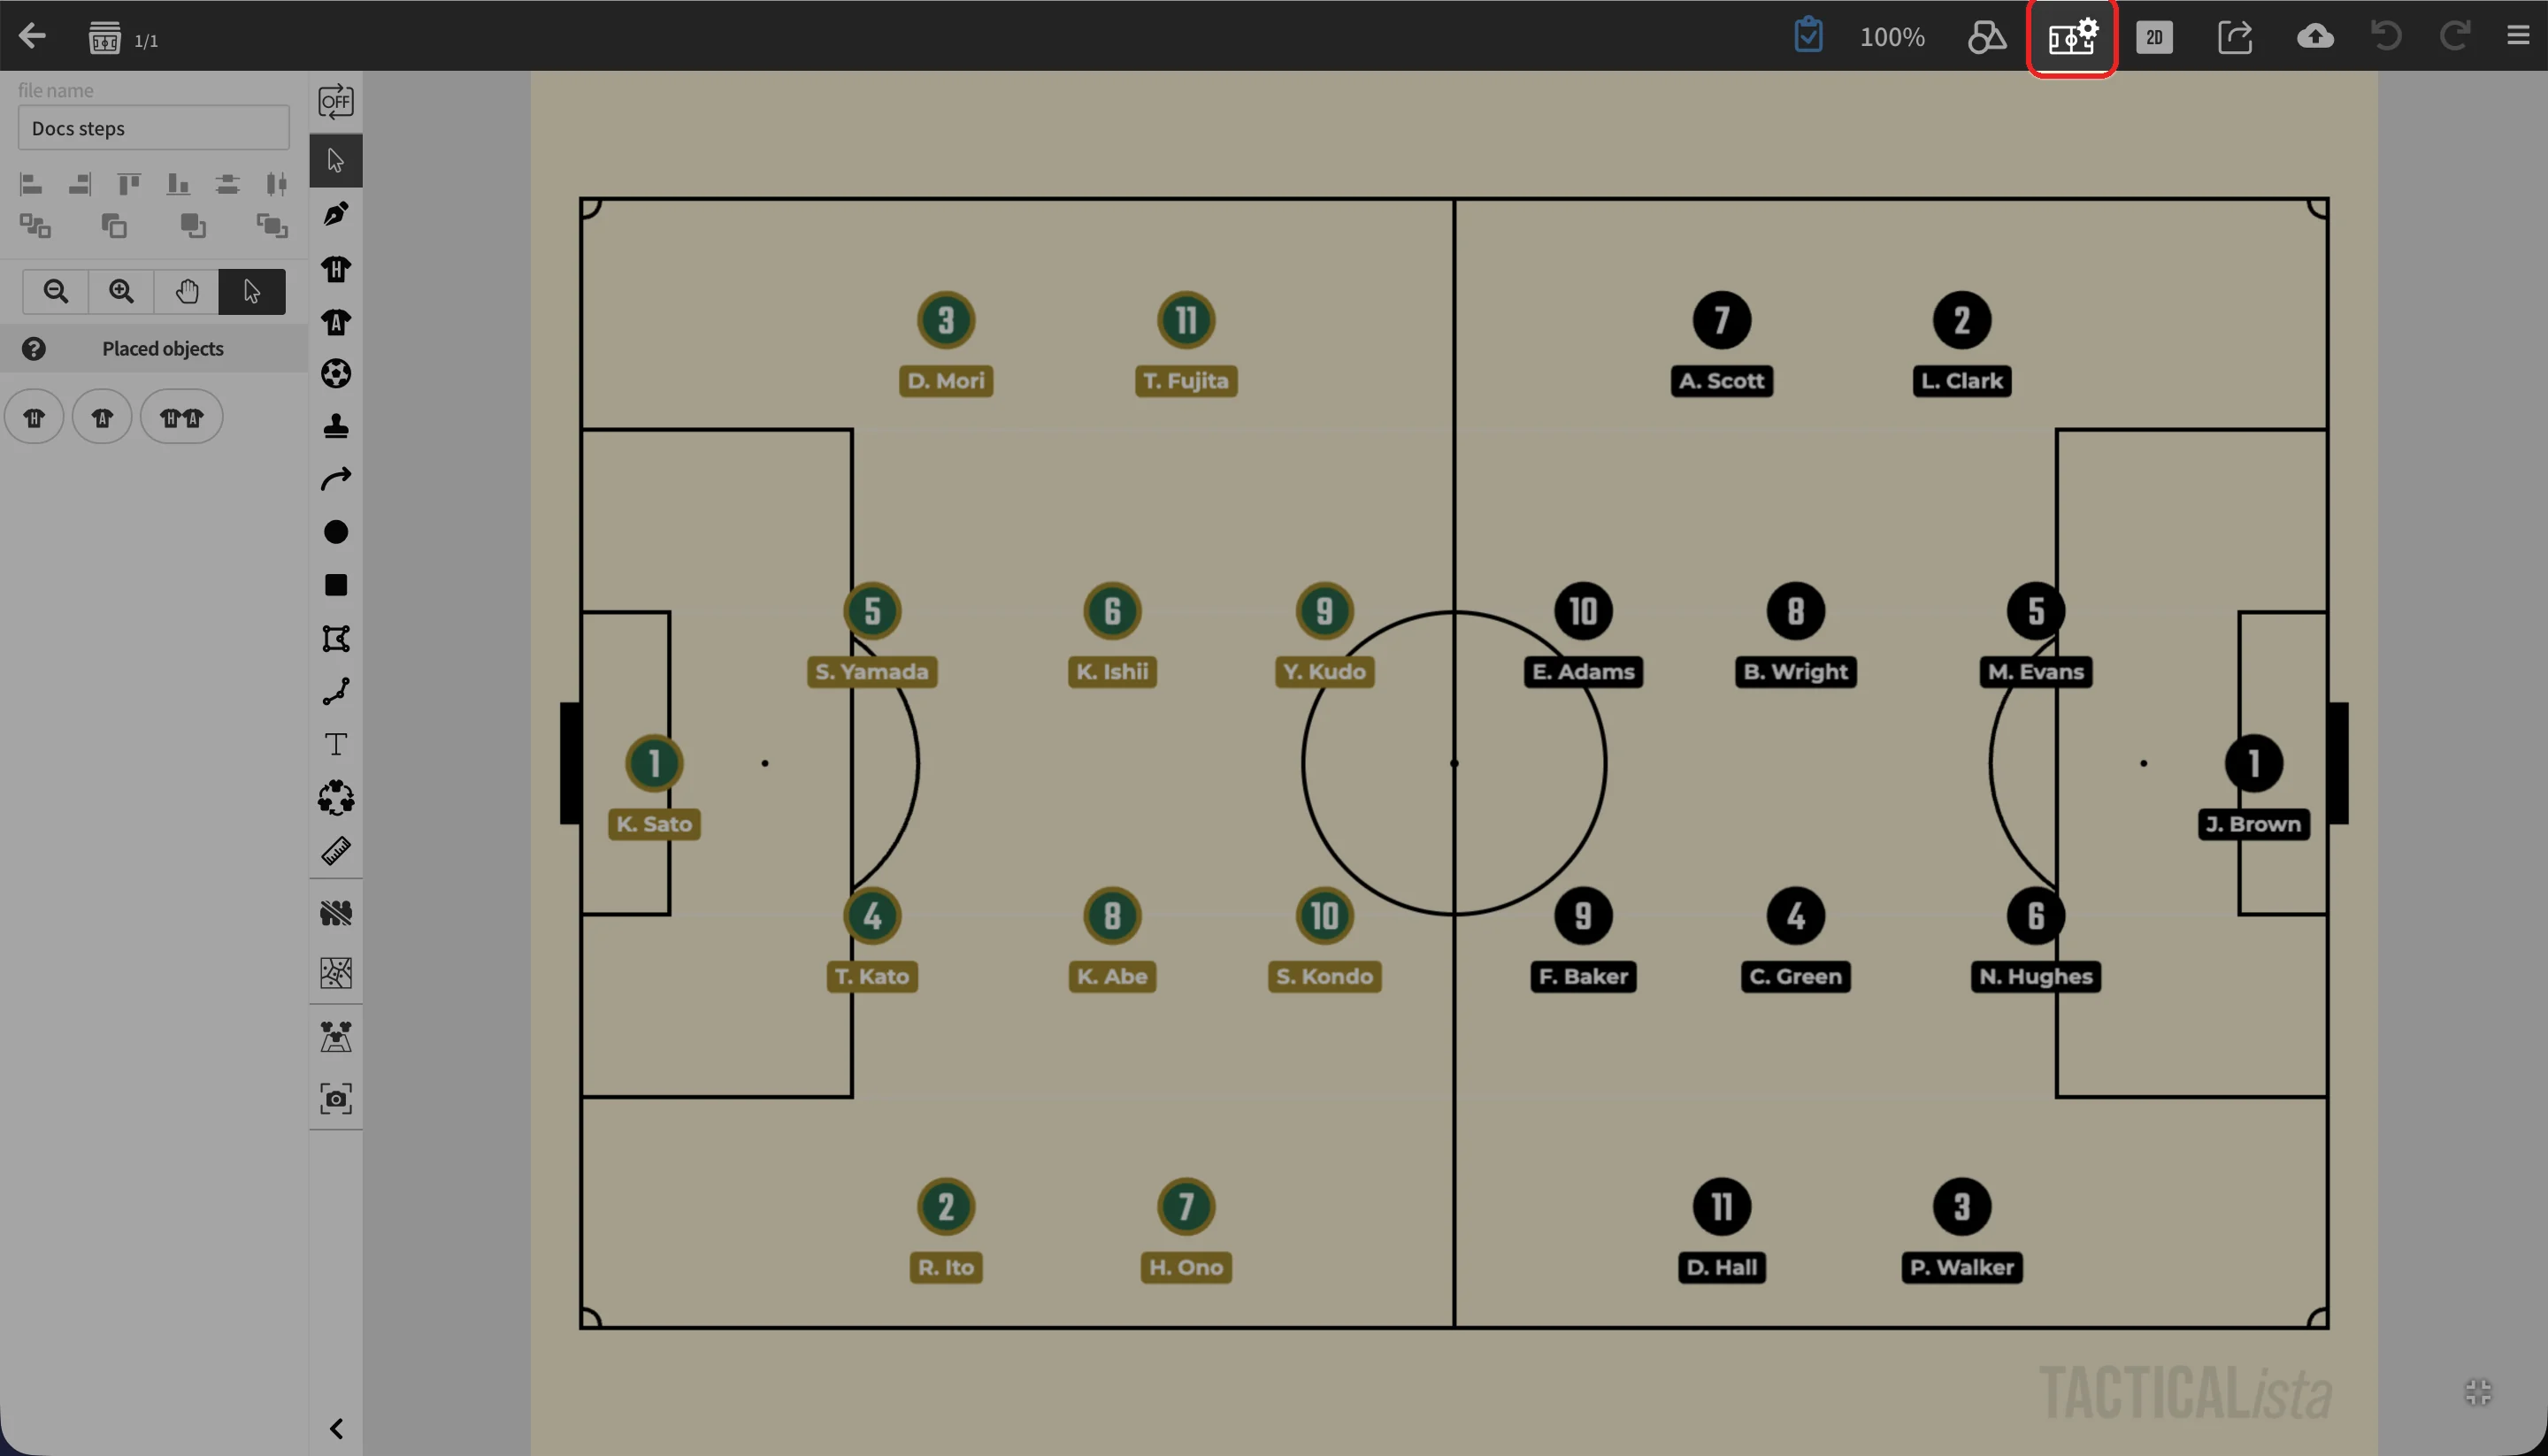
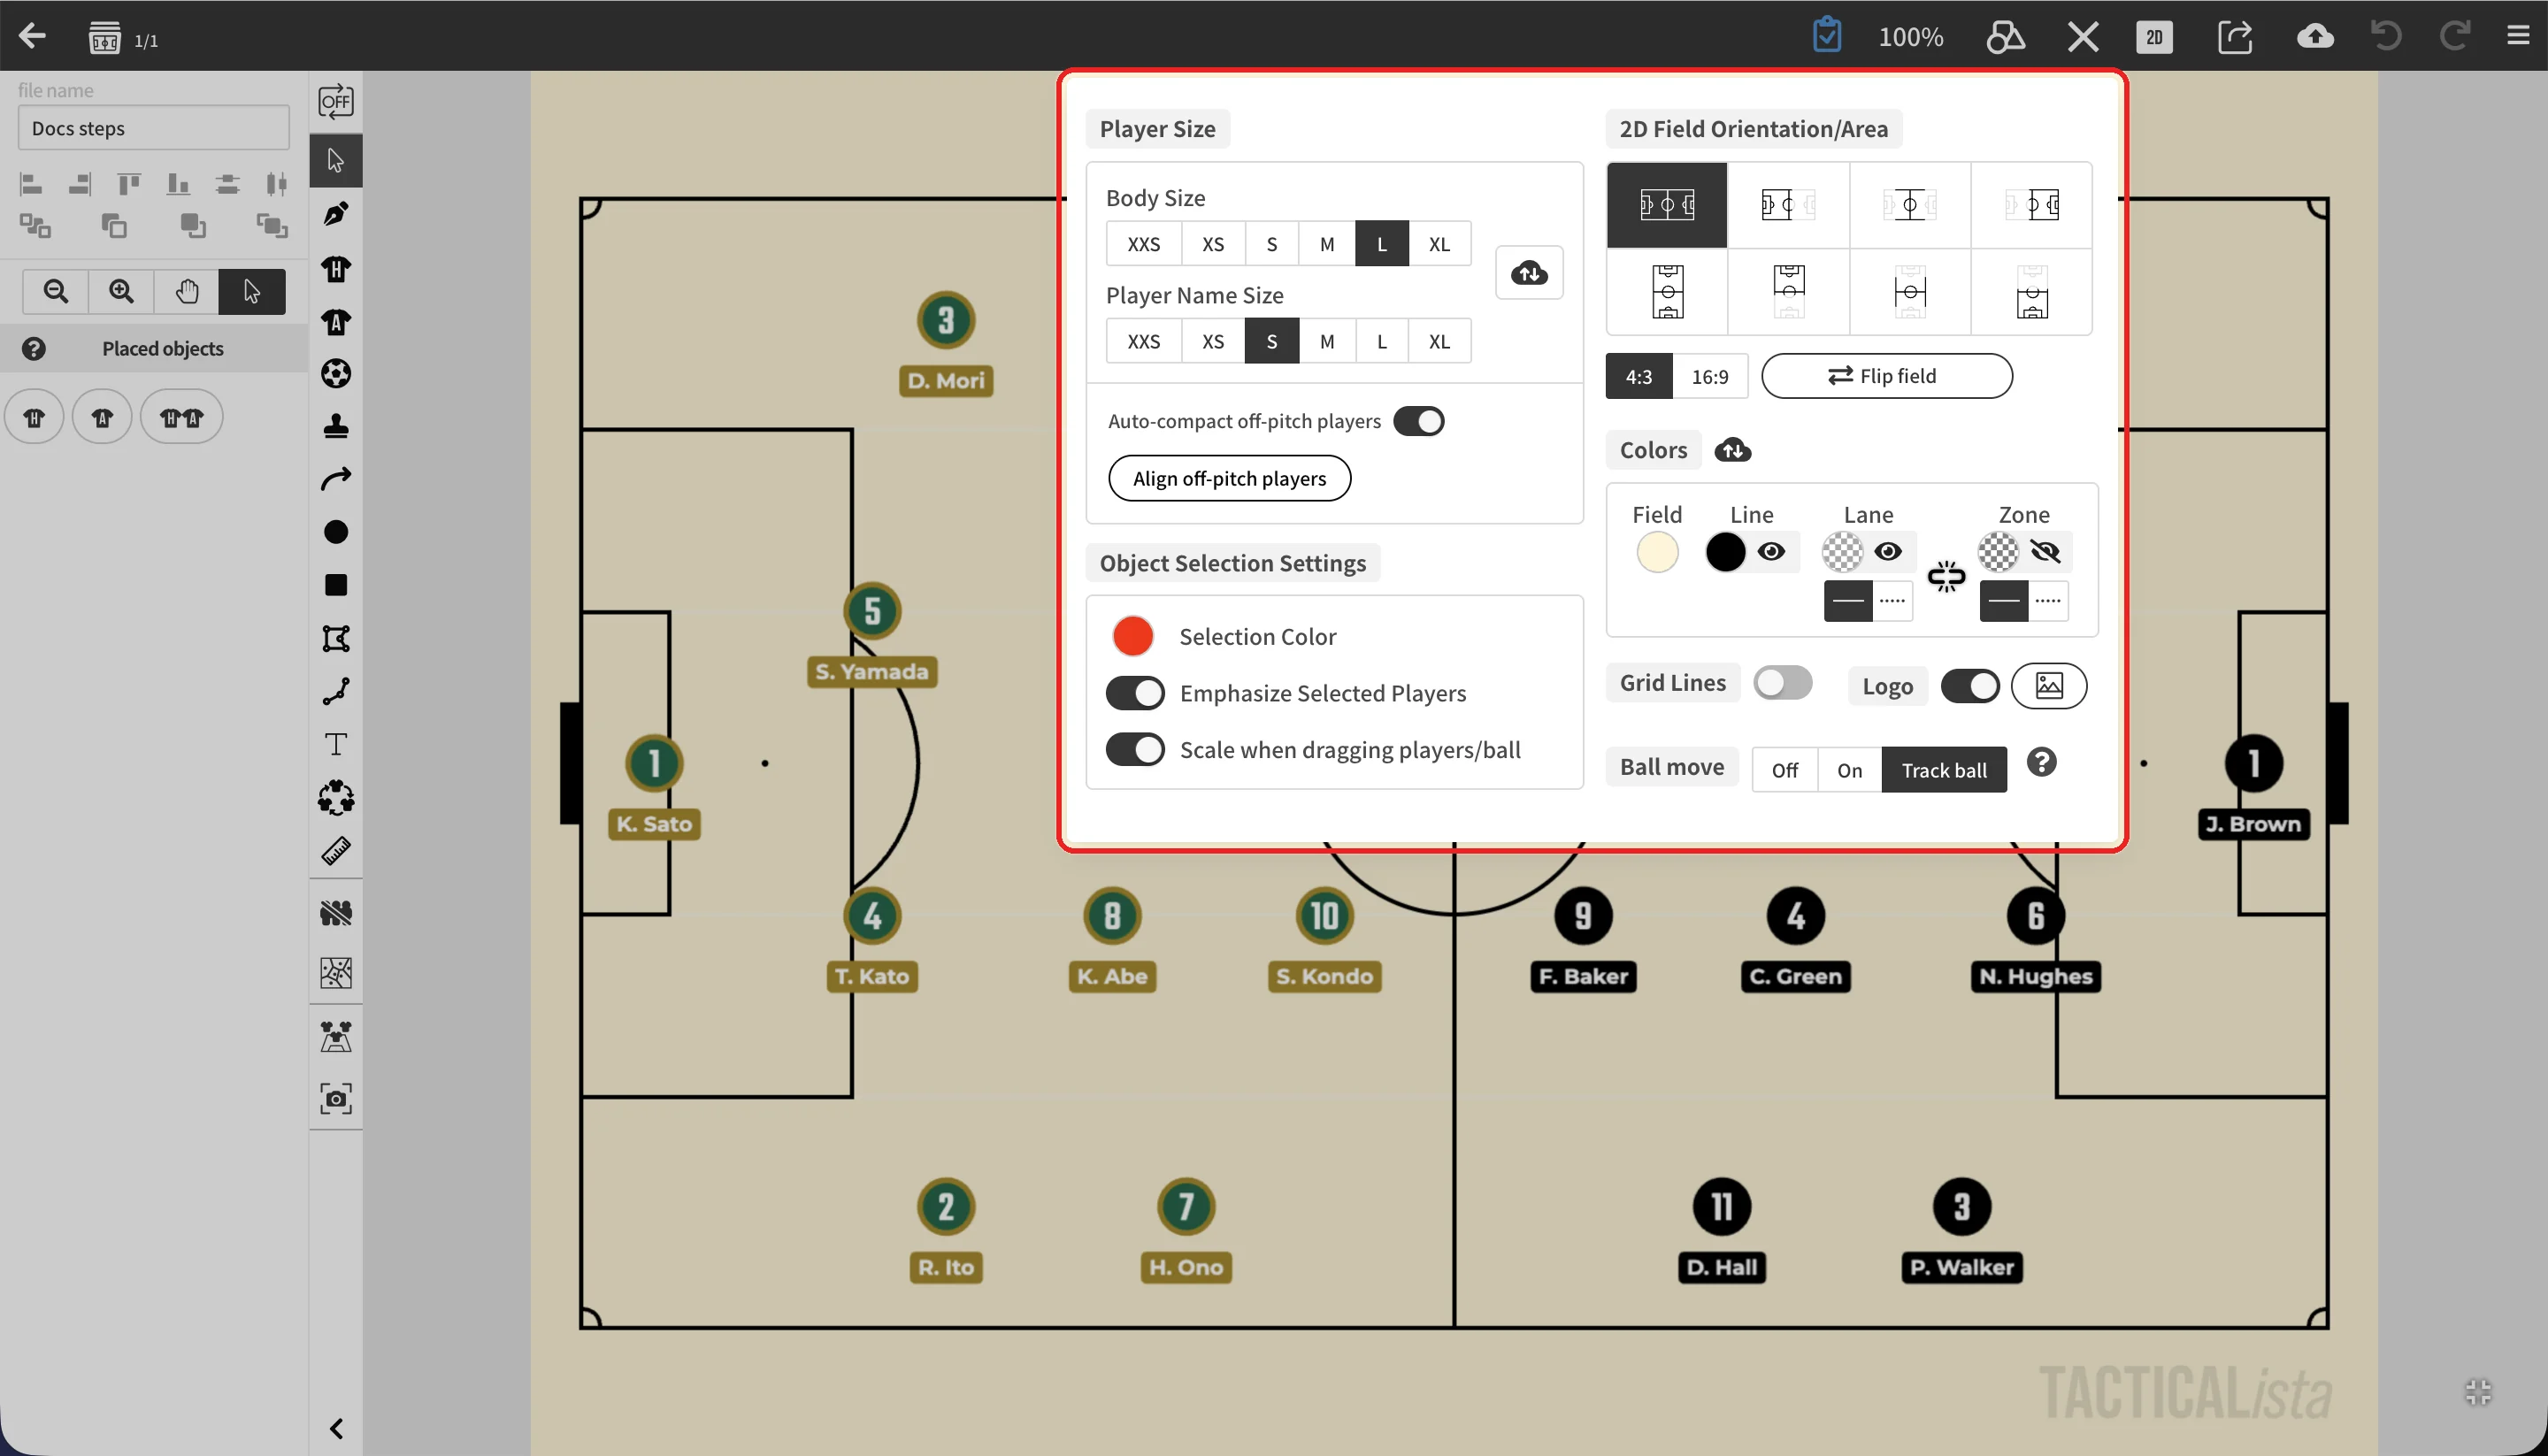
On mobile, open it from in the toolbar at the bottom of the screen.
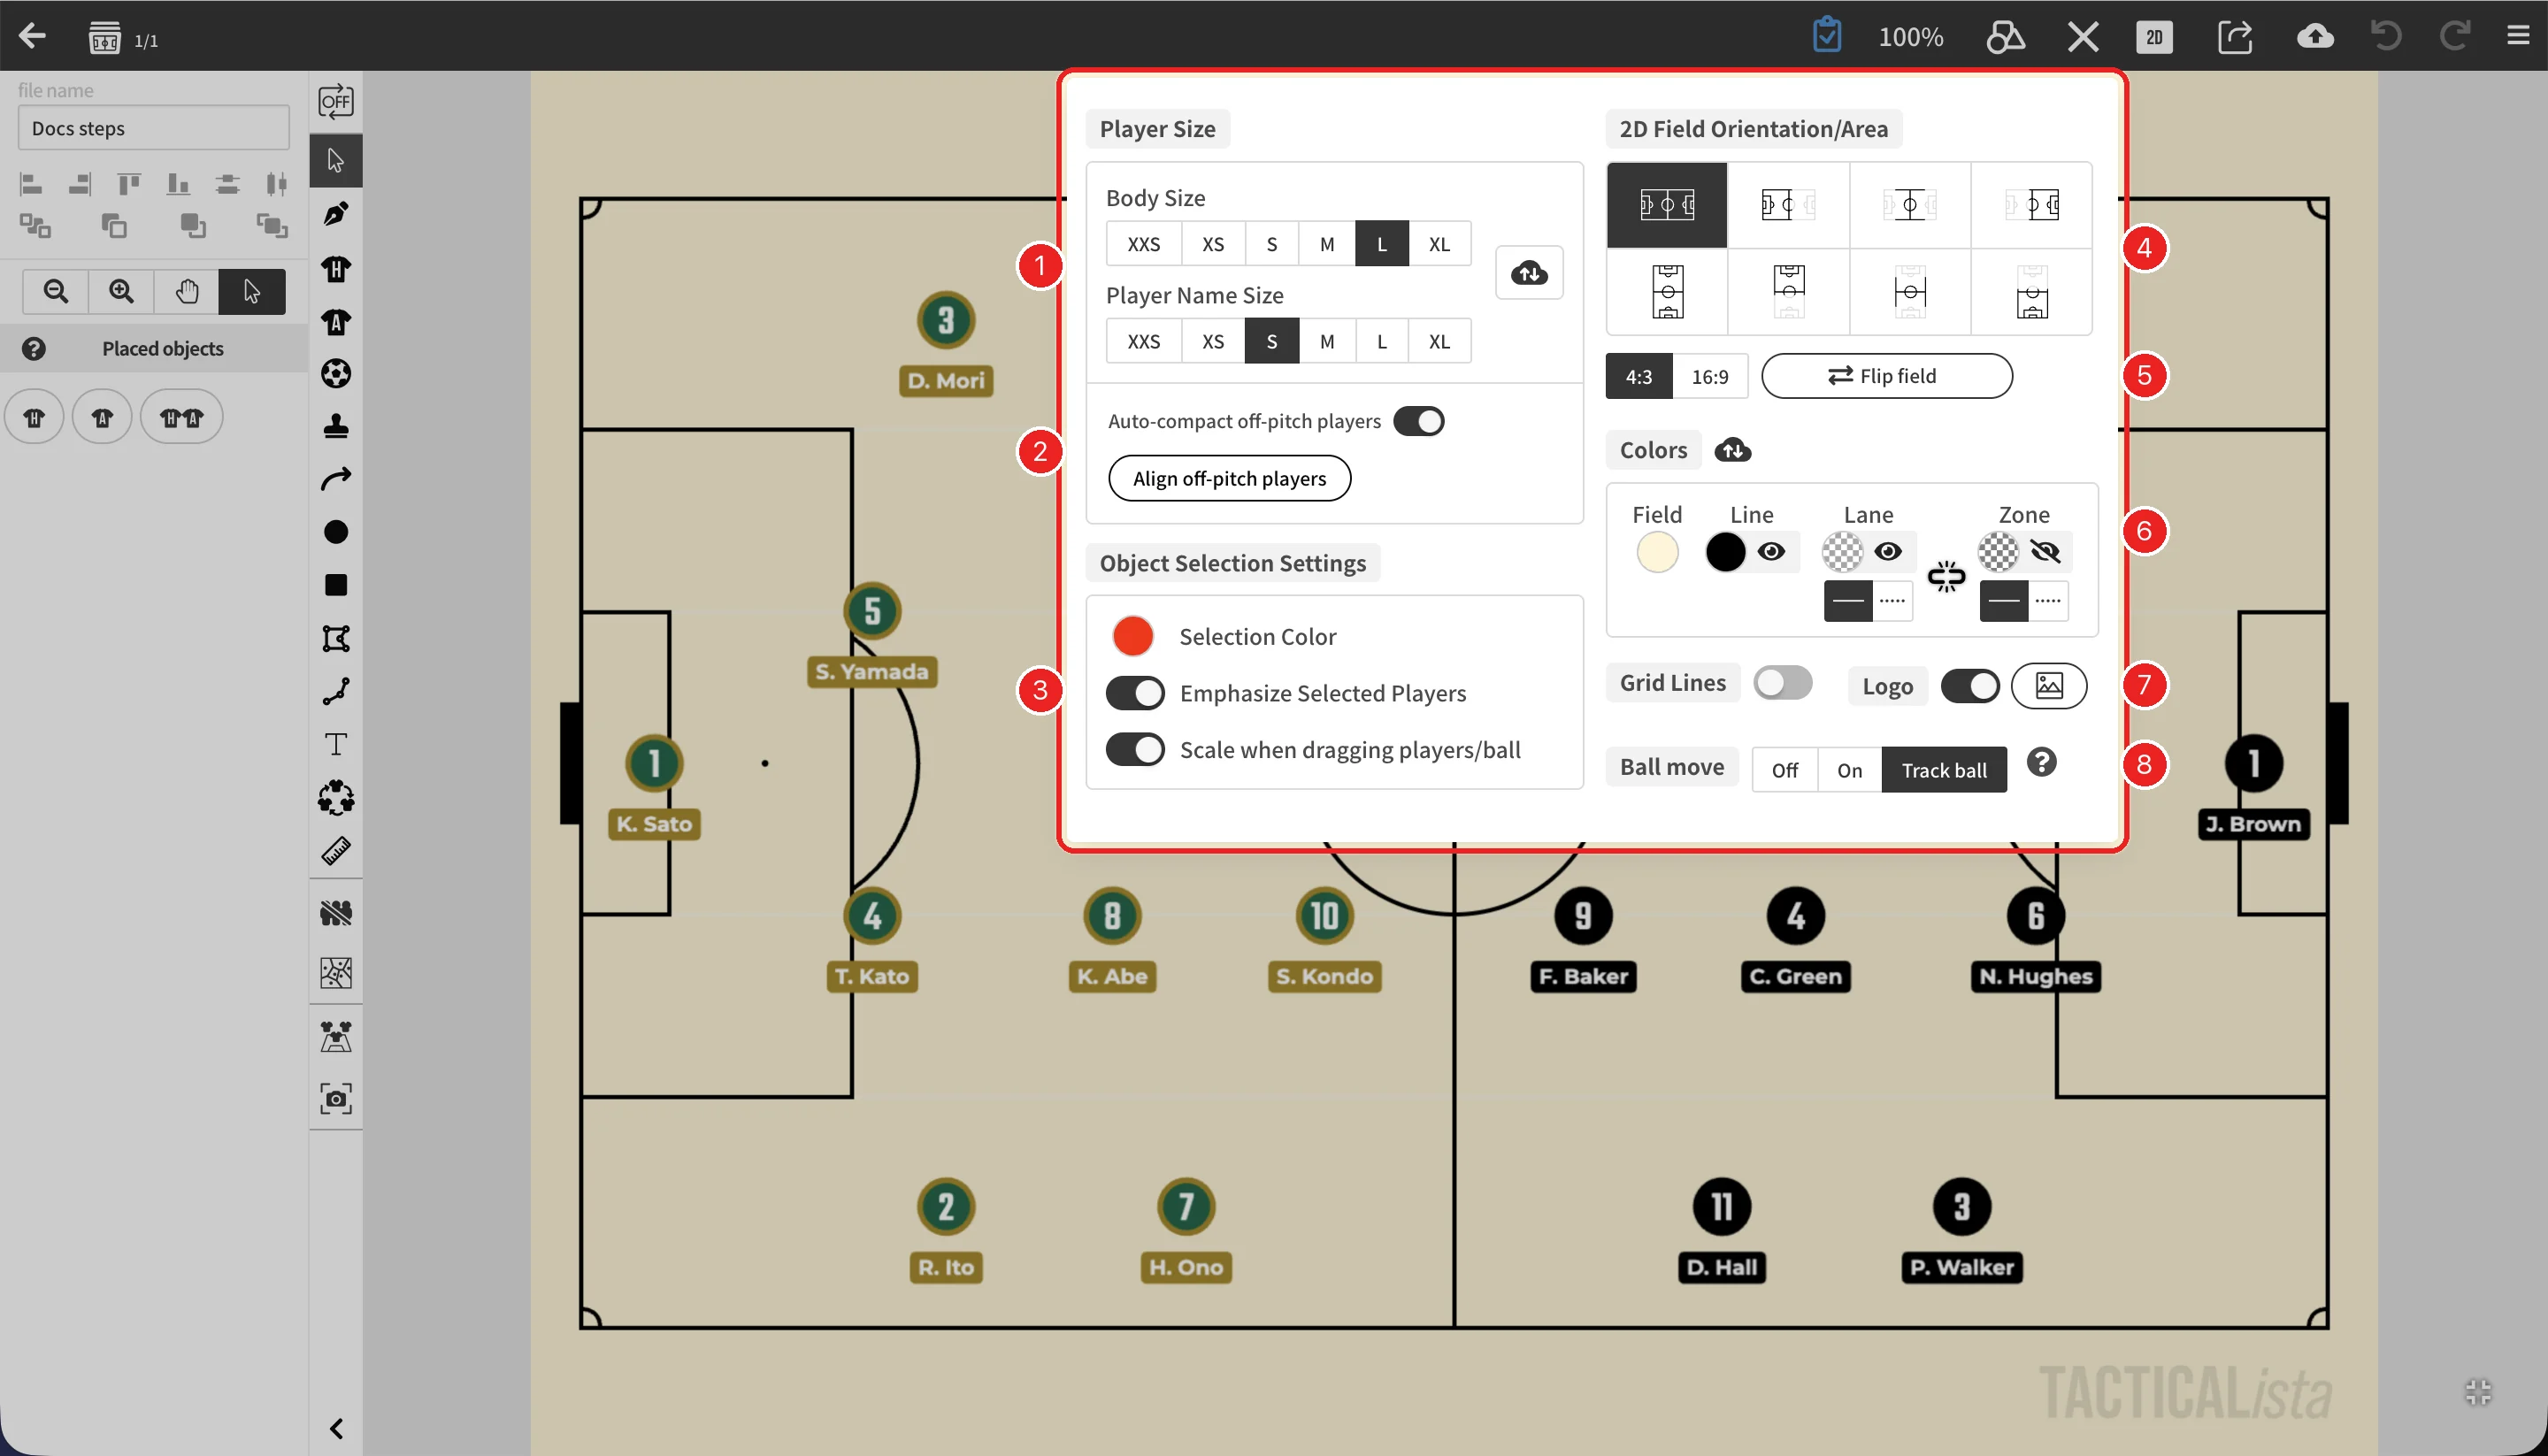
| No. | Item | Description |
|---|---|---|
| 1 | Player Size | Body size and name size for all players. → Player Objects |
| 2 | Off-pitch players | Lining up players moved off the pitch. → Off-pitch players |
| 3 | Object Selection Settings | Selection color, emphasizing selected players, and scaling while dragging. → Basics of Objects |
| 4 | 2D Field Orientation/Area | Landscape or portrait, and the visible area. → Changing orientation and display area |
| 5 | Aspect ratio / Flip field | → Aspect ratio, Flipping placed objects |
| 6 | Colors | Colors of the field, lines, lanes, and zones. → Field colors |
| 7 | Grid Lines / Logo | → Grid lines, Logo display and custom logo |
| 8 | Ball move | Moves the ball to the spot you click. → Ball move |
Changing orientation and display area
Use the buttons under "2D Field Orientation/Area" to choose one of eight layouts: four landscape and four portrait.
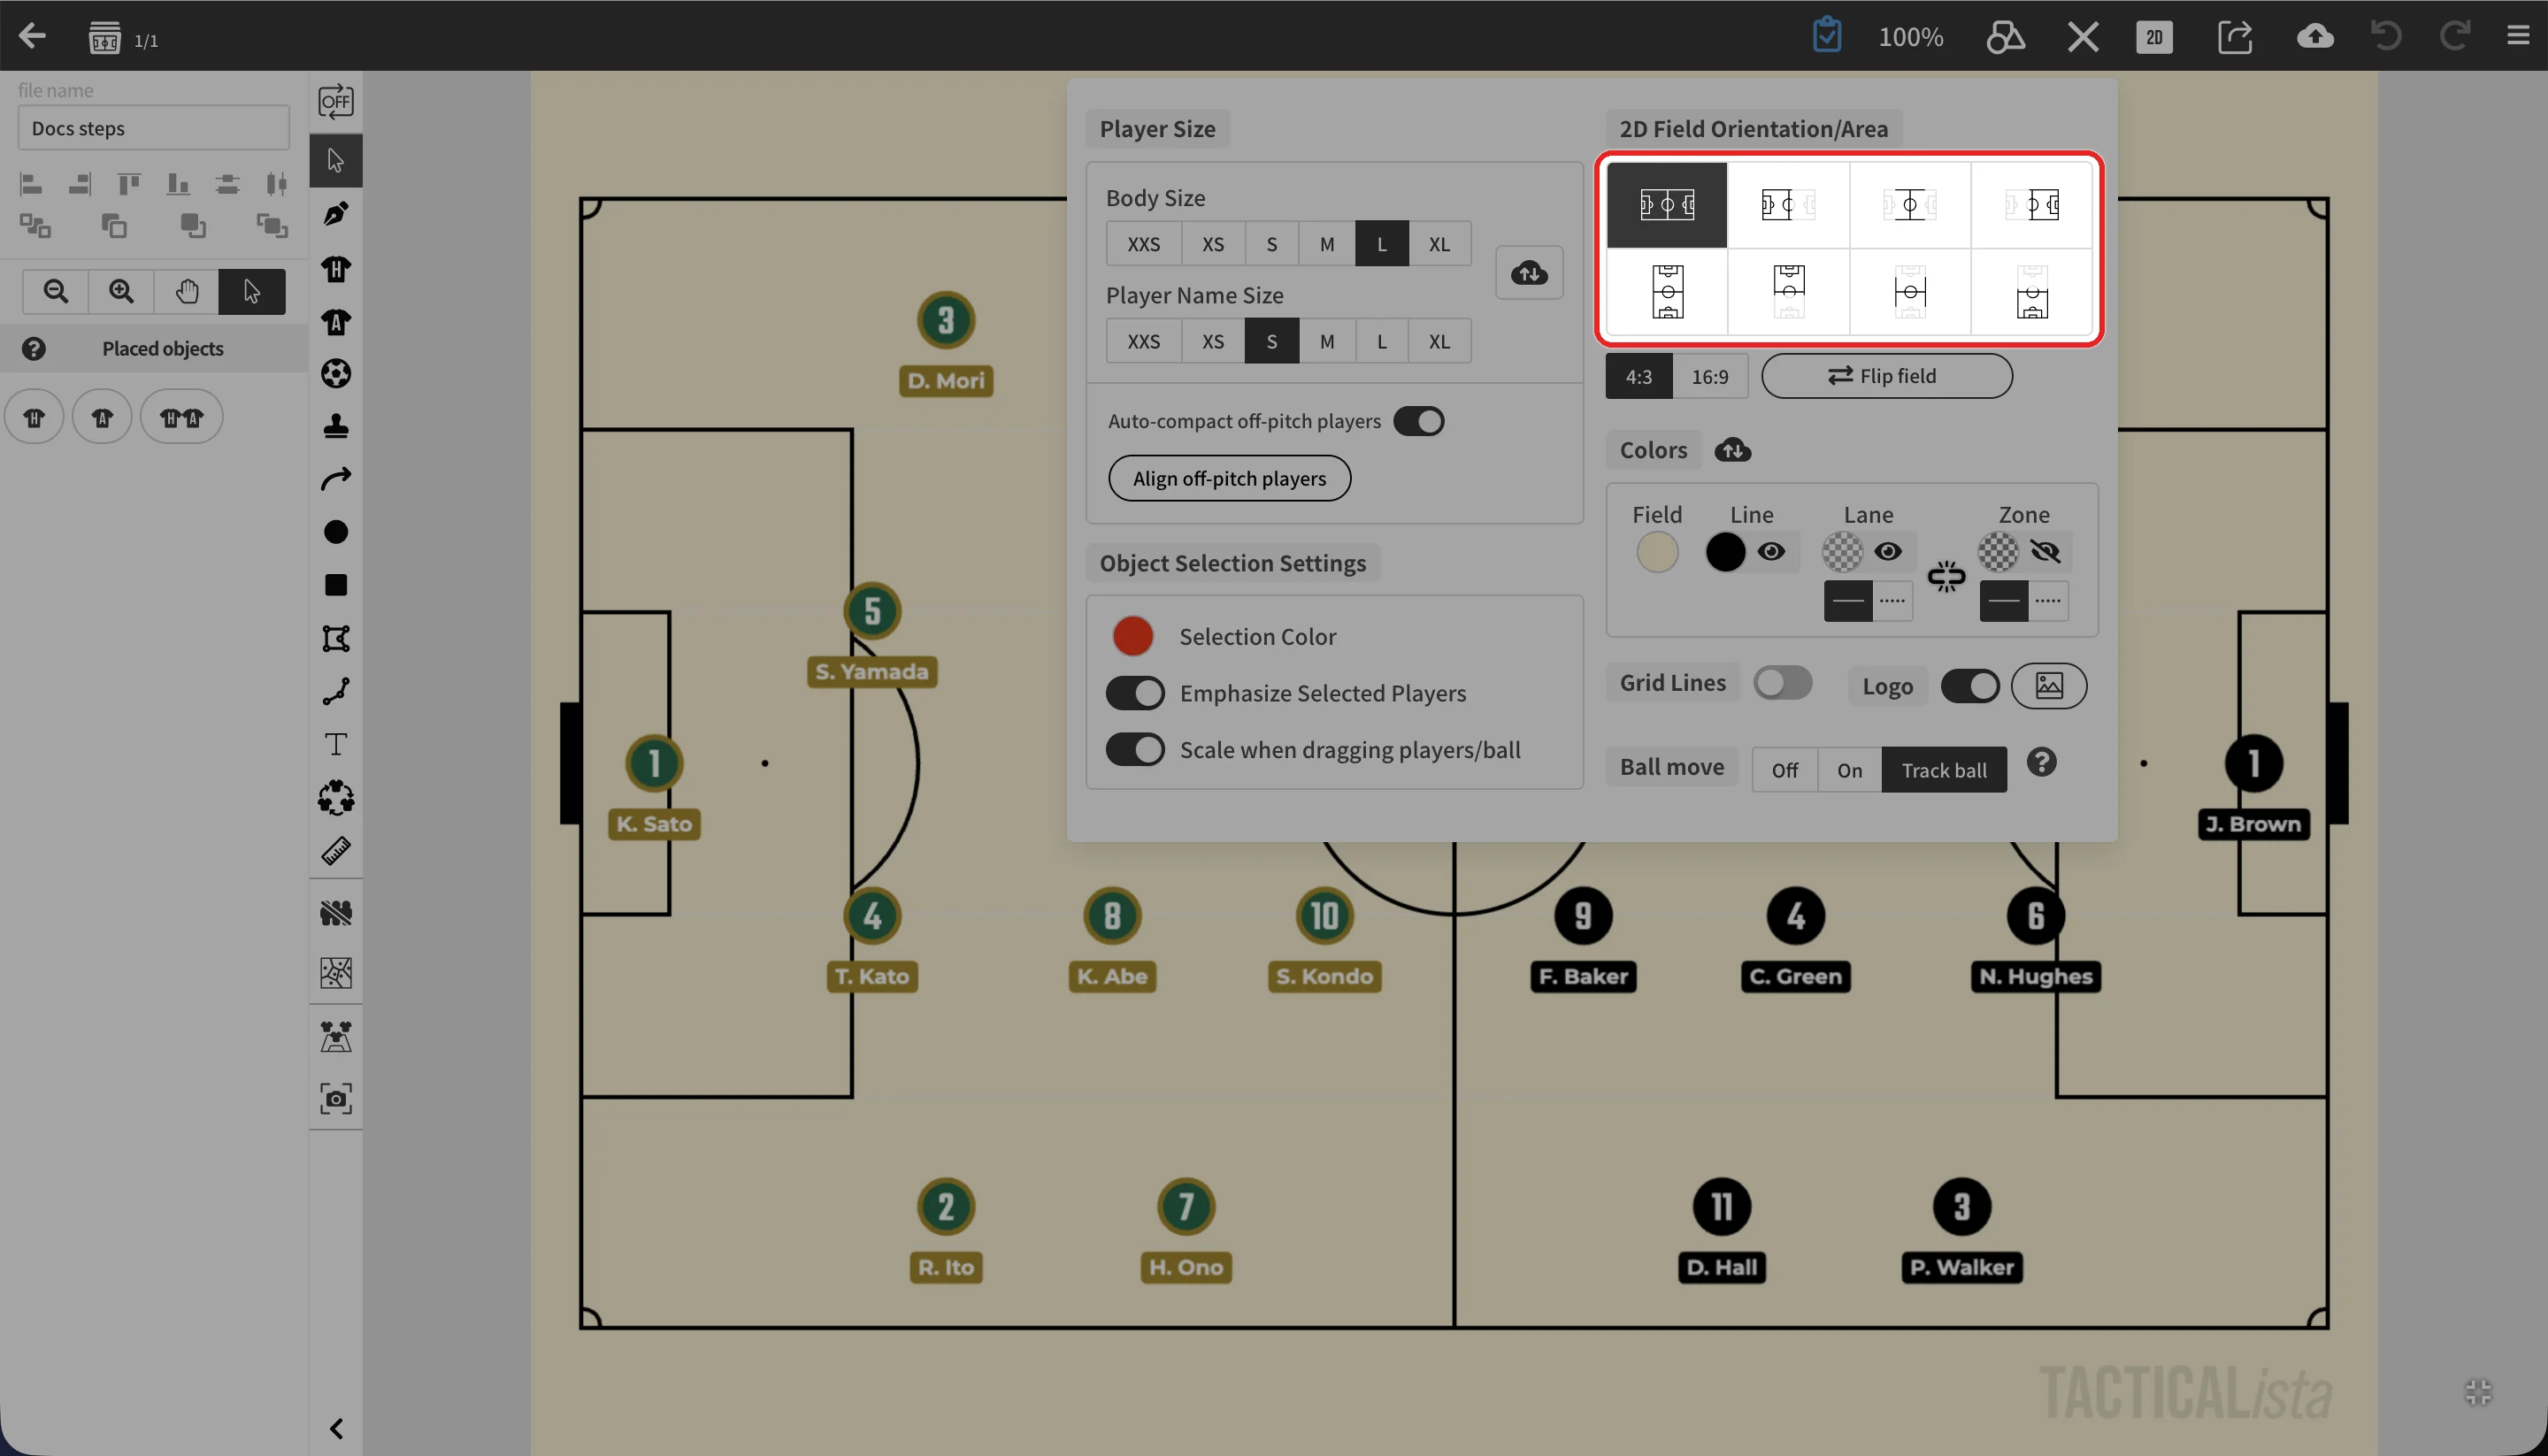
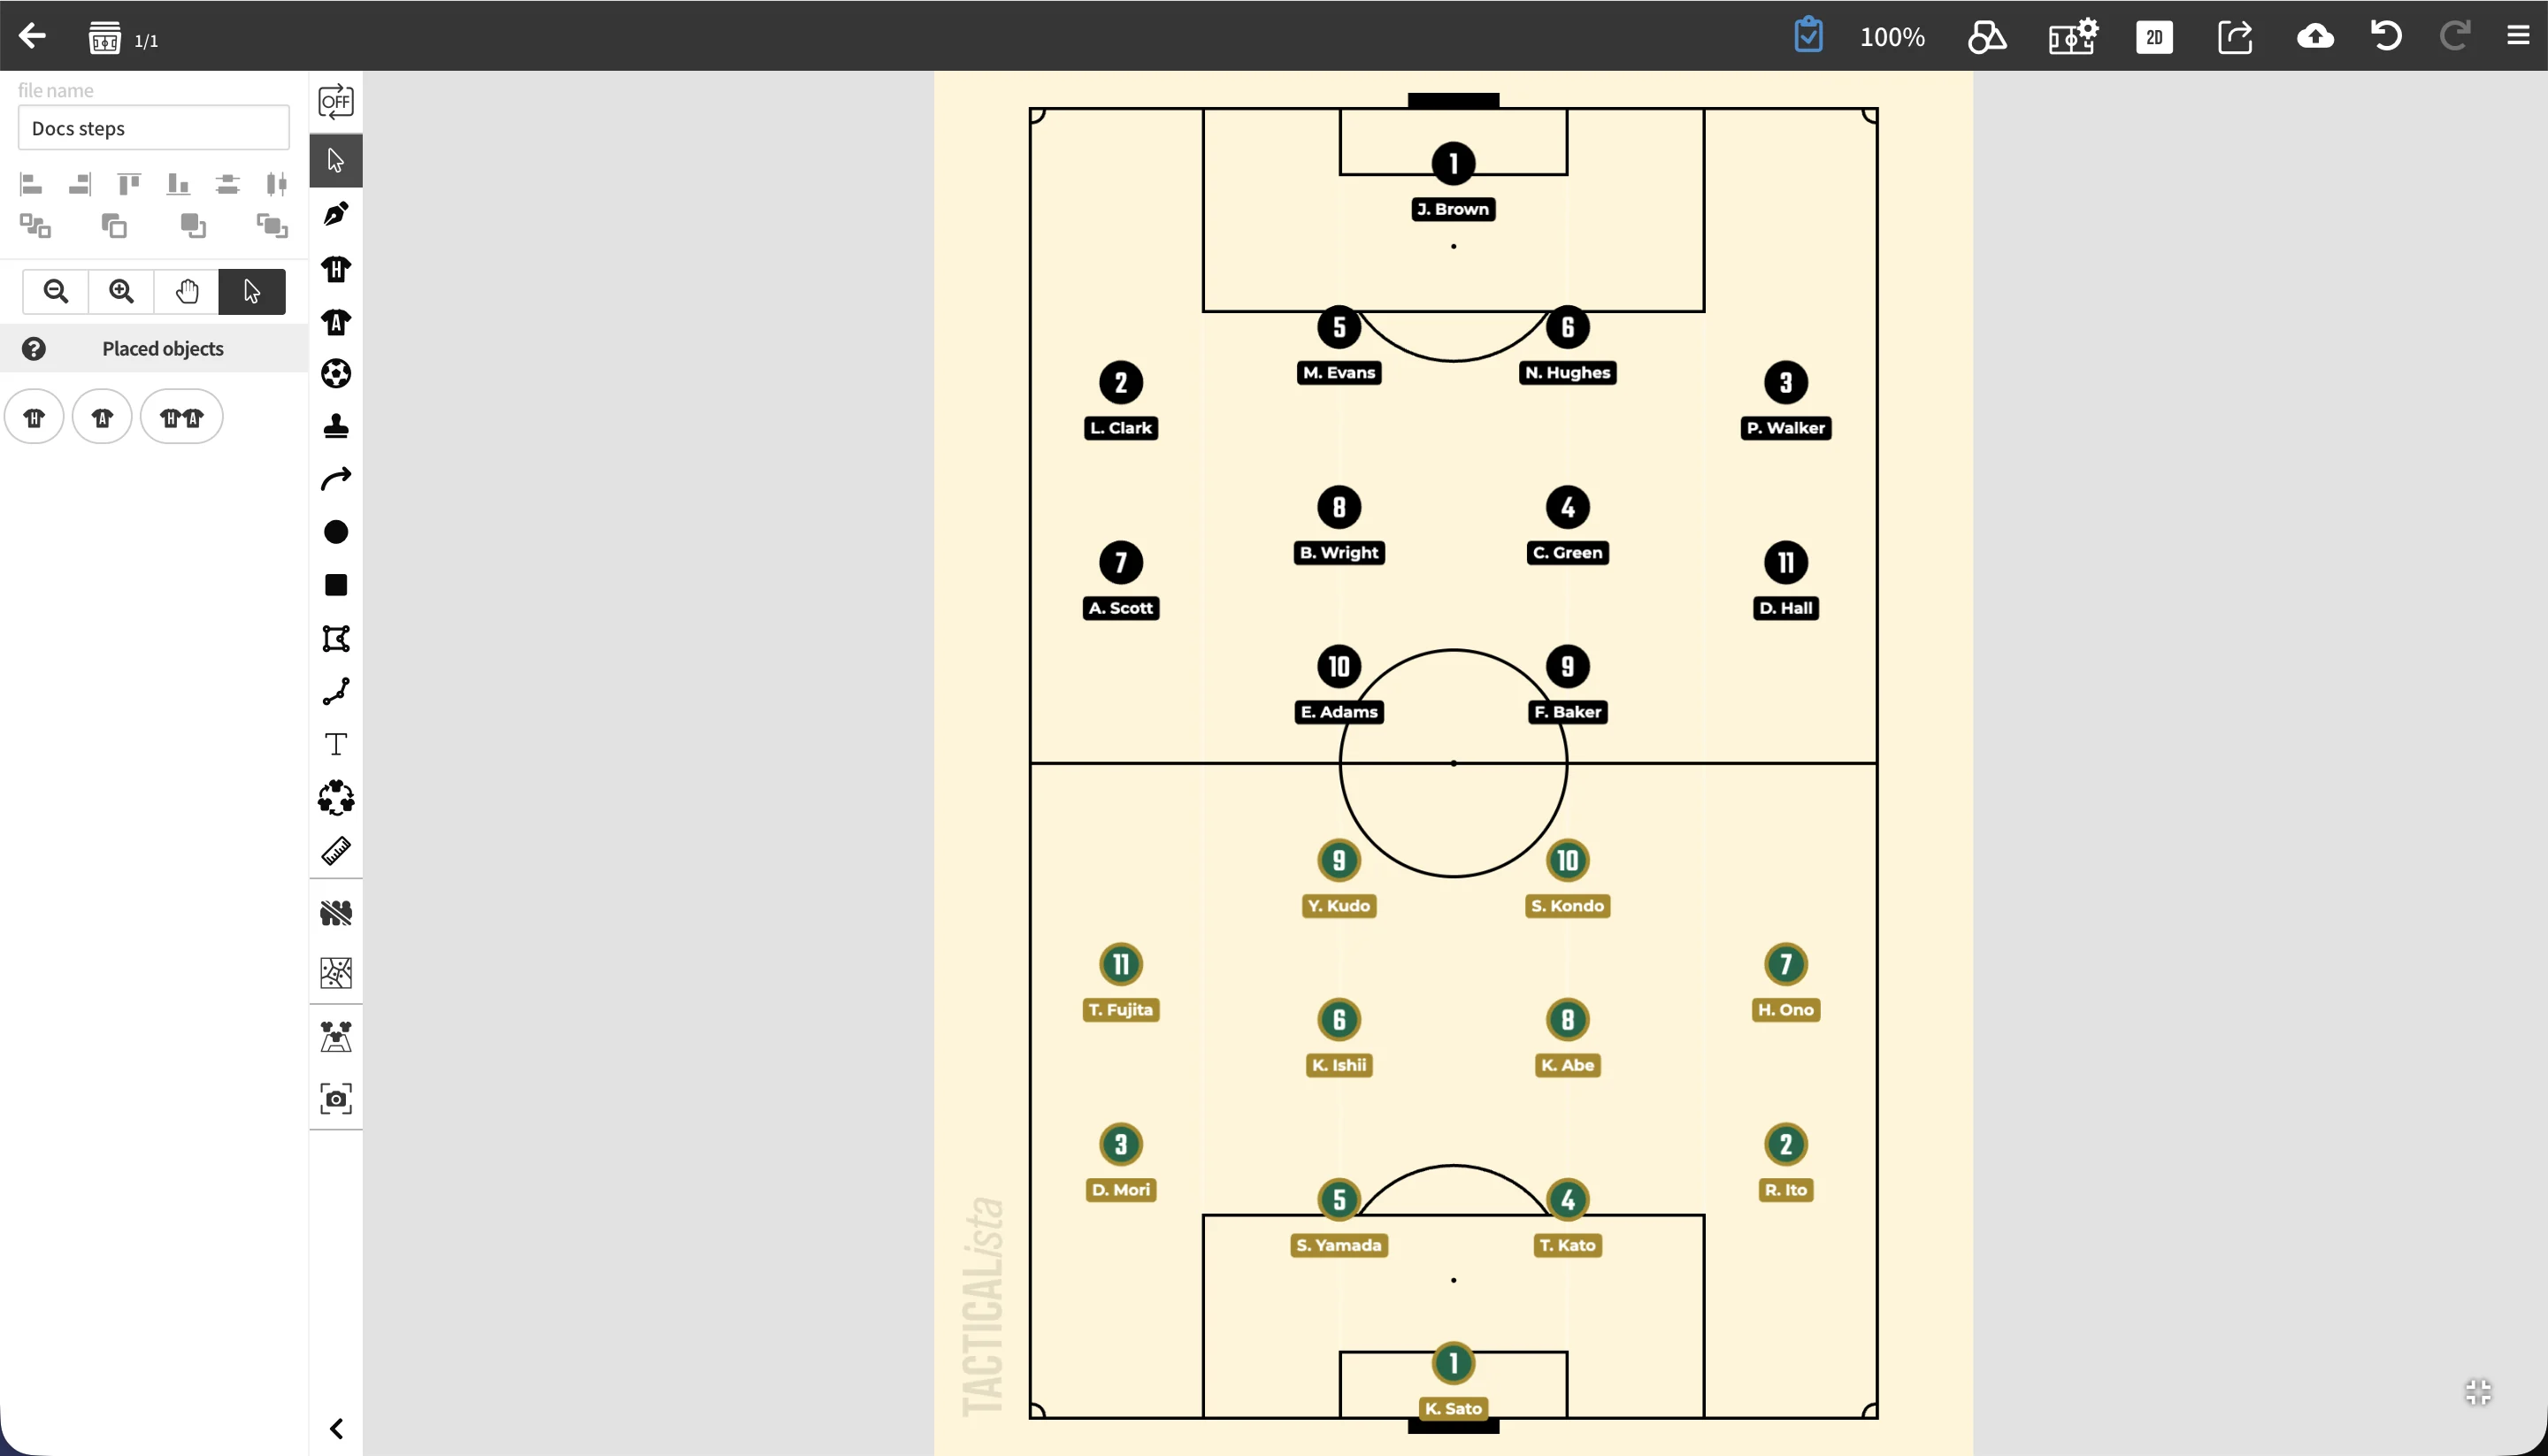
- Landscape: full pitch / left half / center / right half
- Portrait: full pitch / top half / center / bottom half
Custom boards
- Boards created with the "Blank" tab only switch between landscape and portrait. Instead of the layout buttons, the panel shows fields for the canvas dimensions in meters, which can be changed per scene.
- Custom boards created with the "Field" tab can use all eight layouts. The pitch dimensions and player count cannot be changed after creation, so the panel shows the current settings (for example, 68m × 50m / 8v8).
See Custom Field for details.
Aspect ratio
The field's display ratio can be switched between "4:3" and "16:9". In portrait orientation these become 3:4 and 9:16.
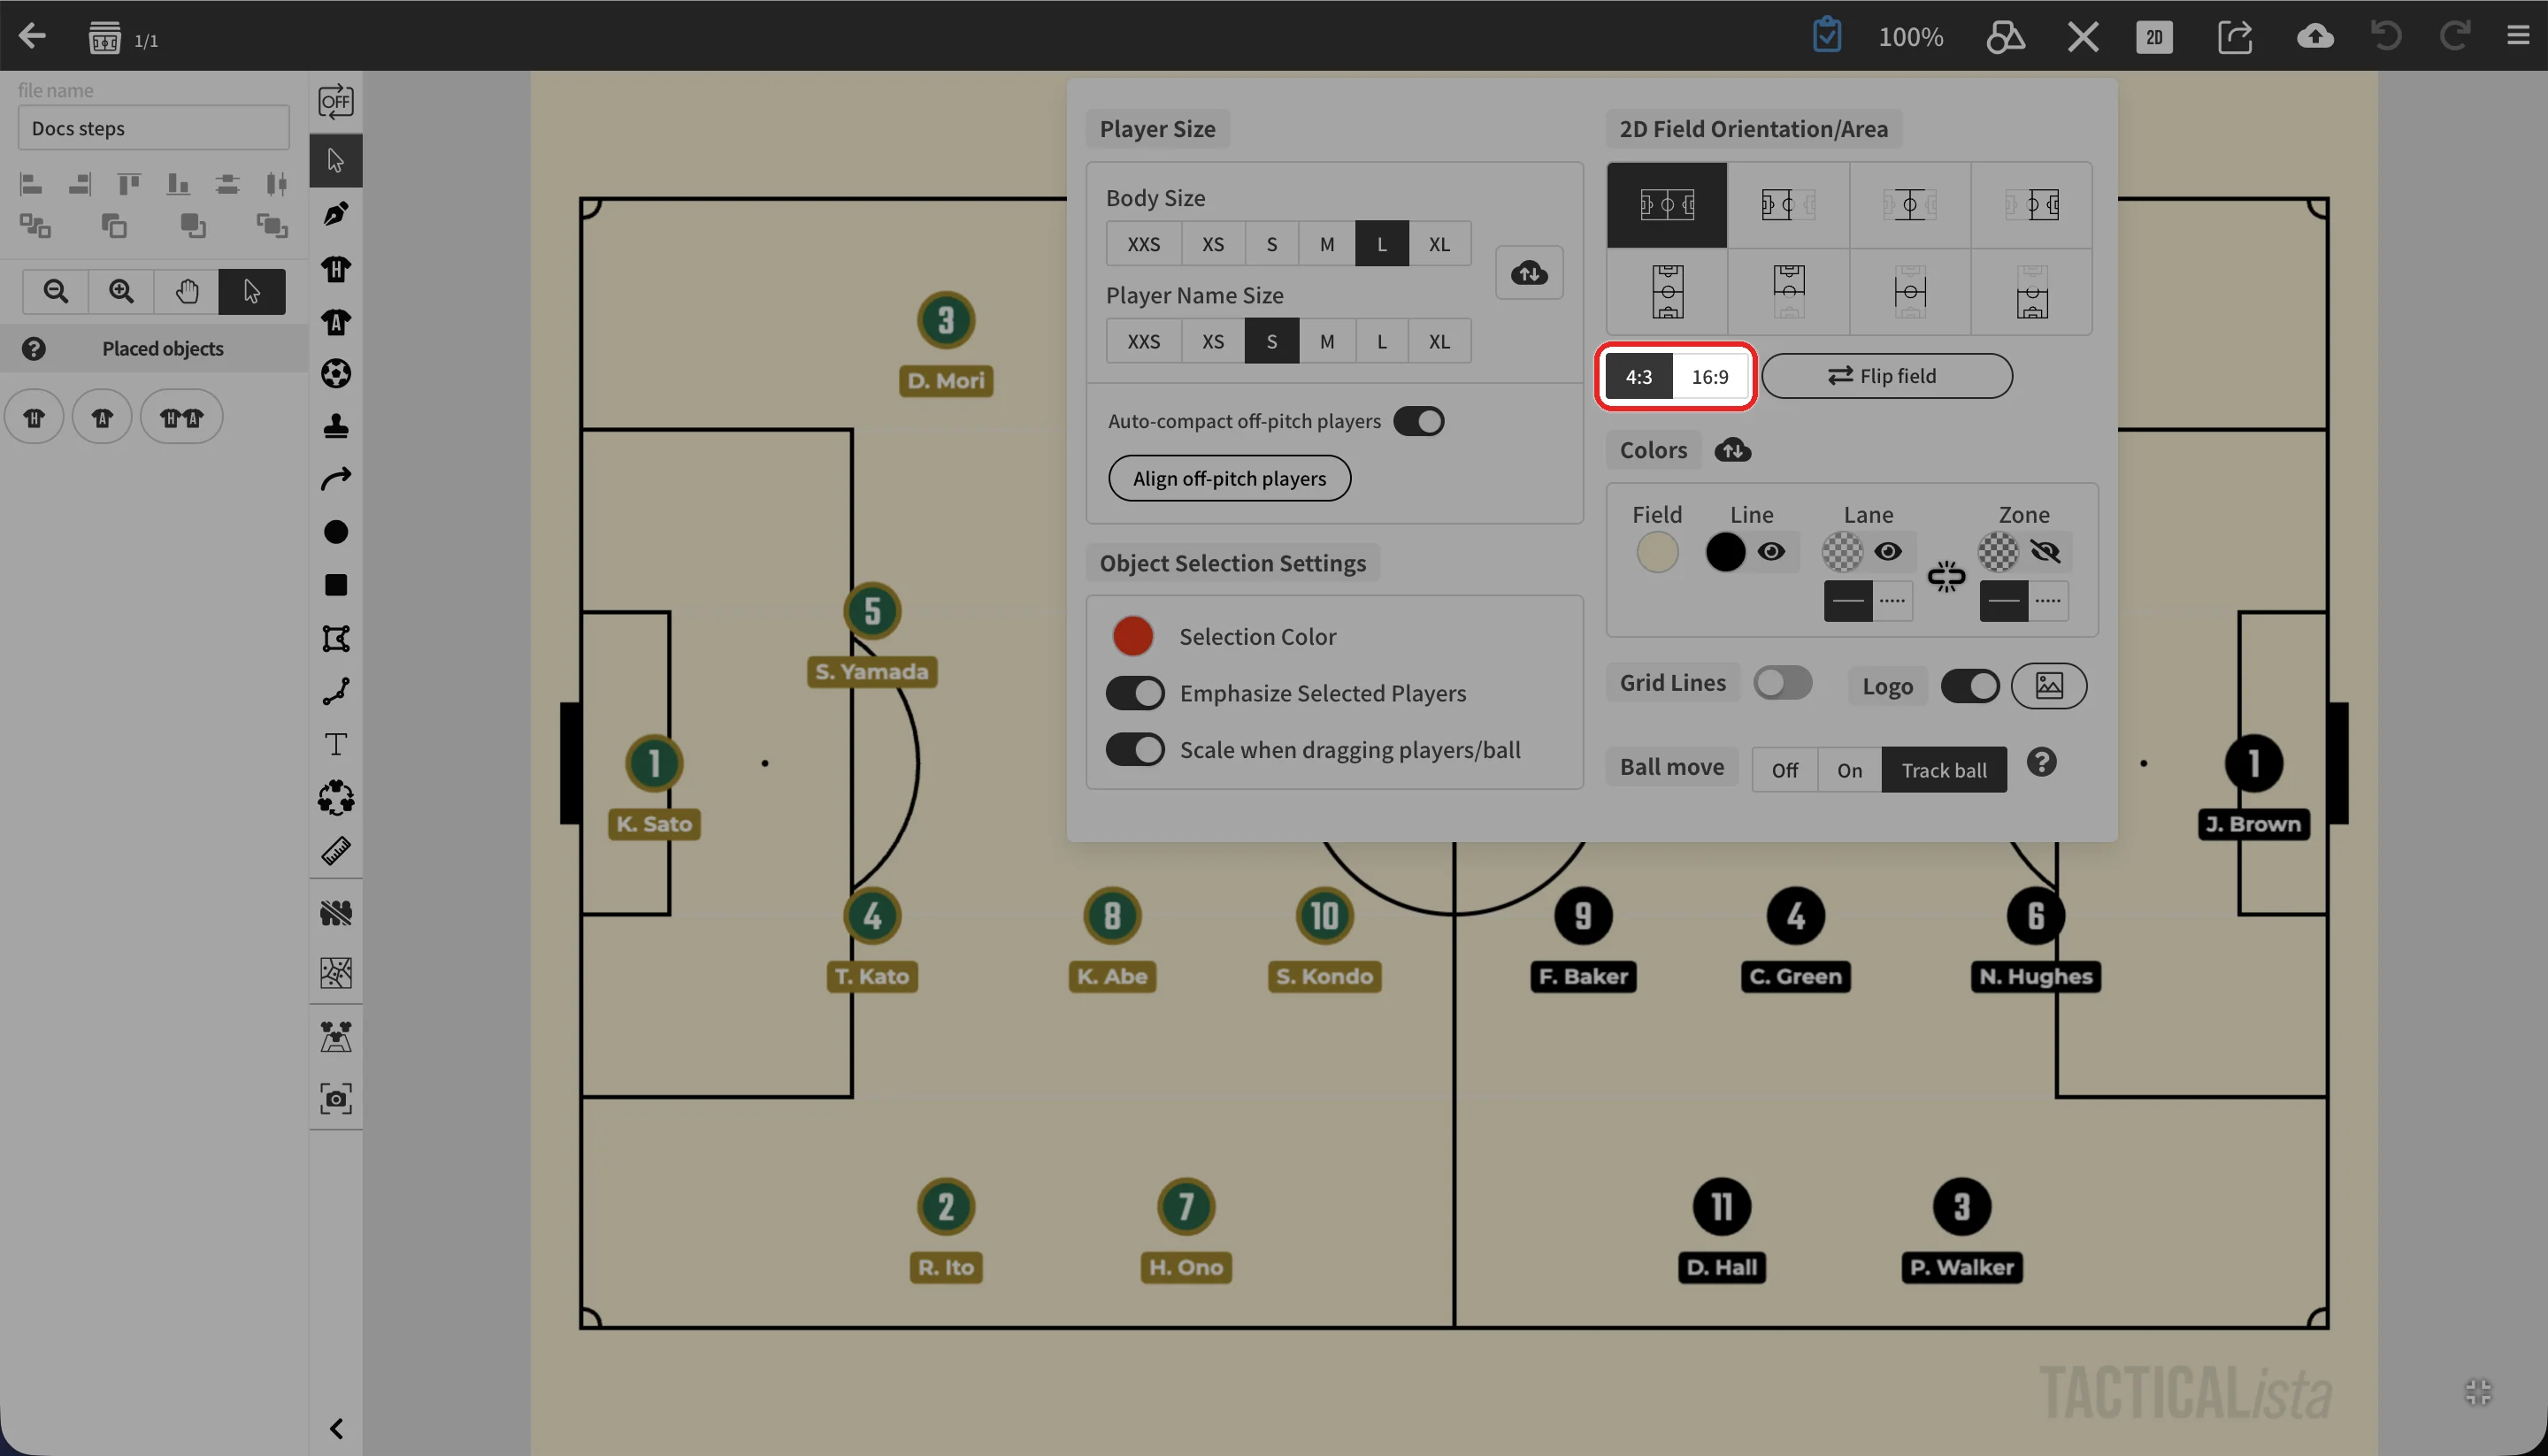
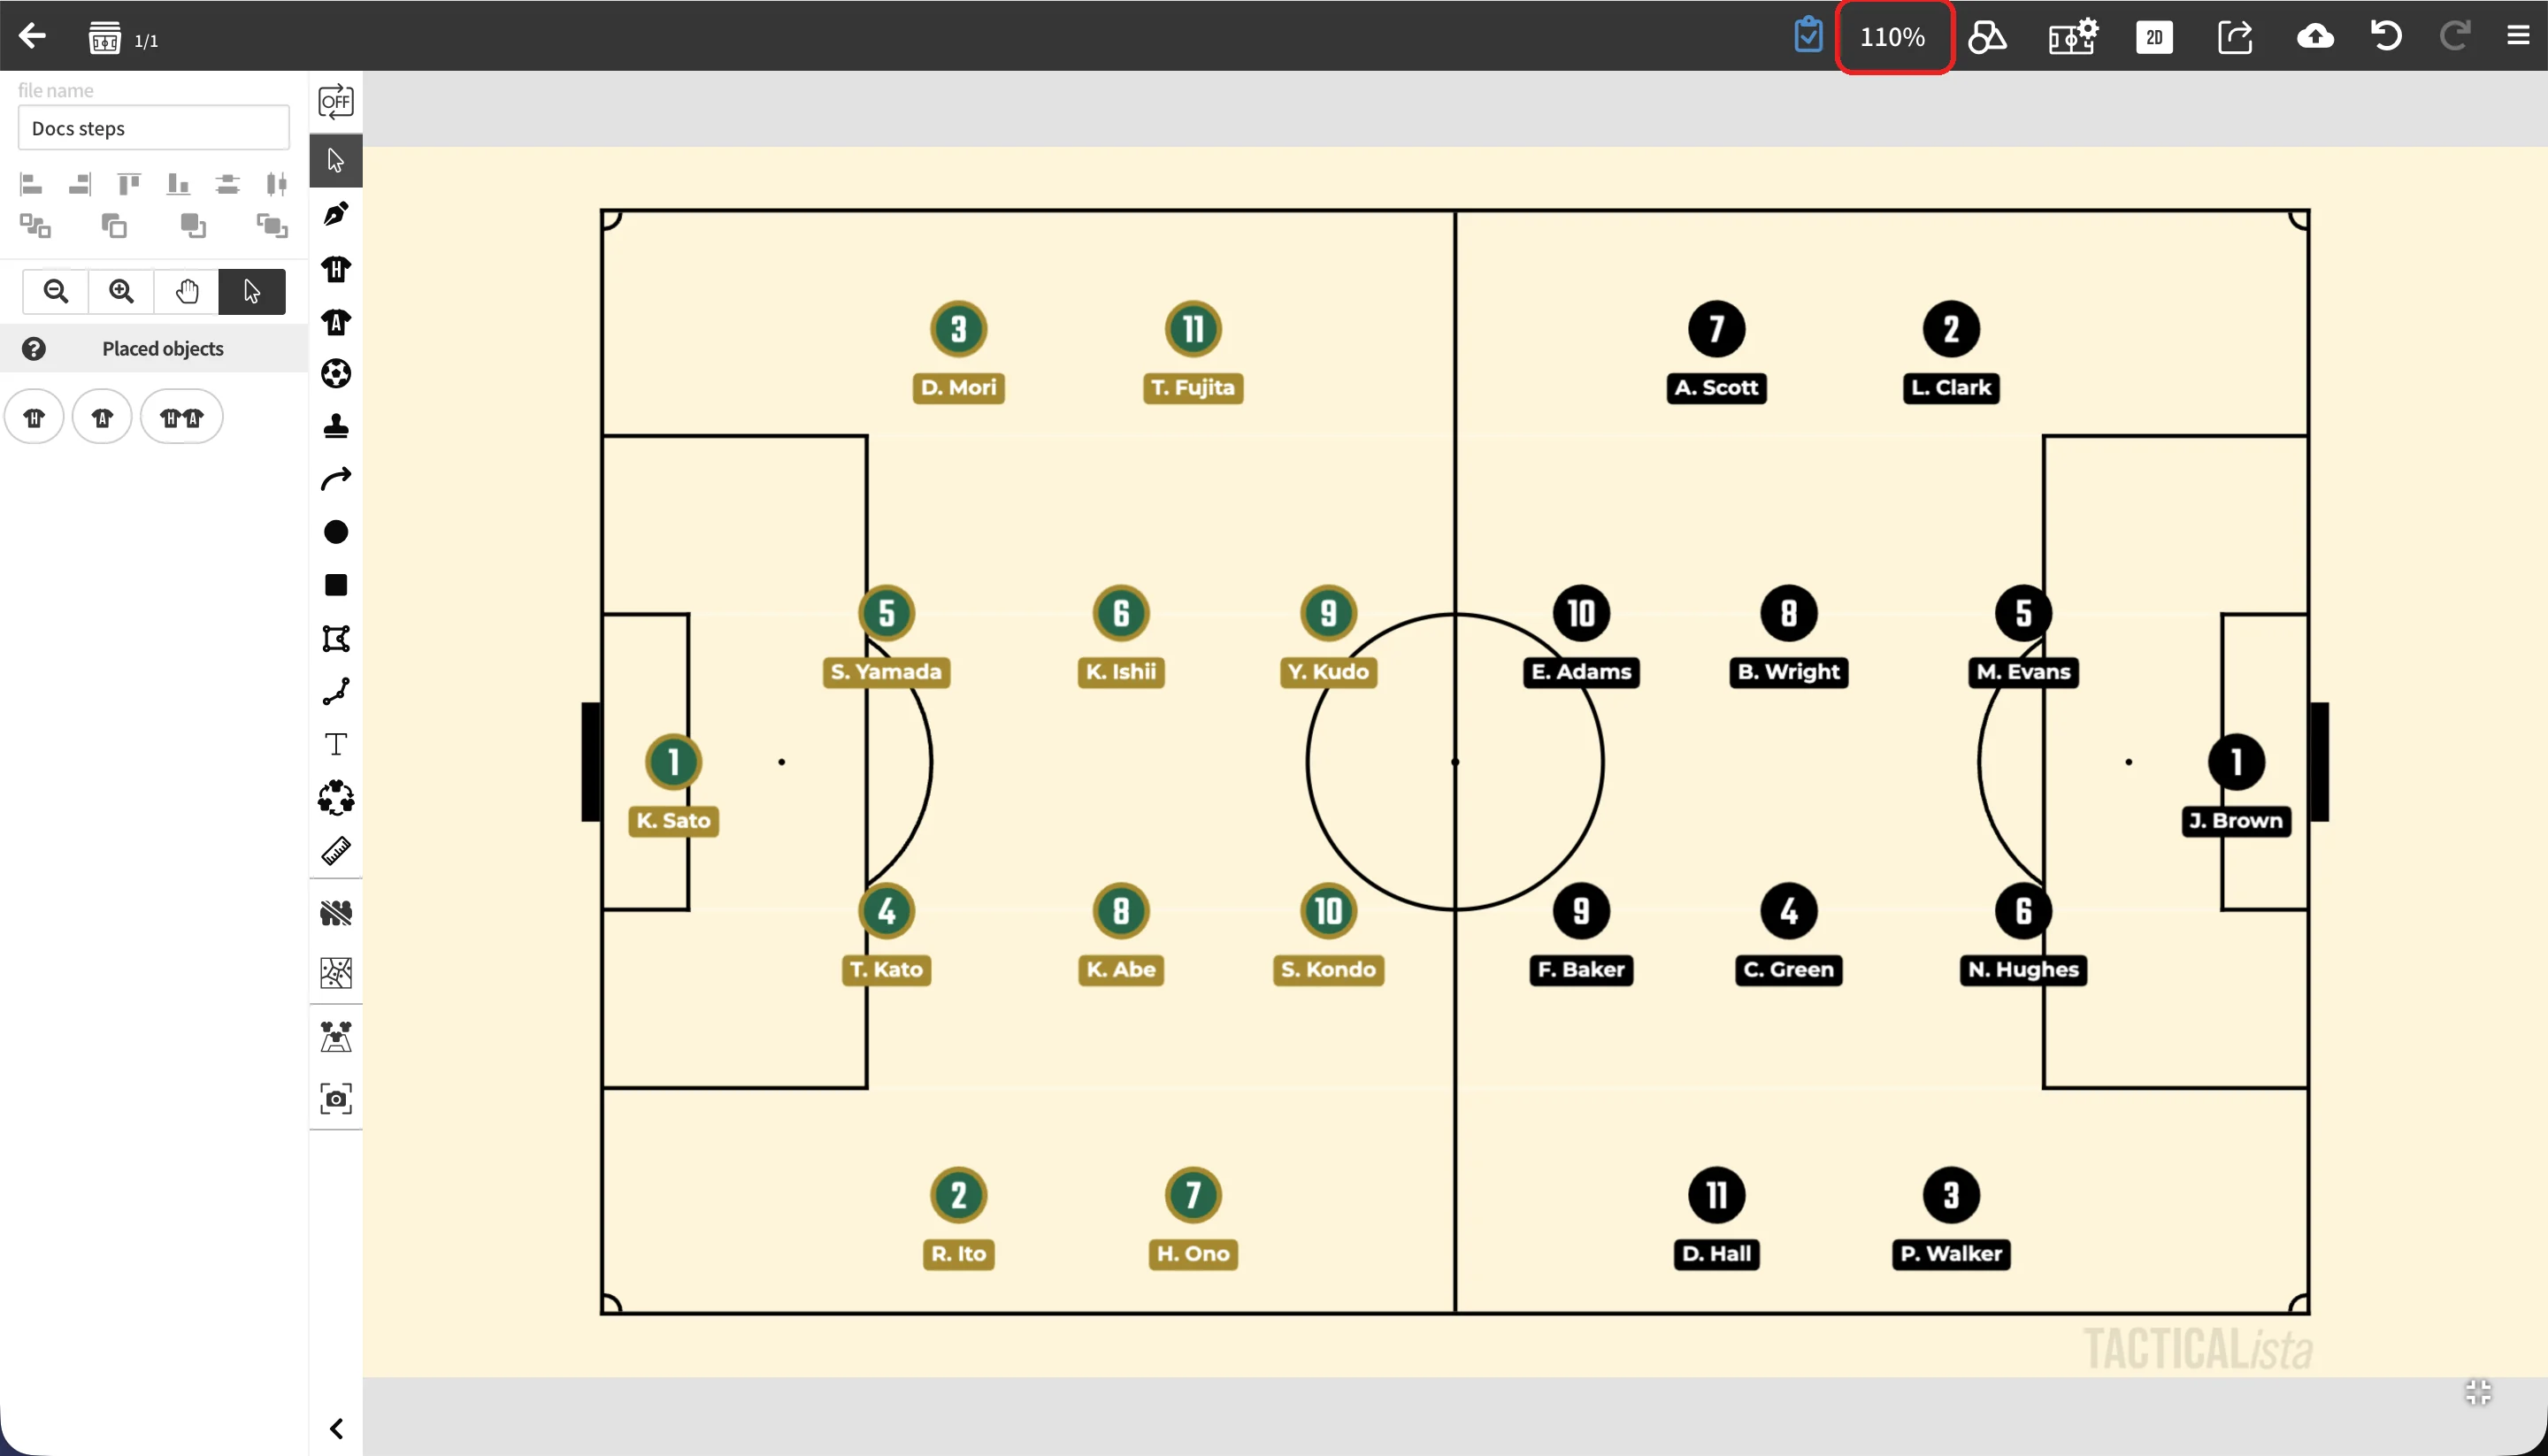
- Switching to 16:9 / 9:16 automatically applies a default zoom that depends on the layout (full pitch: 110%, half and center layouts: 150%).
- Switching back to 4:3 / 3:4 resets the zoom.
- Blank custom boards are fixed at 4:3 (3:4 in portrait).
Flipping placed objects
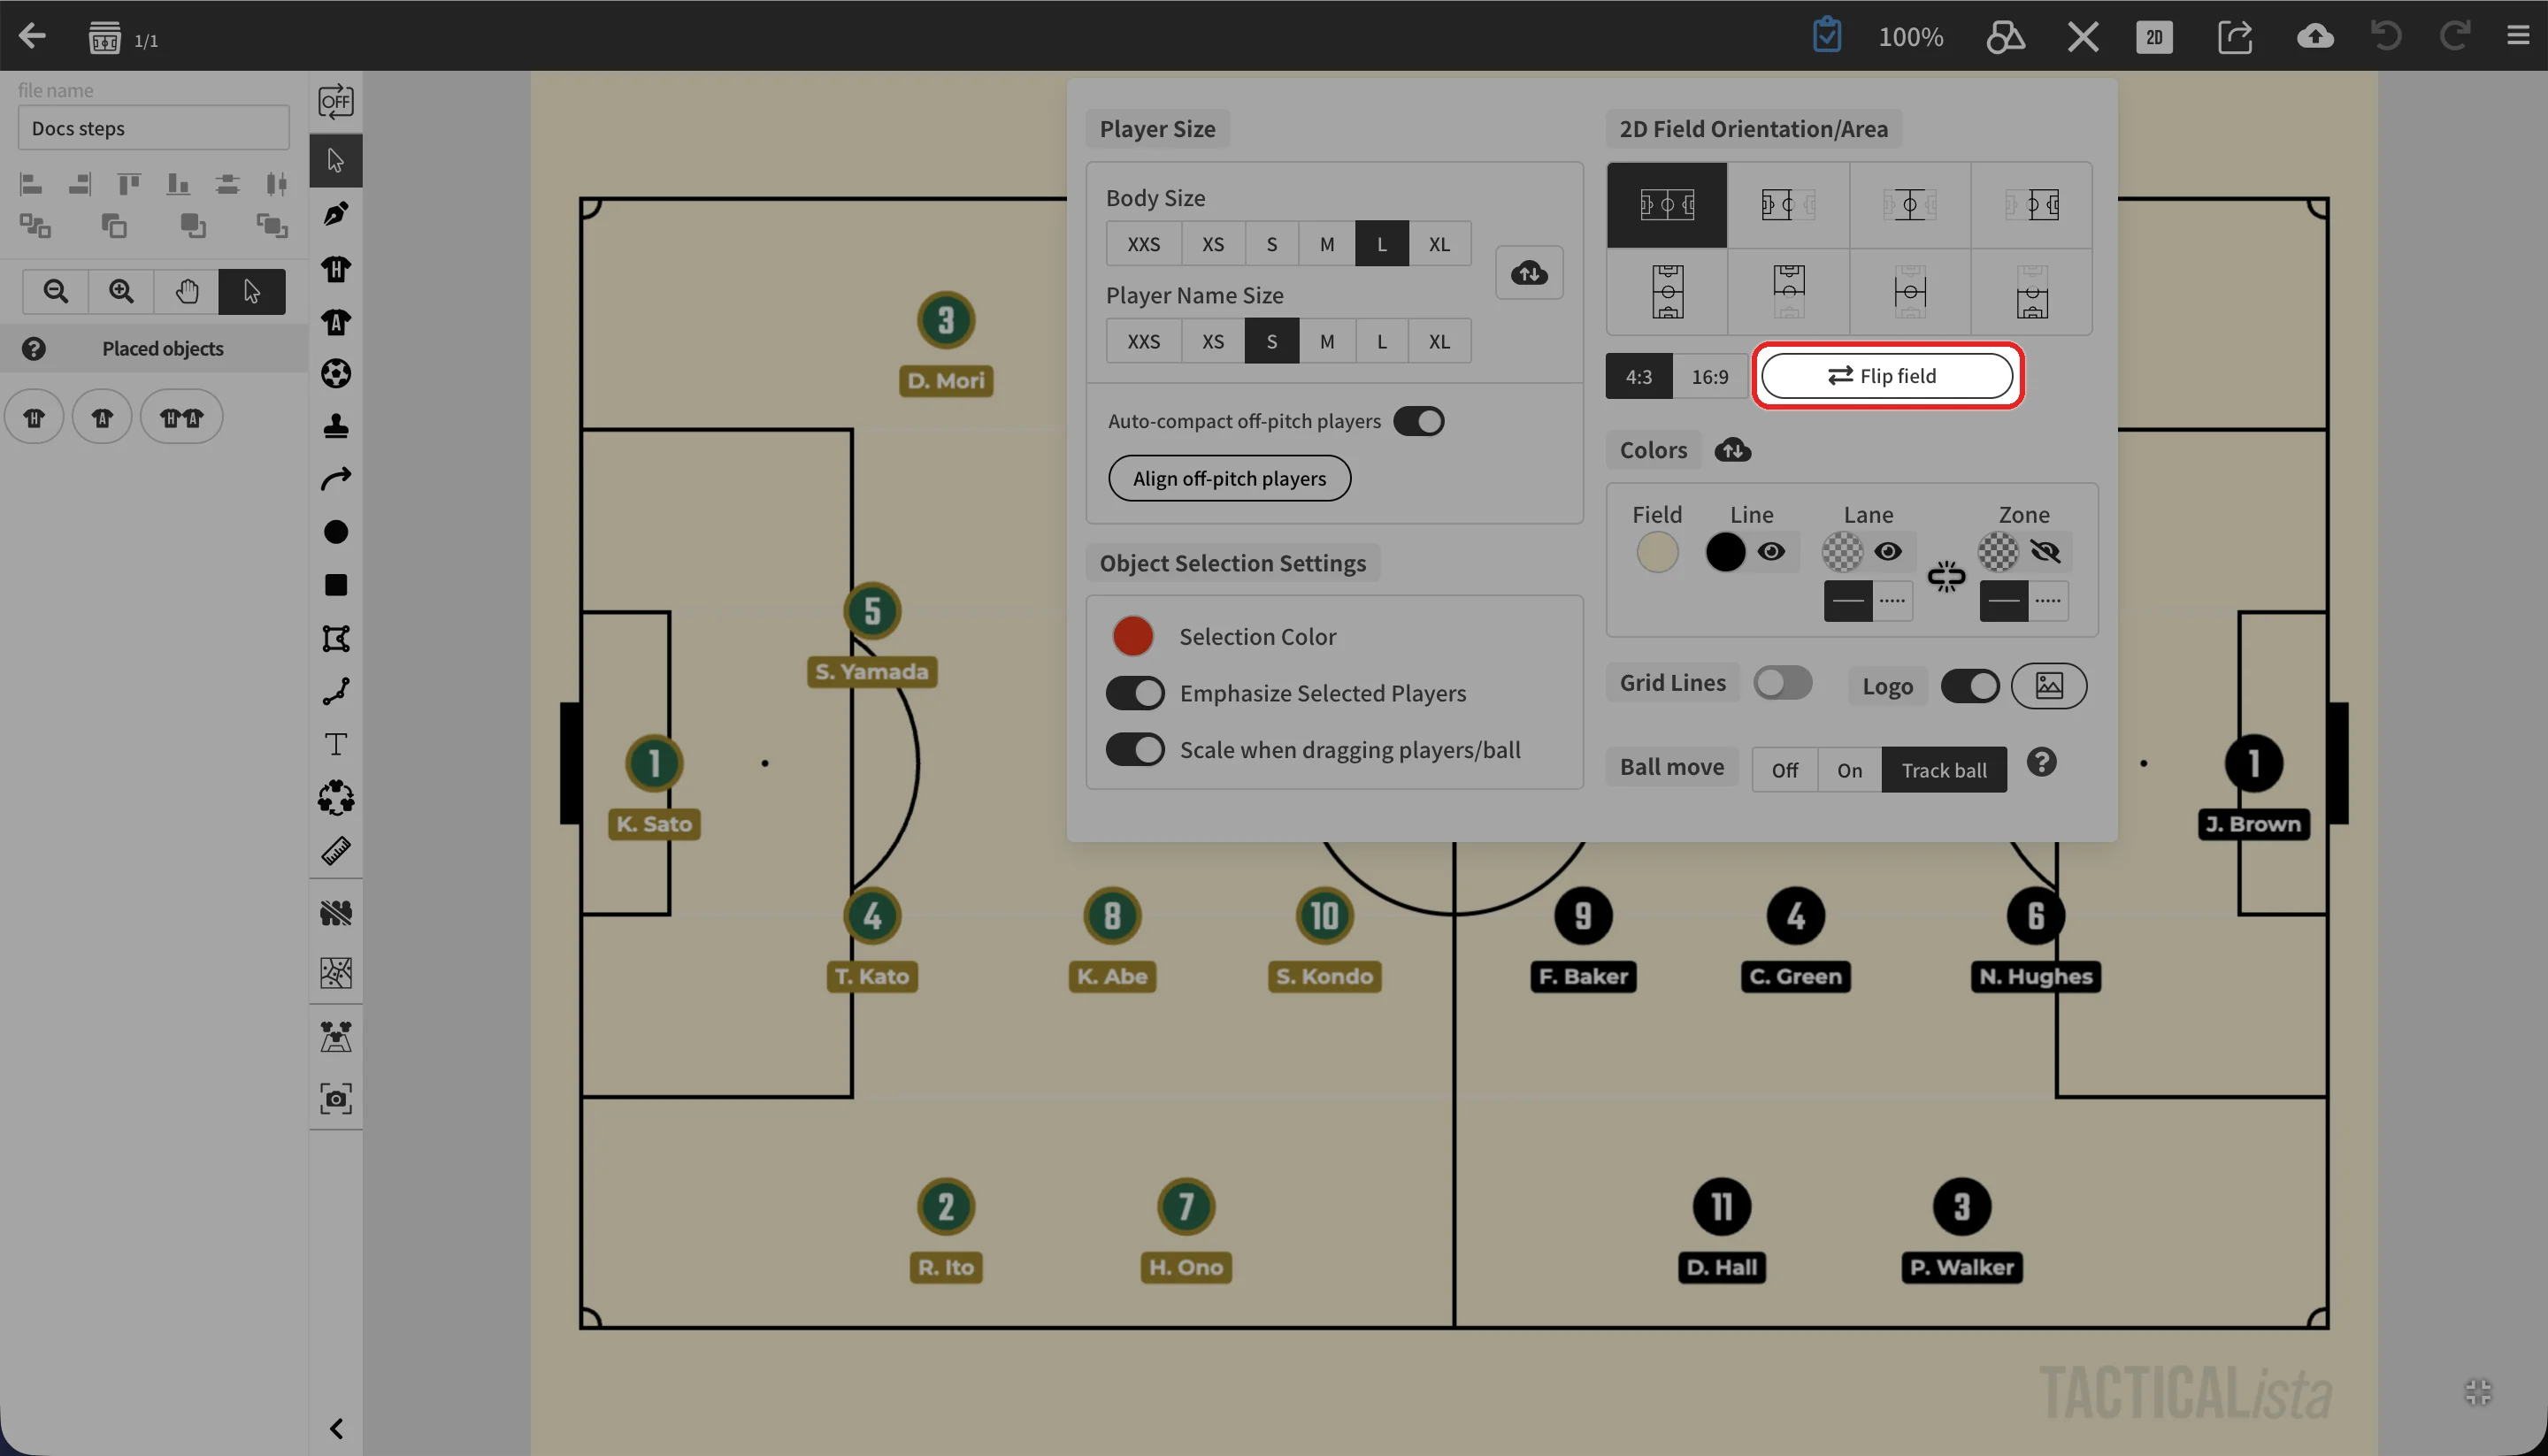
Press "Flip field" to rotate the positions of the placed objects 180 degrees around the center of the field, so the two teams swap attacking directions. This is only available when the field is in full view.
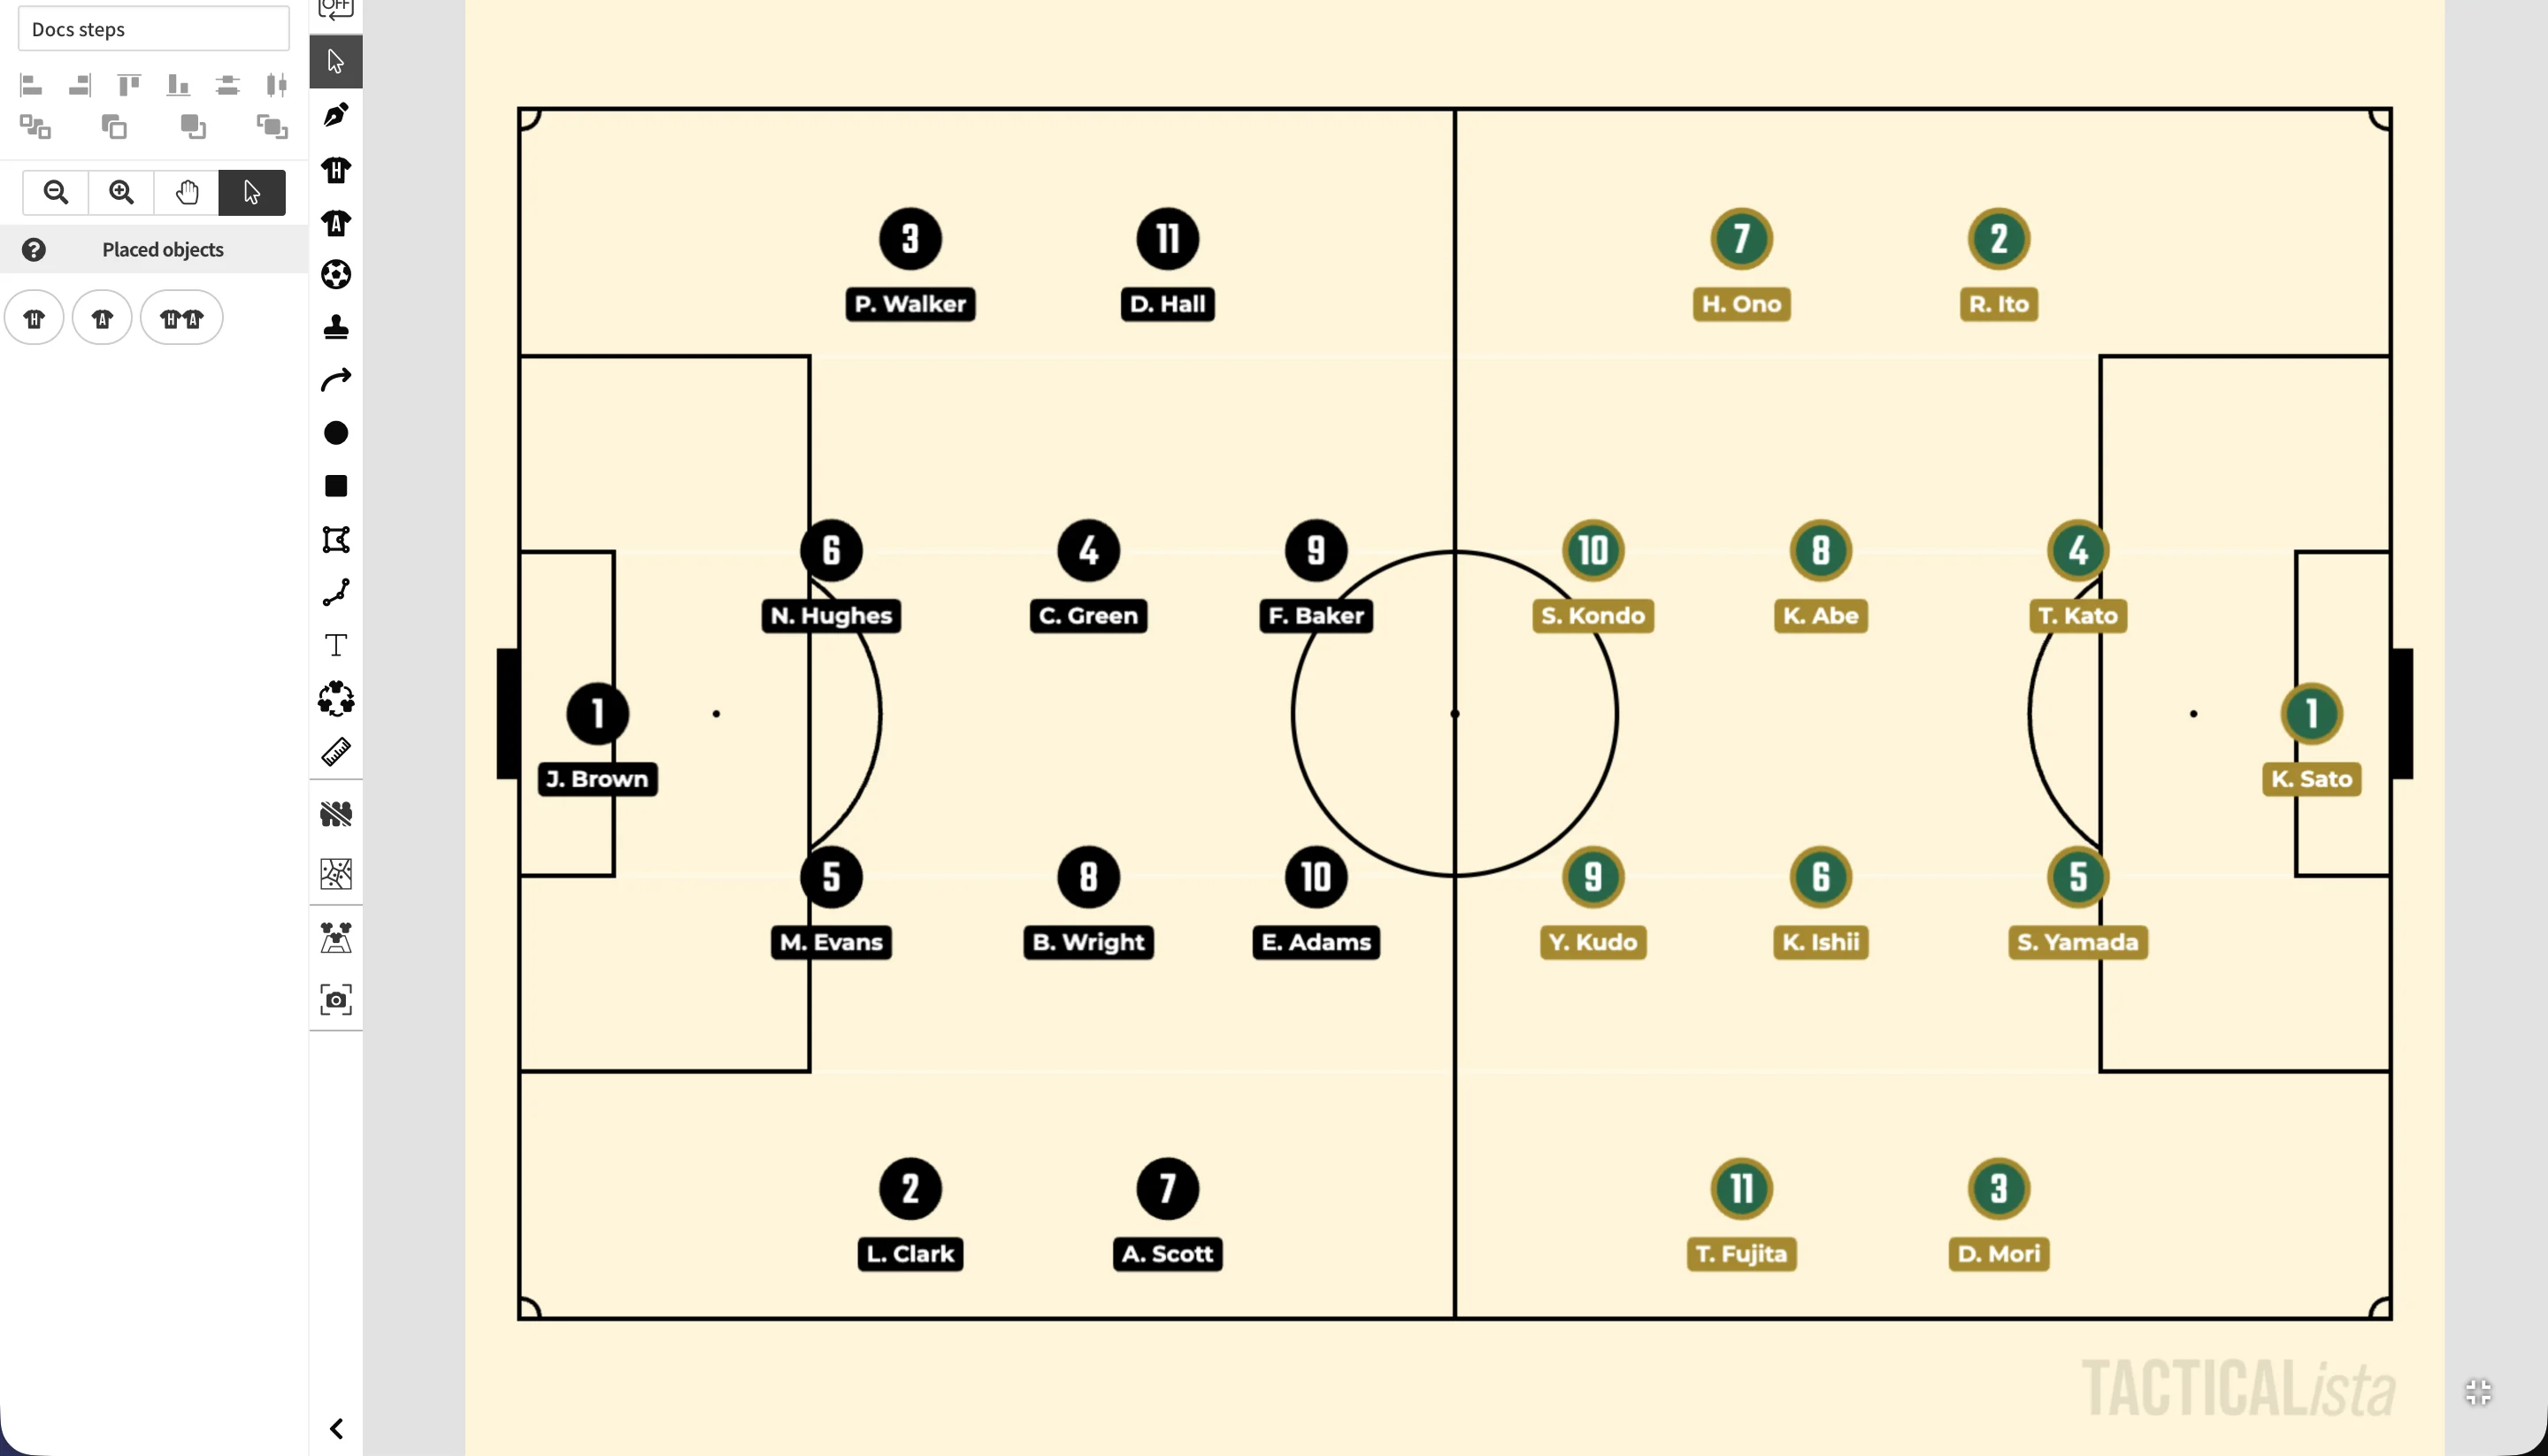
Field colors
Use the color pickers under "Colors" to change the field background (Field), the lines (Line), the lanes that divide the field lengthwise into five sections (Lane), and the zones that divide it crosswise into three sections (Zone).
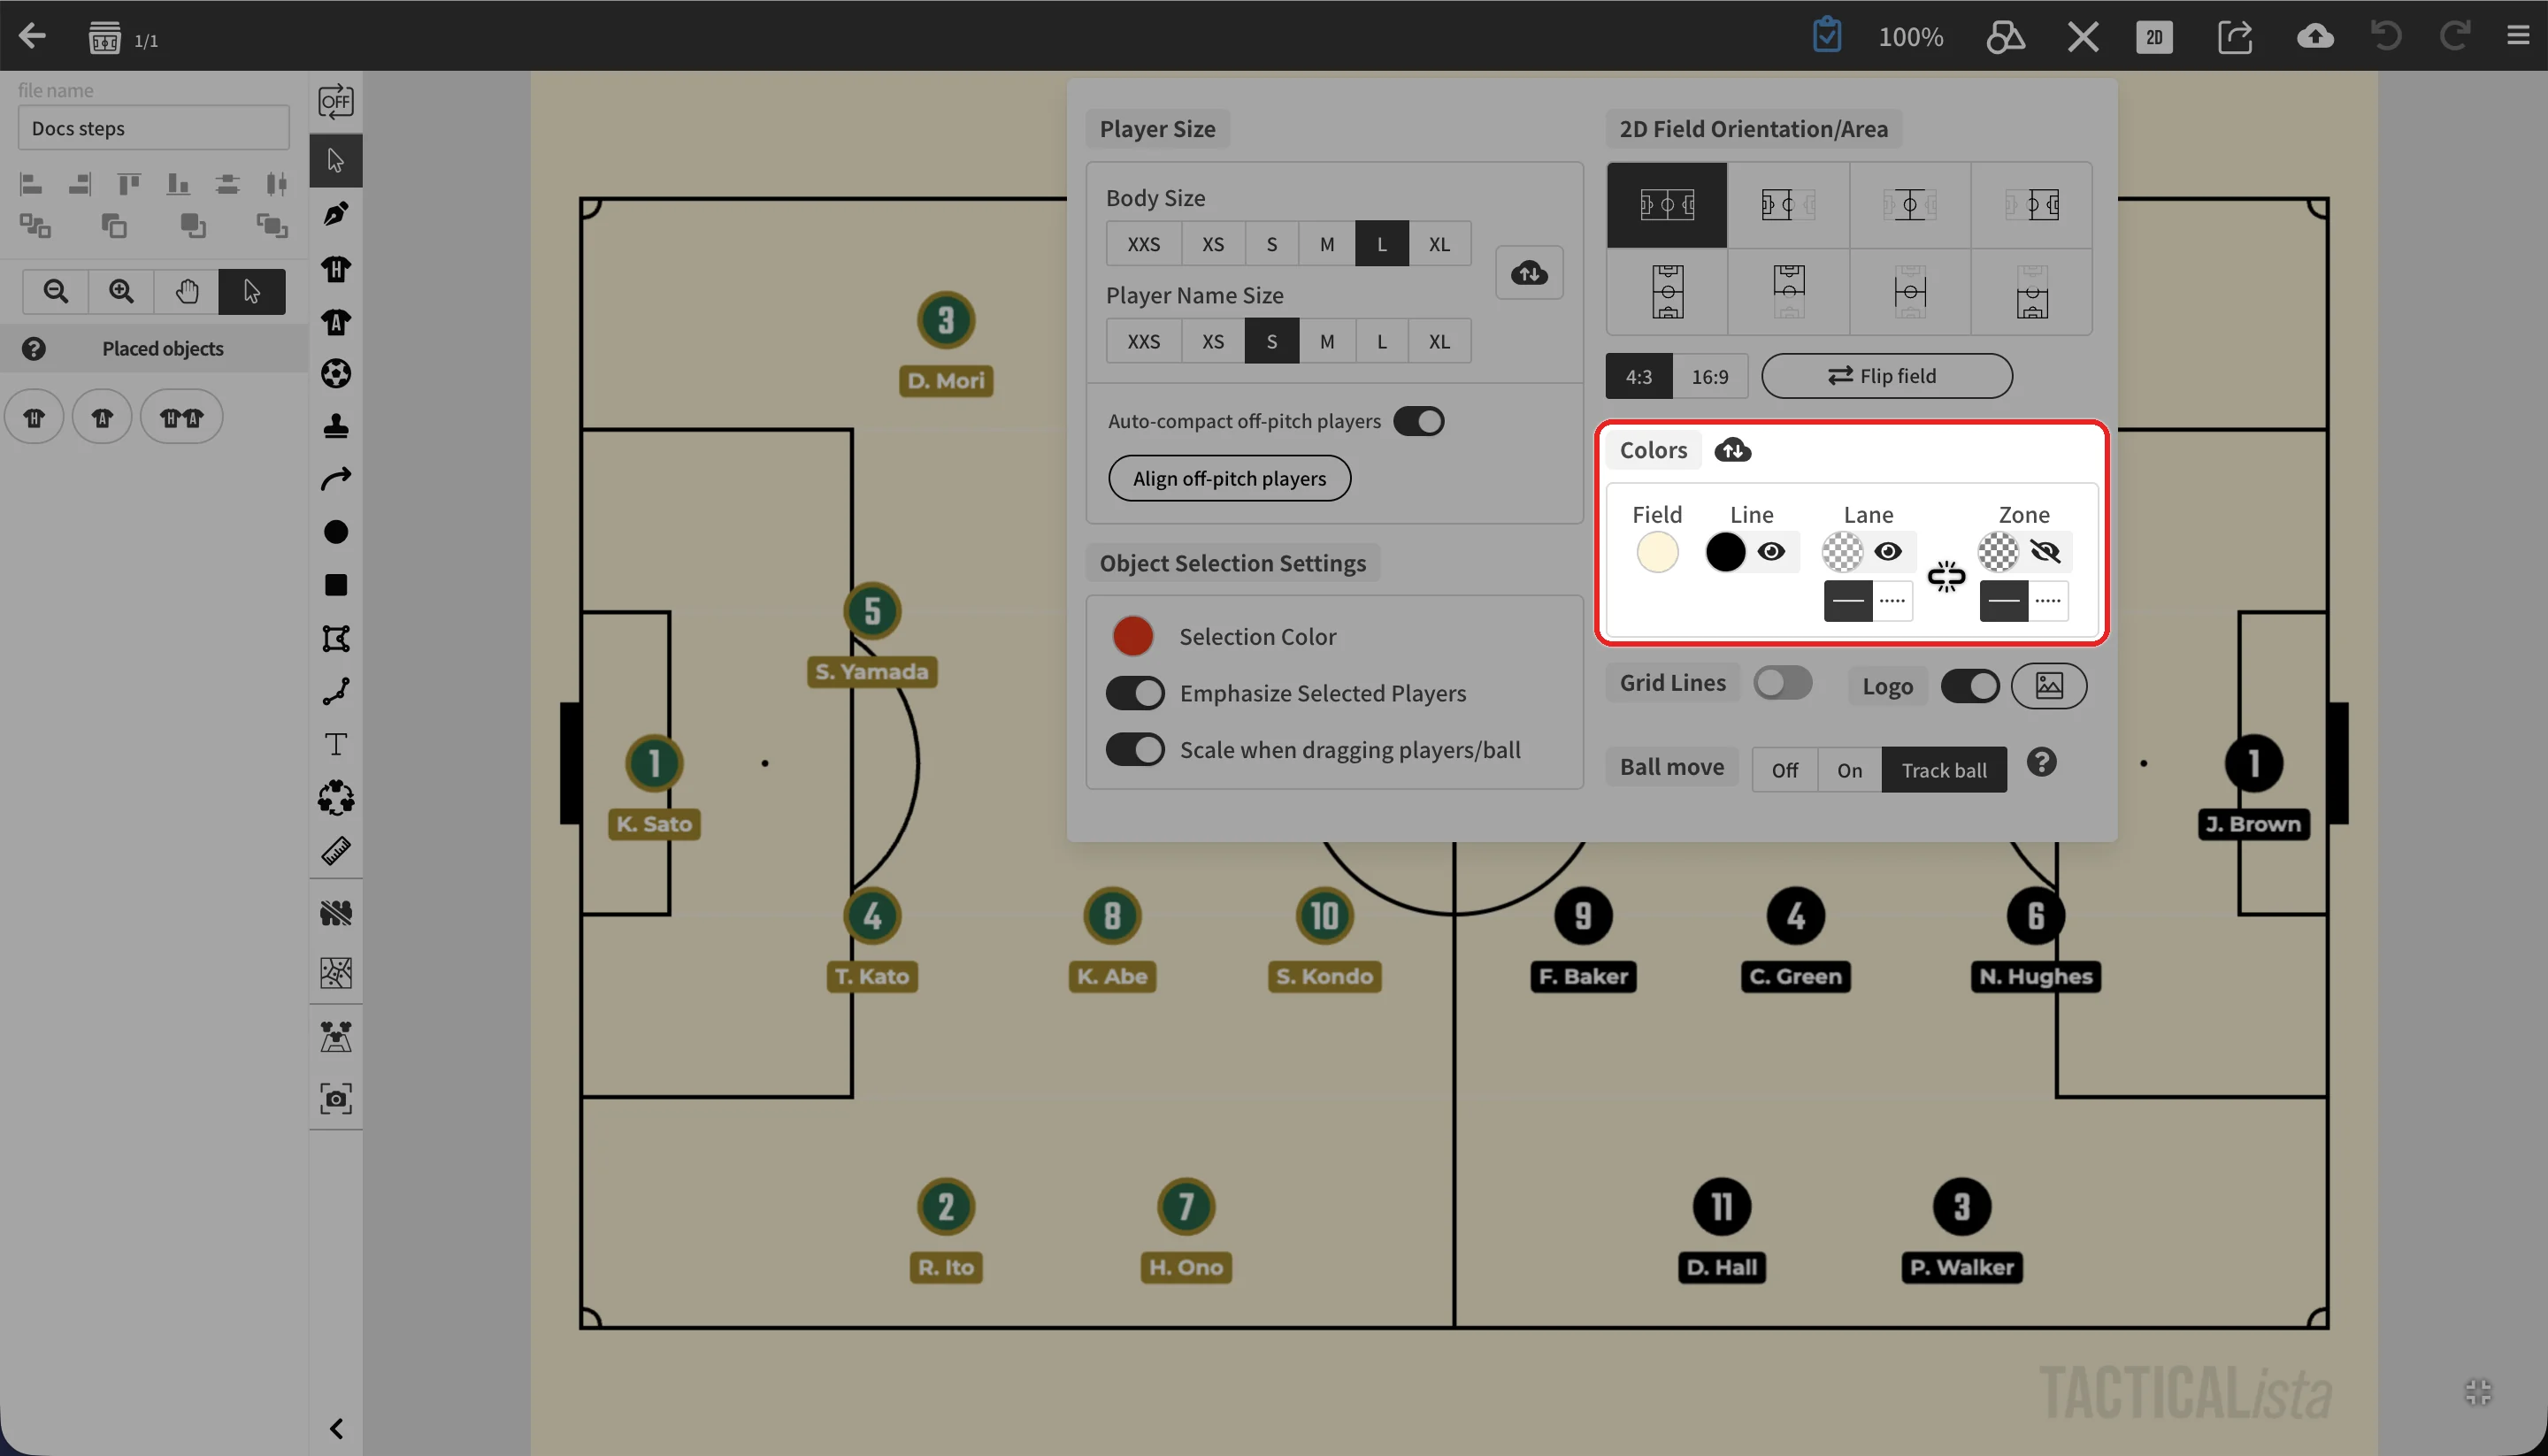
- Press to hide Line, Lane, or Zone. To show it again, pick a color again in the color picker.
- Lane and Zone can be switched between solid and dashed lines.
- Press to link Lane and Zone. While linked, Zone uses the same color and line style as Lane.
- On the Basic plan, lets you save the current colors as your default colors, and apply the saved default colors to the field.
Grid lines
Turn on "Grid Lines" to show grid lines at 1-meter intervals inside the playing area. Every fifth line is drawn thicker.
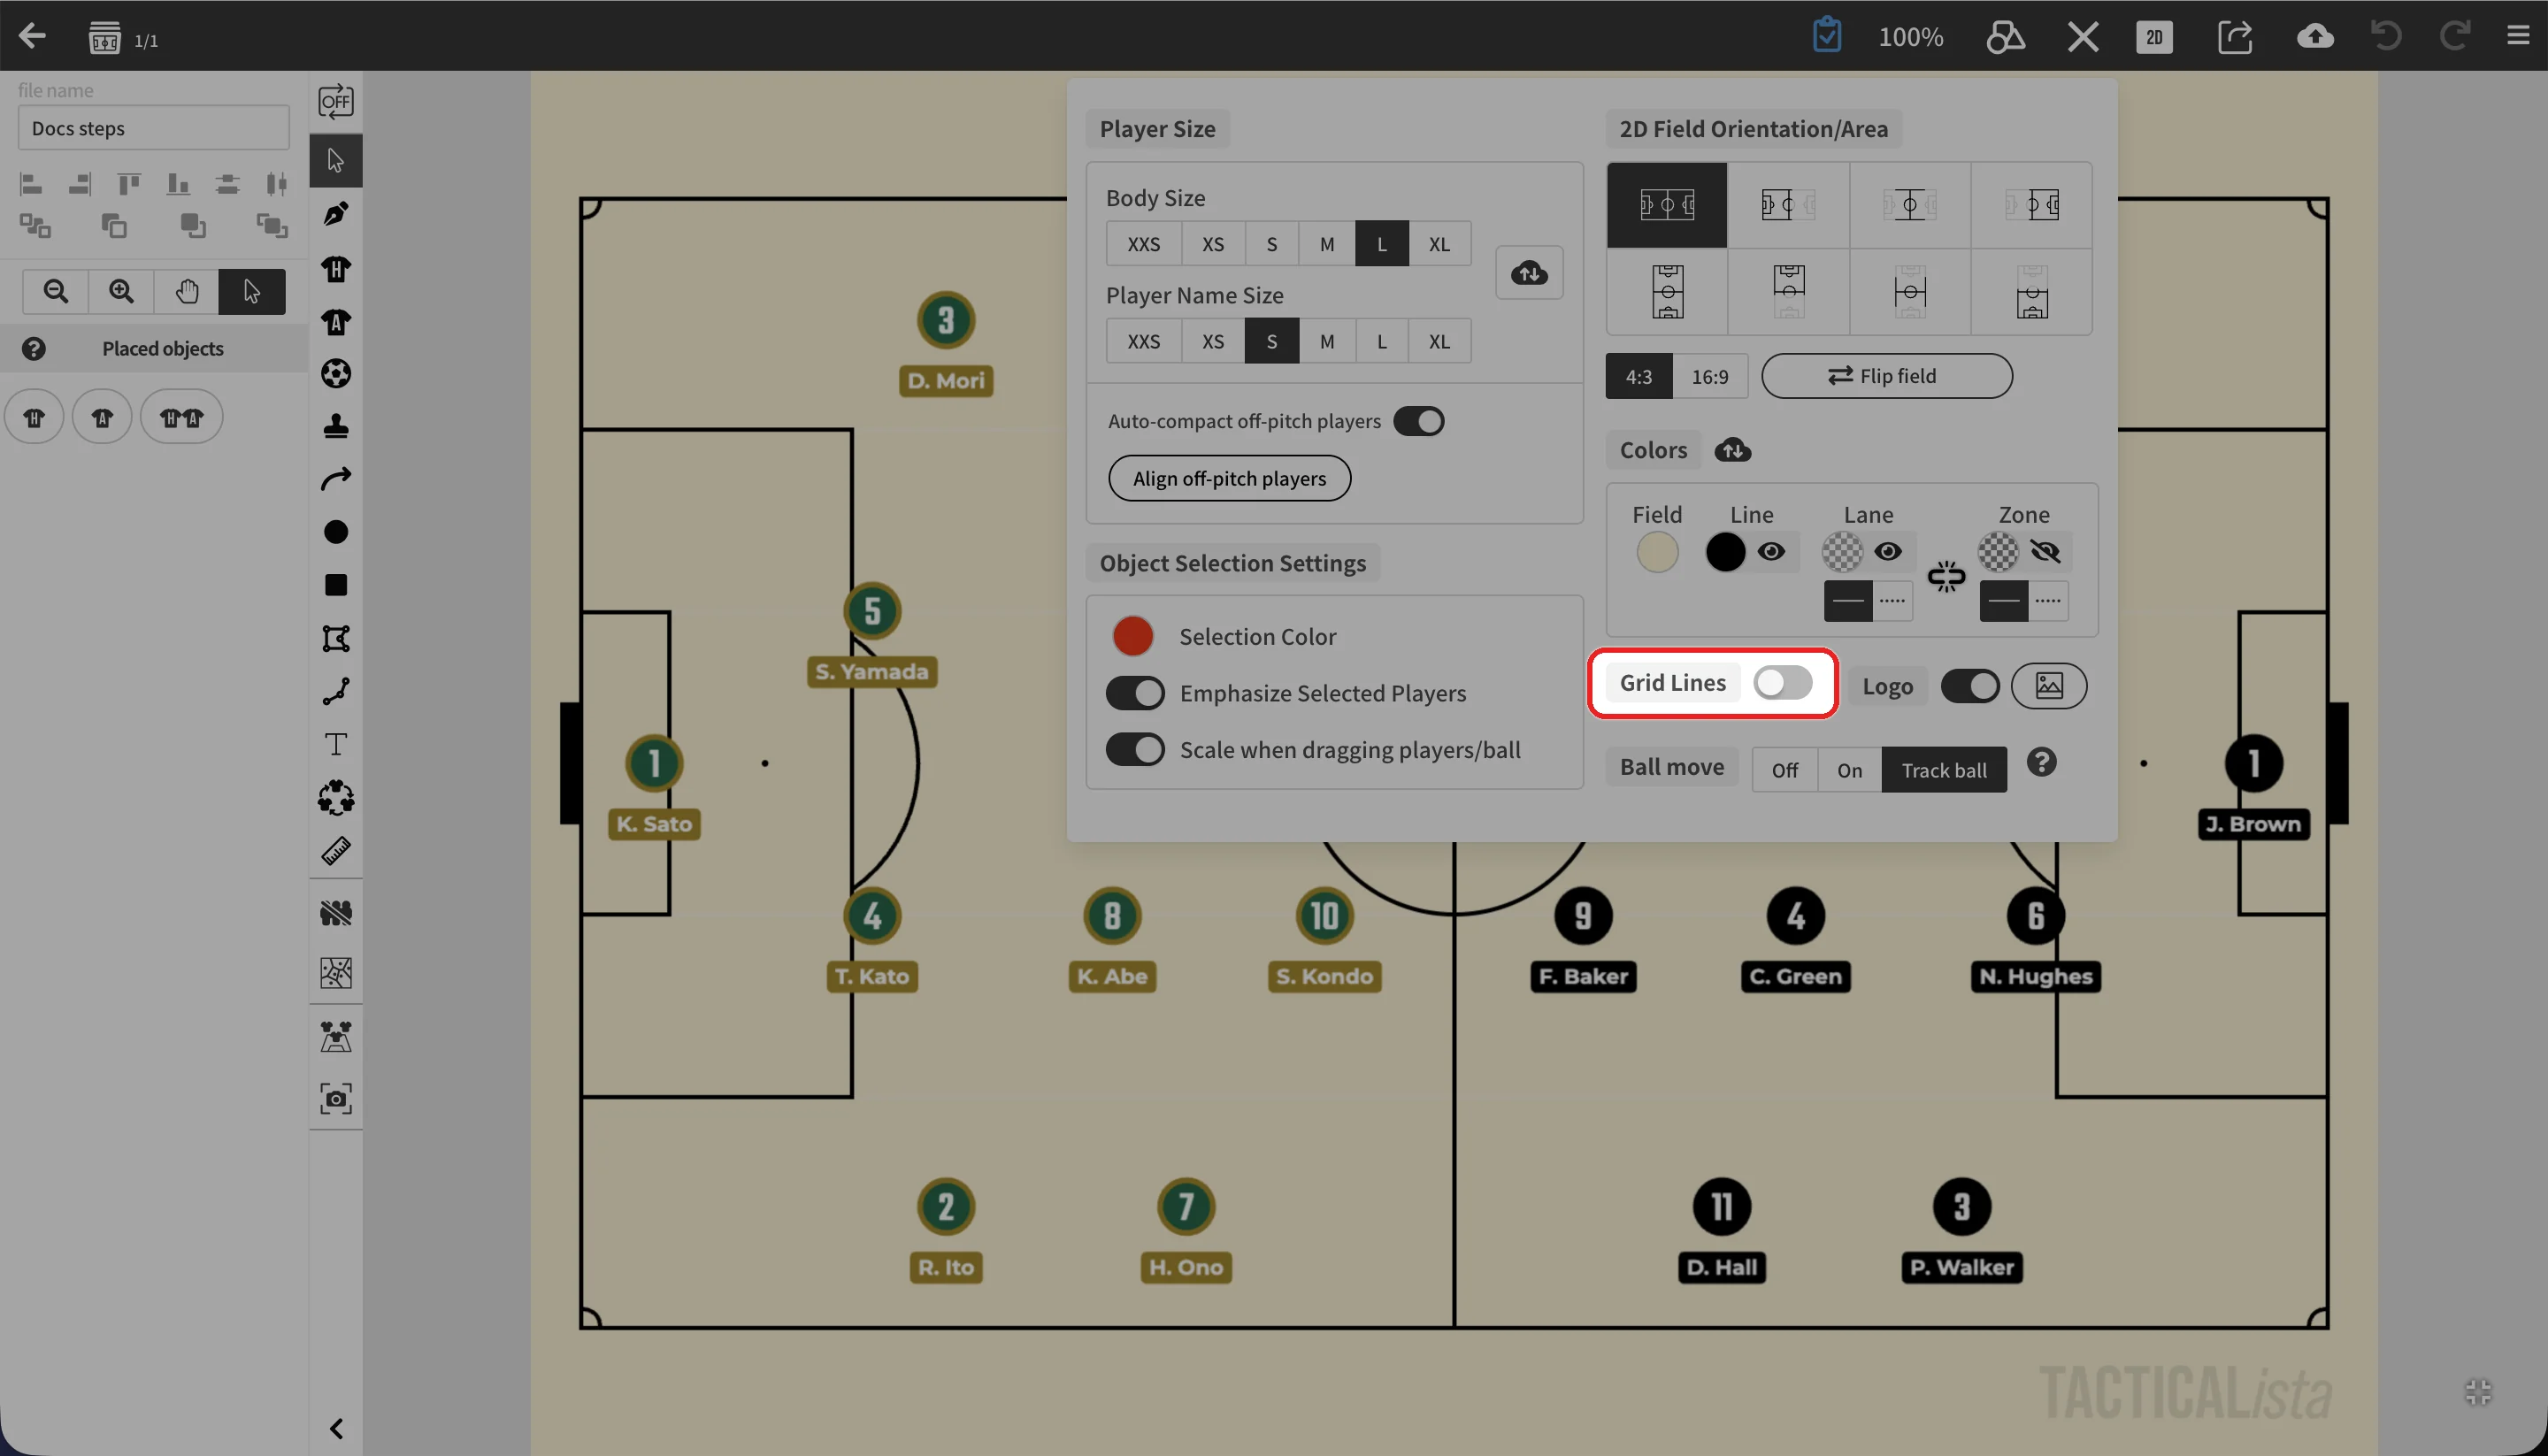
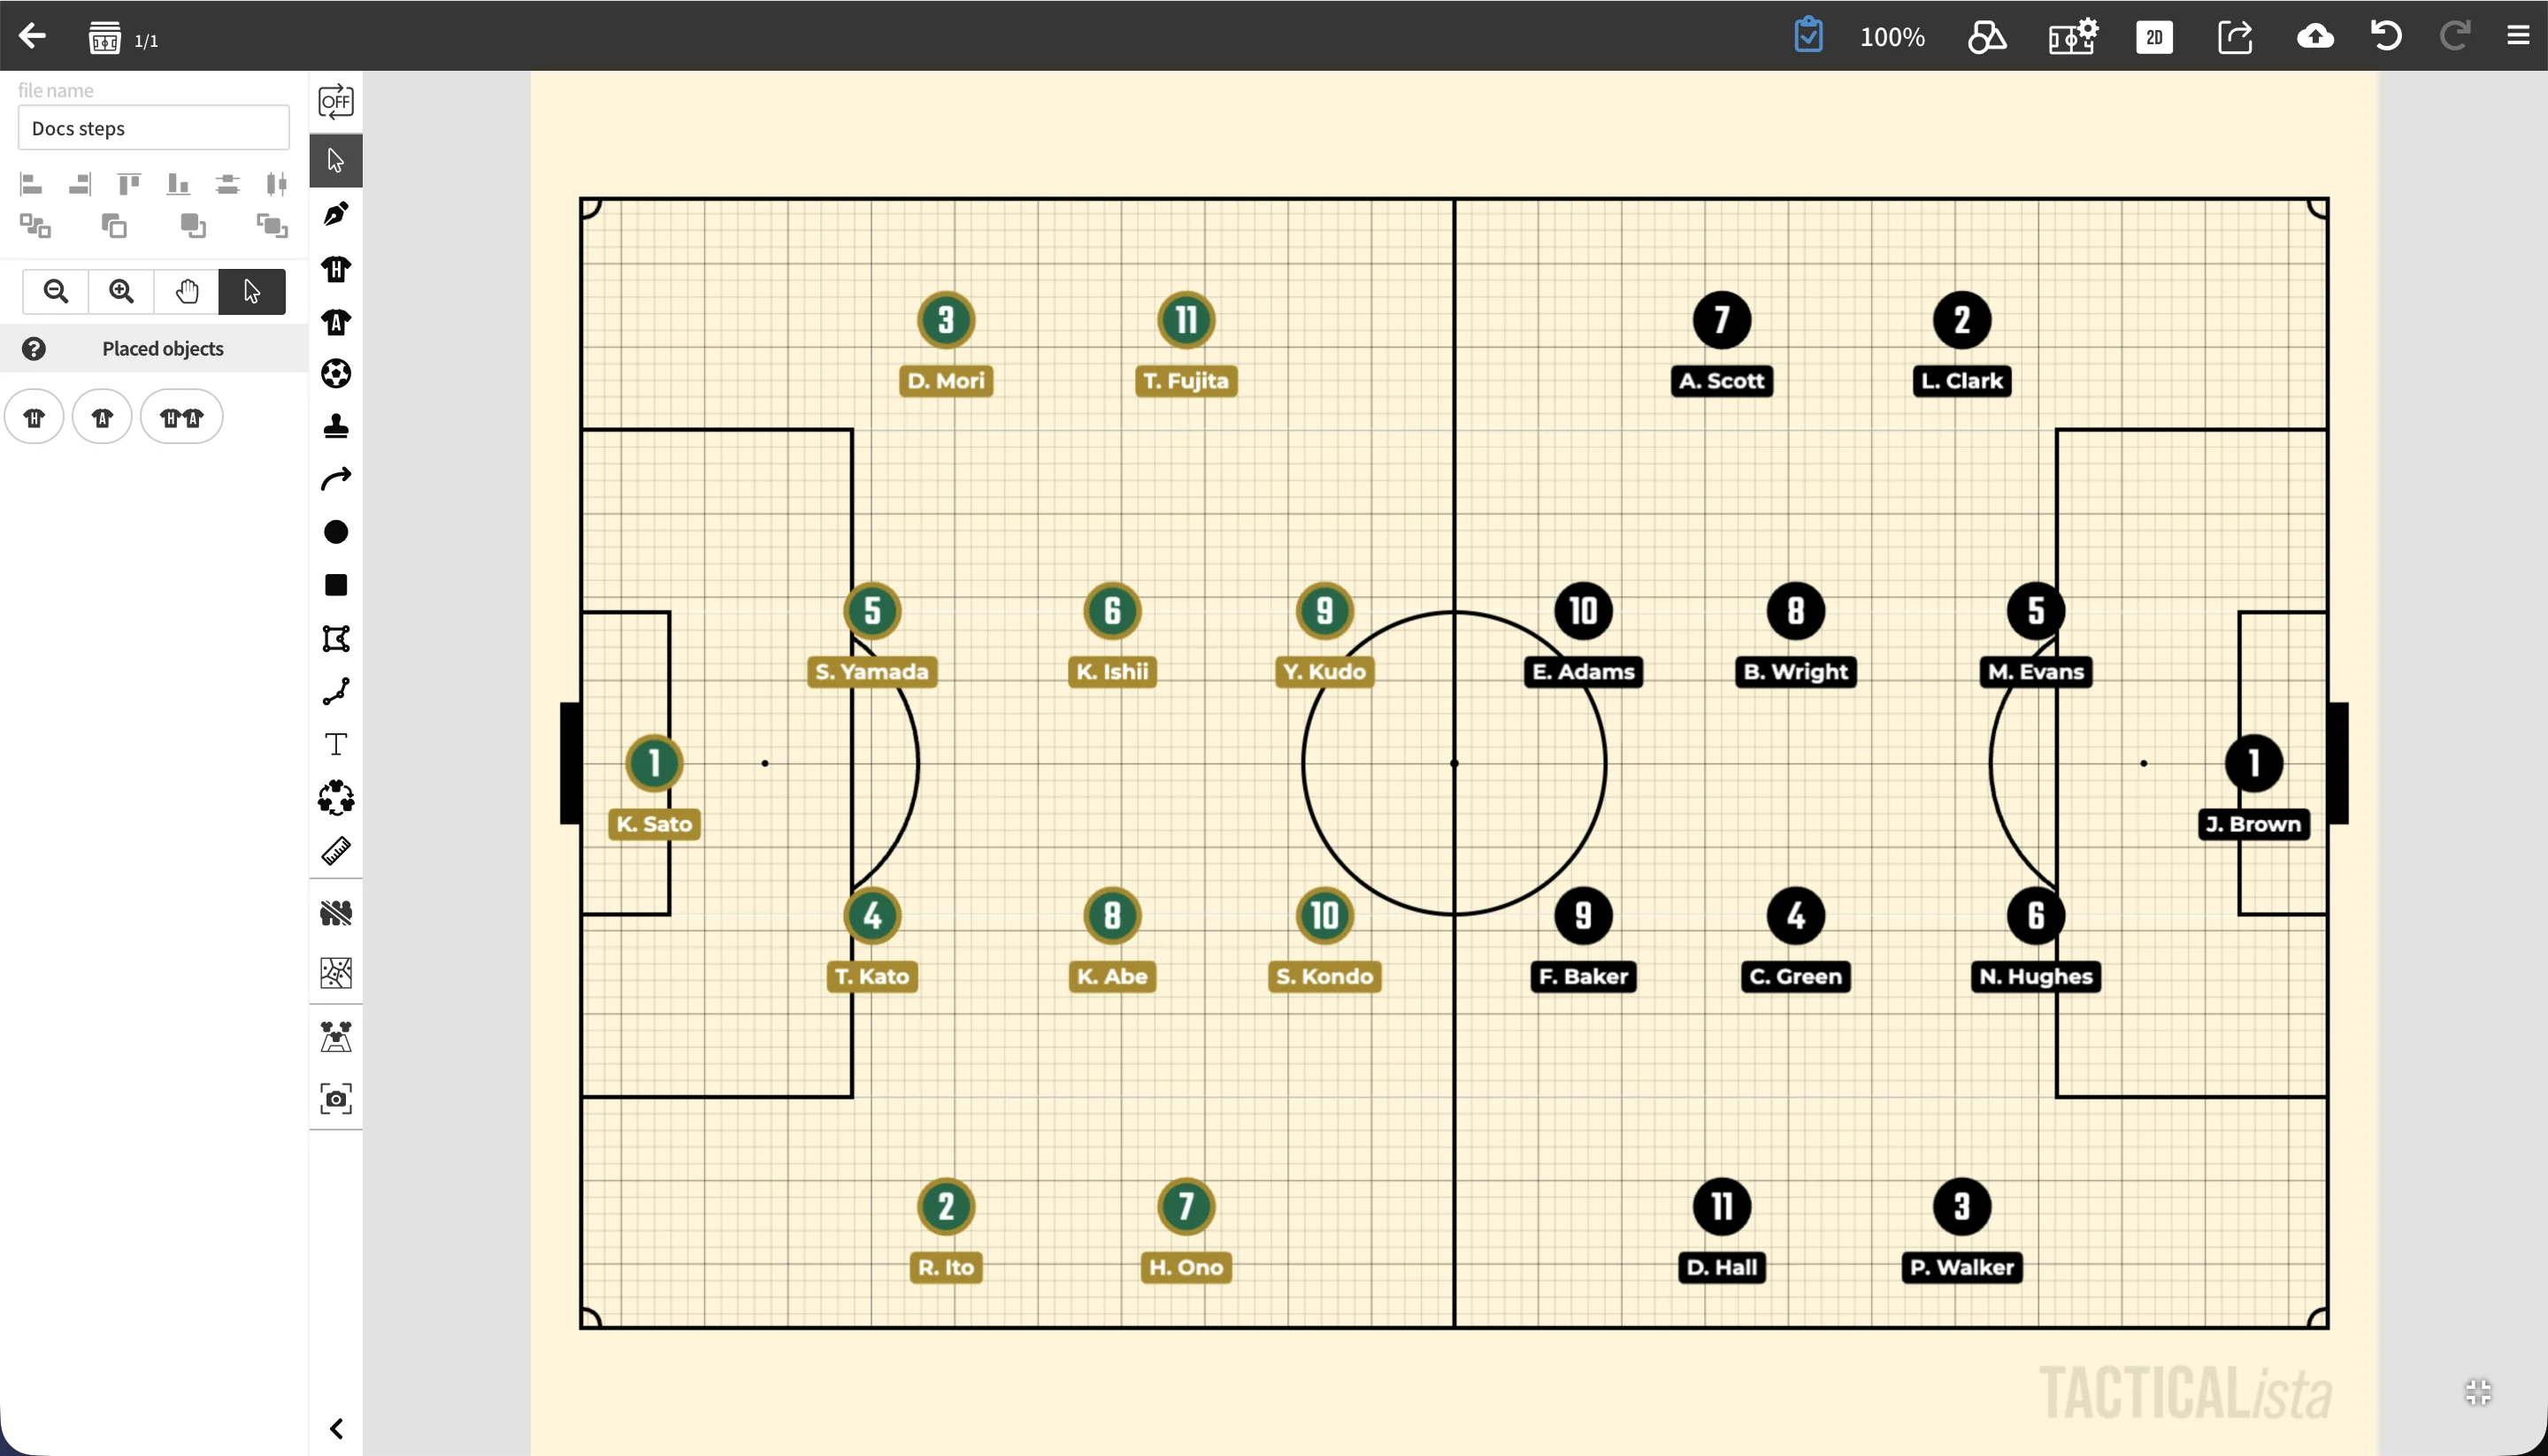
- The line color is automatically black or white depending on the brightness of the field.
- Grid lines are also shown in the 3D view.
- On blank custom boards, the grid covers the whole canvas.
Logo display and custom logo
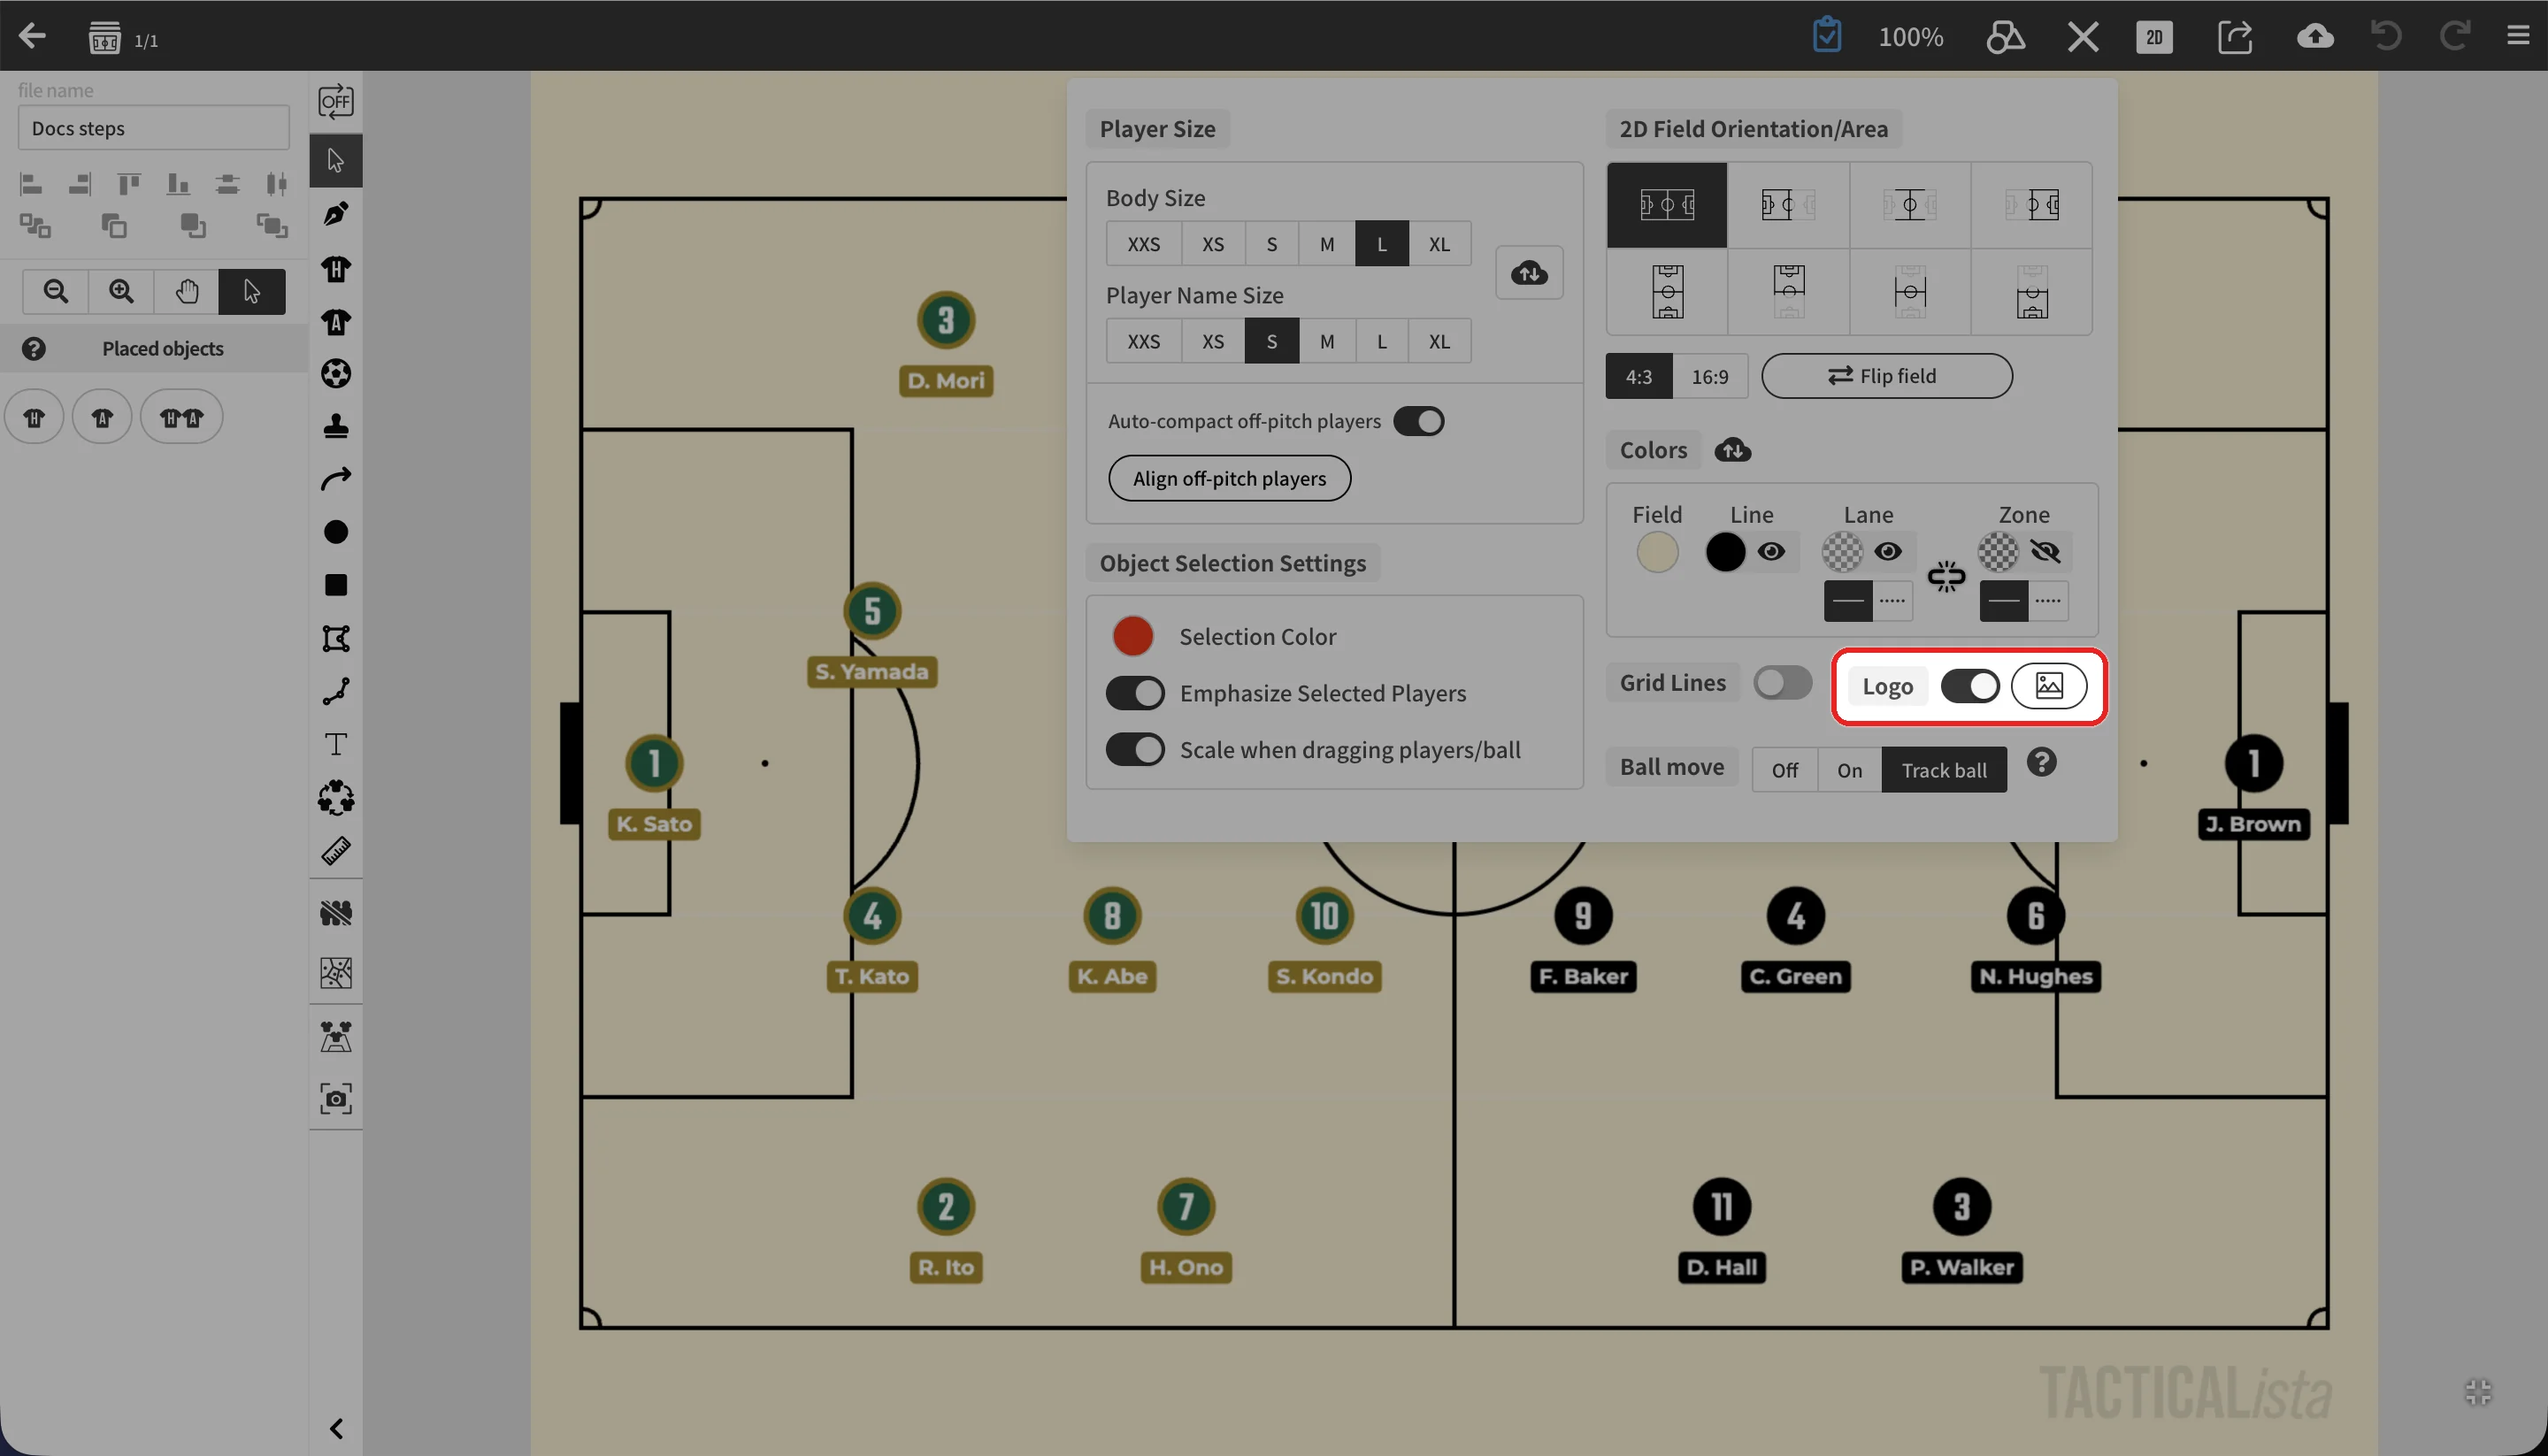
The Tacticalista logo on the field can be shown or hidden with the "Logo" switch. This setting is saved per user. Hiding the logo is available on the Basic plan.
On the Basic plan, opens the custom logo settings, which replace the logo on the field with an image of your choice, such as a club crest.
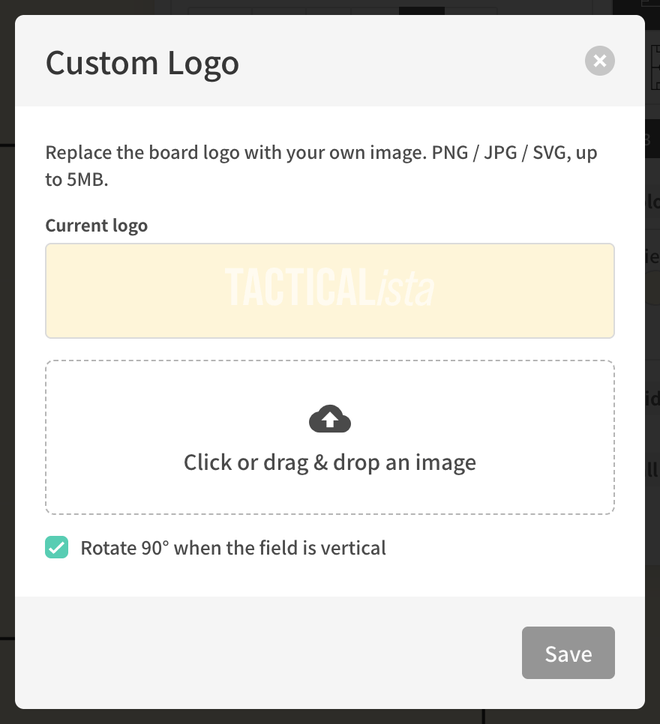
- Supported formats are PNG, JPG, and SVG, up to 5MB.
- Turn on "Rotate 90° in portrait orientation" to rotate the logo by 90 degrees when the field is in portrait orientation.
- "Delete" removes the custom logo and restores the default Tacticalista logo.
- The custom logo applies to all of your boards. It is not shown in the 3D view or in thumbnails.
Off-pitch players
Turn on "Auto-compact off-pitch players" to automatically line up players that have been moved off the pitch. "Align off-pitch players" lines up the players currently off the pitch. Aligning is only available when the field is in full view.
Window fit mode
In the desktop version, window fit mode expands or shrinks the field to fit the window size.
Window fit mode has two display modes: one that keeps the menus inside the window, and one that overlays the menus on the field. 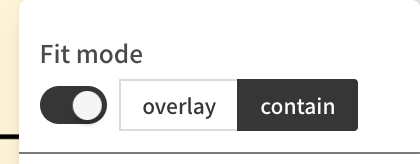
Zoom and pan
You can zoom and pan the field to enlarge a specific area. Zoom and pan are available on all plans.
Desktop
- Mouse wheel: Hold Ctrl (⌘ on macOS) and scroll to zoom around the cursor position.
- Keyboard: Hold the Space key and drag to pan. Hold the Z key and click to zoom in at that position; Z + Alt zooms out. Both work temporarily even while an object tool is selected.
- Viewport tools: Select (zoom out), (zoom in), or (pan) at the top of the left panel to zoom and pan by clicking and dragging. Holding Alt reverses the zoom direction.
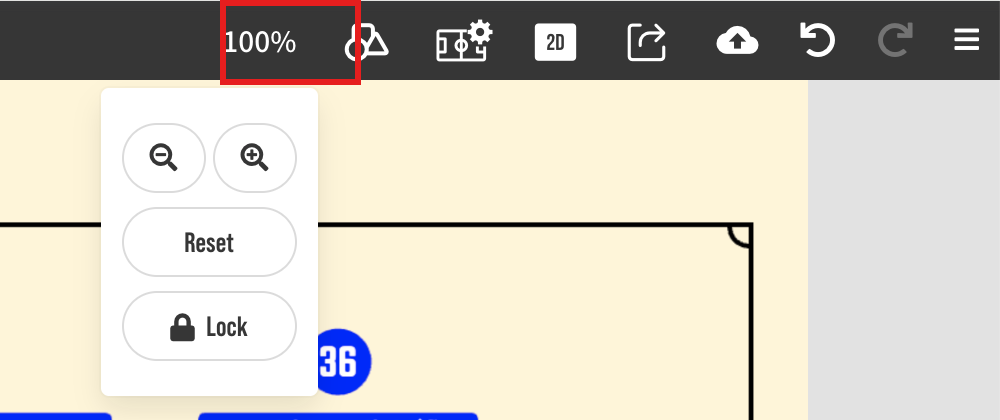
- Zoom menu: Click the zoom level in the header (for example, 100%) to show / for 10% steps, Reset, and Lock / Unlock. The zoom level ranges from 25% to 400%.

Touch devices
- Pinch in or out with two fingers to zoom, and swipe with two fingers to pan.
- On mobile, tap the zoom level at the bottom of the screen to show Lock / Reset / / . → Using the Mobile Version
Lock
To prevent accidental zooming and panning, press "Lock" in the zoom menu. While locked, wheel, pinch, keyboard, and viewport tool operations are disabled, as are / / Reset in the zoom menu. Press "Unlock" to release the lock.
The lock state is saved per scene on static boards and per board on animation boards. 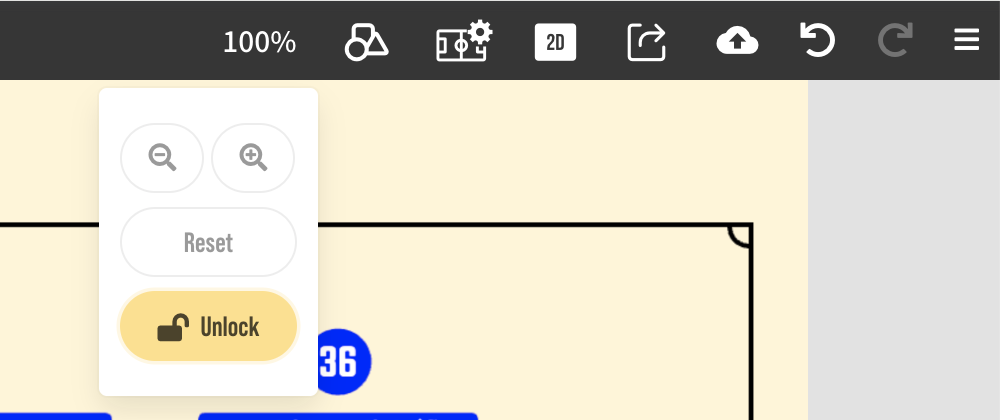
Differences by plan
- On the Basic plan, the zoom and pan state is saved with the file and restored the next time you open it. On the Starter plan it is not saved, and the field returns to the default view when reopened.
- On the Starter plan, each project can be exported three times without a watermark. From the fourth export onward, a watermark is added whether or not the field is zoomed. See Export Images & Video for details.